Imagine sealing every gap in your home for warmth, only to realize you have also sealed out fresh air. That is the reality for millions of homeowners with modern double or triple glazed windows — and it is exactly the problem retrofit trickle vents are designed to solve.
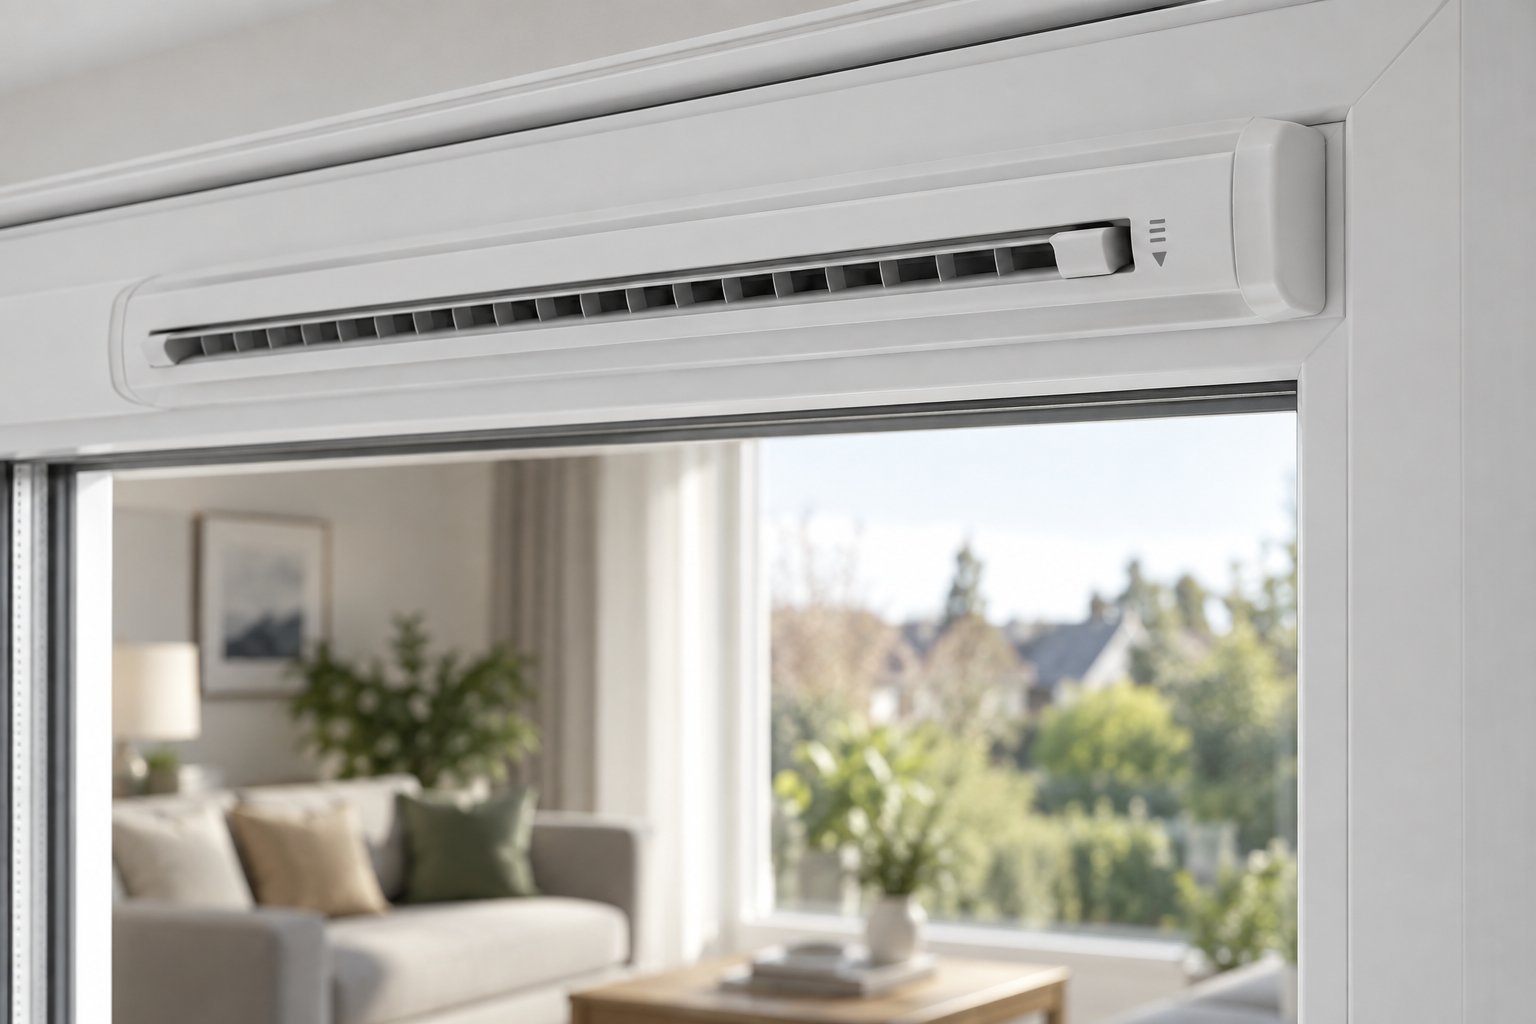
Retrofit trickle vents are small, controllable ventilation devices installed into existing window frames that were originally manufactured and fitted without any built-in background ventilation. Unlike factory-integrated trickle vents — which are incorporated into the window profile during manufacturing — retrofit versions are added after the window is already in place, using purpose-designed kits that require cutting a slot through the frame head.
The distinction between these two types matters more than most people realize. A factory-integrated vent is part of the window from day one. Its slot, grille, and external cover are all designed, tested, and certified as a single system during production. A retrofit vent, by contrast, is an aftermarket addition — a solution for windows that left the factory with no ventilation provision at all. The tools, the process, and the considerations involved are fundamentally different.
Every trickle vent — whether integrated or retrofitted — consists of three core components working together. Understanding these parts helps you grasp how the system actually moves air through your window frame:
Air enters through the canopy's baffles, travels through the frame slot, and emerges past the internal grille into the room. Each layer serves a distinct purpose — the canopy handles weather protection, the slot sets the physical airflow limit, and the grille hands control to you, the occupant.
A retrofit trickle vent kit bundles these three components together with the necessary fixings and, sometimes, a paper or cardboard drilling template. The critical difference from an integrated system is this: you are creating the through-frame slot yourself (or having an installer do it), rather than relying on one that was moulded into the frame profile at the factory. That slot creation step — routing or drilling through the frame head — is what makes retrofitting a more involved process and why getting it right matters so much. As Colin's Sash Windows notes from practical installation experience, retrofitting is possible in nearly all windows, but choosing the right method for the specific window in front of you is the real challenge.
Here is something that catches many homeowners off guard: not everyone searching for "retrofit trickle vents" actually needs a full new installation. A significant number of people are really looking for replacement parts for vents that are already fitted — a cracked external canopy, a jammed internal grille, or a vent that has simply stopped performing after years of exposure to the elements.
These are fundamentally different tasks. A true retrofit means your windows currently have no trickle vents whatsoever. You are starting from scratch — measuring the frame, checking for obstructions, cutting a new slot, and fitting all three components. A replacement, on the other hand, means the slot already exists in your frame head. You need to identify the original vent manufacturer, match the fixing centres and dimensions, and swap the damaged component for a compatible one. The tools are different, the cost is different, and the risk profile is different.
So how do you know which situation applies to you? Look at the top of your window frame, both inside and outside. If you see a slotted grille on the interior face and a slim horizontal cover on the exterior — even if they appear damaged or stuck — you have existing vents that may only need replacement parts. If the frame head is completely smooth and uninterrupted on both sides, with no visible slots or covers, you are looking at a genuine retrofit project.
Getting this distinction right before you spend any money saves you from ordering the wrong kit entirely. And whichever category you fall into, the driving reason behind adding or maintaining these vents is the same — modern windows have created a ventilation problem that most homeowners do not notice until condensation, mould, or stale air makes it impossible to ignore.

Your new double glazed windows keep heat in brilliantly. They also keep something else trapped inside — moisture. And that moisture, invisible at first, is the root cause of streaming windows, black mould patches, and that stale feeling you cannot quite shake on a winter morning.
Older single-glazed windows were far from airtight. They leaked air through loose seals, gaps in putty, and rattling frames. That uncontrolled air leakage was uncomfortable and energy-wasteful, but it did one thing well: it carried moisture out. Modern double and triple glazed windows, with their precision-engineered weather seals and multi-point locking systems, have largely eliminated those draughts. Thermal efficiency has improved dramatically — but the trade-off is a home that no longer "breathes" on its own.
This is why so many homeowners find themselves asking why do modern windows cause condensation when they were supposed to be an upgrade. The answer is not that the windows are faulty. It is that they work too well at sealing the building envelope, removing the background ventilation that older homes relied on by accident.
Every occupied home generates a surprising amount of moisture. A family of four can produce between 10 and 15 litres of water vapour per day just through everyday activities — cooking, showering, boiling the kettle, breathing, and even drying clothes on radiators or indoor airers. That moisture enters the air as invisible water vapour and raises the humidity level inside the house.
Here is where the science becomes practical. Warm air holds more moisture than cold air. When that warm, moisture-laden indoor air meets a cold surface — like a window pane, a window reveal, or even a cold external wall — it cools rapidly. Once the air temperature at that surface drops to what is known as the dew point, the moisture it was carrying can no longer stay suspended as vapour. It changes state and appears as liquid water droplets. That is condensation.
Think of it like breathing on a cold mirror. Your breath is warm and carries moisture. The mirror surface is cold. The result is instant fogging. The same physics play out across your windows every time indoor humidity is high enough and the glass surface is cold enough.
Windows are especially vulnerable because glass is thermally conductive — even in double glazed units, the inner pane is typically the coldest interior surface in the room. As APS Double Glazing explains, the key factor is surface temperature: when the inside surface of a window falls below the dew point of the indoor air, moisture forms. Double glazing raises that surface temperature compared to single glazing, which helps — but it cannot overcome excessively high indoor humidity created by a sealed-up home with nowhere for that moisture to escape.
Kitchens and bathrooms are the worst-affected rooms because they generate concentrated bursts of steam and vapour. A single shower can release over a litre of moisture into the air. Cooking a meal on the hob adds more. Without adequate background ventilation — the kind retrofit trickle vents provide — this moisture has no exit route. It spreads through the home, and when nighttime temperatures drop, it condenses on the coldest surfaces it can find.
Condensation itself is an inconvenience. What it leads to, though, is far more serious.
Persistent damp conditions on and around windows create the perfect environment for mould growth. Mould needs just three things to thrive: moisture, a food source (such as dust, paint, wallpaper paste, or timber), and still air with limited ventilation. A tightly sealed home with double glazed windows condensation problems delivers all three.
The health consequences of prolonged mould exposure are well documented. Harvard Health Publishing notes that mould exposure can cause inflammation anywhere along the respiratory tract, triggering symptoms such as a runny nose, itchy eyes, coughing, and wheezing. For people with asthma or mould allergies, reactions can be even more severe. Chronic exposure has been linked to elevated inflammatory markers in the body, mood changes including increased anxiety and depression, and a higher risk of childhood asthma development.
Beyond health, there is the property damage. Moisture that repeatedly wets window frames, timber reveals, and plasterwork does not just evaporate harmlessly. Over months and years, it softens timber, bubbles paint, loosens wallpaper adhesive, and can even penetrate into wall insulation — reducing its thermal performance and creating hidden damp zones behind finished surfaces. Structural timber exposed to prolonged damp conditions is at risk of wet rot, which weakens the material and can require expensive remediation.
So do trickle vents help with condensation? Yes — because they address the root cause. By providing a continuous, controlled trickle of fresh air into the room, they allow moisture-laden indoor air to be gradually diluted and displaced. The moisture still needs to exit through extractor fans or open windows, but trickle vents ensure there is always replacement air flowing in to keep the system moving. Without that supply air, even a good extractor fan struggles to create effective airflow.
If you are unsure whether poor ventilation mould on windows is already developing in your home, watch for these warning signs:
Spotting even one or two of these signs is a strong signal that your home lacks adequate background ventilation. The encouraging news is that this is exactly the type of problem retrofit trickle vents are engineered to solve — but whether you can install them, and what the process involves, depends heavily on your specific window frames and, in many cases, what the building regulations require.
Knowing your home needs better ventilation is one thing. Knowing the law requires it is another — and for most homeowners replacing windows in England or Wales, the legal obligation is clear. Building regulations part F trickle vents requirements have tightened significantly, and understanding exactly where you stand can save you from compliance headaches, failed inspections, and potential issues when selling your property.
Approved Document F of the Building Regulations governs ventilation in dwellings. It sets out what constitutes adequate background ventilation and specifies how that ventilation must be provided in habitable rooms — bedrooms, living rooms, kitchens, and bathrooms. Trickle vents are the most common method of satisfying these background ventilation requirements, though they are not the only one.
The key regulatory update came into effect on 15 June 2022 in England and 23 November 2022 in Wales. Under these revised rules, the majority of replacement windows and doors must be fitted with trickle vents. This applies whether your installation is registered through FENSA (the industry self-certification scheme) or signed off by your local authority building control.
Here is the principle at the heart of the regulation: you cannot reduce the ventilation provision of a property when replacing its windows. In practical terms, this breaks down into two scenarios:
This second point trips up a lot of homeowners. The logic sounds counterintuitive: "My old windows never had vents, so why do replacement windows need trickle vents?" The answer lies in how much uncontrolled air leakage those older windows allowed. Draughty single-glazed or early double-glazed units provided accidental ventilation through gaps, worn seals, and loose fittings. Modern precision-sealed units eliminate all of that. The building regulations recognise this reality and require deliberate ventilation to compensate for what airtight windows take away.
It is also worth noting that simply being able to open a window does not satisfy Part F. Opening a window provides purge ventilation — useful for rapidly clearing cooking smells or steam — but it is not a substitute for background ventilation, which needs to operate continuously, including during cold weather, at night, and when the property is unoccupied. That continuous trickle of fresh air is precisely what trickle vents deliver.
Any window replacement in England or Wales is considered "building work" and must comply with current building regulations. There are two routes to demonstrating compliance:
Missing either of these steps creates problems. Without a FENSA certificate or building control sign-off, you have no proof that your window replacement was done to standard. This can cause complications during property sales — conveyancing solicitors routinely check for these certificates, and their absence may require indemnity insurance or remedial work. As FENSA's own guidance makes clear, disclaimers and indemnity policies are not valid substitutes and will not be accepted by LABC.
For homeowners considering retrofit trickle vents as a way to bring non-compliant windows up to standard after installation, this is where the retrofit route becomes especially relevant. If windows were recently replaced without vents and without proper sign-off, adding them retrospectively can help address the ventilation shortfall — though you should still discuss the overall compliance position with your local building control office.
If you are a landlord, the stakes are higher. Ventilation is not just a building regulation box to tick — it is directly tied to your legal duty to provide a safe, habitable home for tenants.
The Housing Health and Safety Rating System (HHSRS) is used by local authorities to assess hazards in residential properties. Damp and mould growth is a specifically defined hazard under the system. Where inadequate ventilation leads to persistent condensation, mould, and damp conditions, an environmental health officer can classify this as a Category 1 hazard — the most serious category — requiring the landlord to take enforcement action to remedy the problem.
The consequences of a Category 1 hazard finding are significant. Local authorities can serve improvement notices, prohibit occupation of affected rooms, or in serious cases, issue emergency remedial action notices. For social housing providers, regulatory standards enforced by the Regulator of Social Housing require landlords to meet the Decent Homes Standard, which demands that properties are free of serious Category 1 hazards, maintained in reasonable repair, and fitted with efficient heating and effective insulation.
Recent legislation has sharpened these obligations further. Awaab's Law, which took effect on 27 October 2025, requires social landlords to address damp and mould hazards that present a significant risk of harm within fixed timeframes. The UK government has also signalled its intention to extend similar requirements to the private rented sector in the coming years, alongside the introduction of a reformed Decent Homes Standard that would apply to privately rented homes.
For landlords managing properties with sealed modern windows and no background ventilation, retrofitting trickle vents represents one of the most cost-effective ways to address ventilation deficiencies — particularly across portfolios where full window replacement would be prohibitively expensive. It is a targeted intervention that directly reduces the moisture buildup driving damp and mould complaints.
| Scenario | Trickle Vent Obligation | Applicable Regulation / Standard |
|---|---|---|
| New build property | Required as part of whole-dwelling ventilation strategy | Building Regulations Part F (Approved Document F) |
| Window replacement (like-for-like or upgrade) | Required in most cases; must not reduce existing ventilation provision | Building Regulations Part F; FENSA or LABC sign-off |
| Renovation or refurbishment | Required where windows are replaced or ventilation is materially altered | Building Regulations Part F; may require full building control approval |
| Rental property (private sector) | Must ensure adequate ventilation to avoid damp/mould hazards | HHSRS (Housing Act 2004); Homes (Fitness for Human Habitation) Act 2018 |
| Rental property (social housing) | Must meet Decent Homes Standard; must address damp/mould within fixed timeframes | HHSRS; Decent Homes Standard; Awaab's Law (2025) |
| Listed building or conservation area | Possible exemption where vents would harm historic character — assessed case by case | Part F exemption provisions; planning authority approval |
Whether you are a homeowner replacing windows, a landlord managing rental stock, or a contractor advising clients, the regulatory picture points in one direction: background ventilation is not optional. The question is not whether to provide it, but how — and for existing windows that were installed without vents, retrofitting is often the most practical and least disruptive path to compliance. The real challenge lies in whether your specific window frames can physically accommodate a vent, which depends entirely on the frame material, its dimensions, and what is hidden inside the profile.
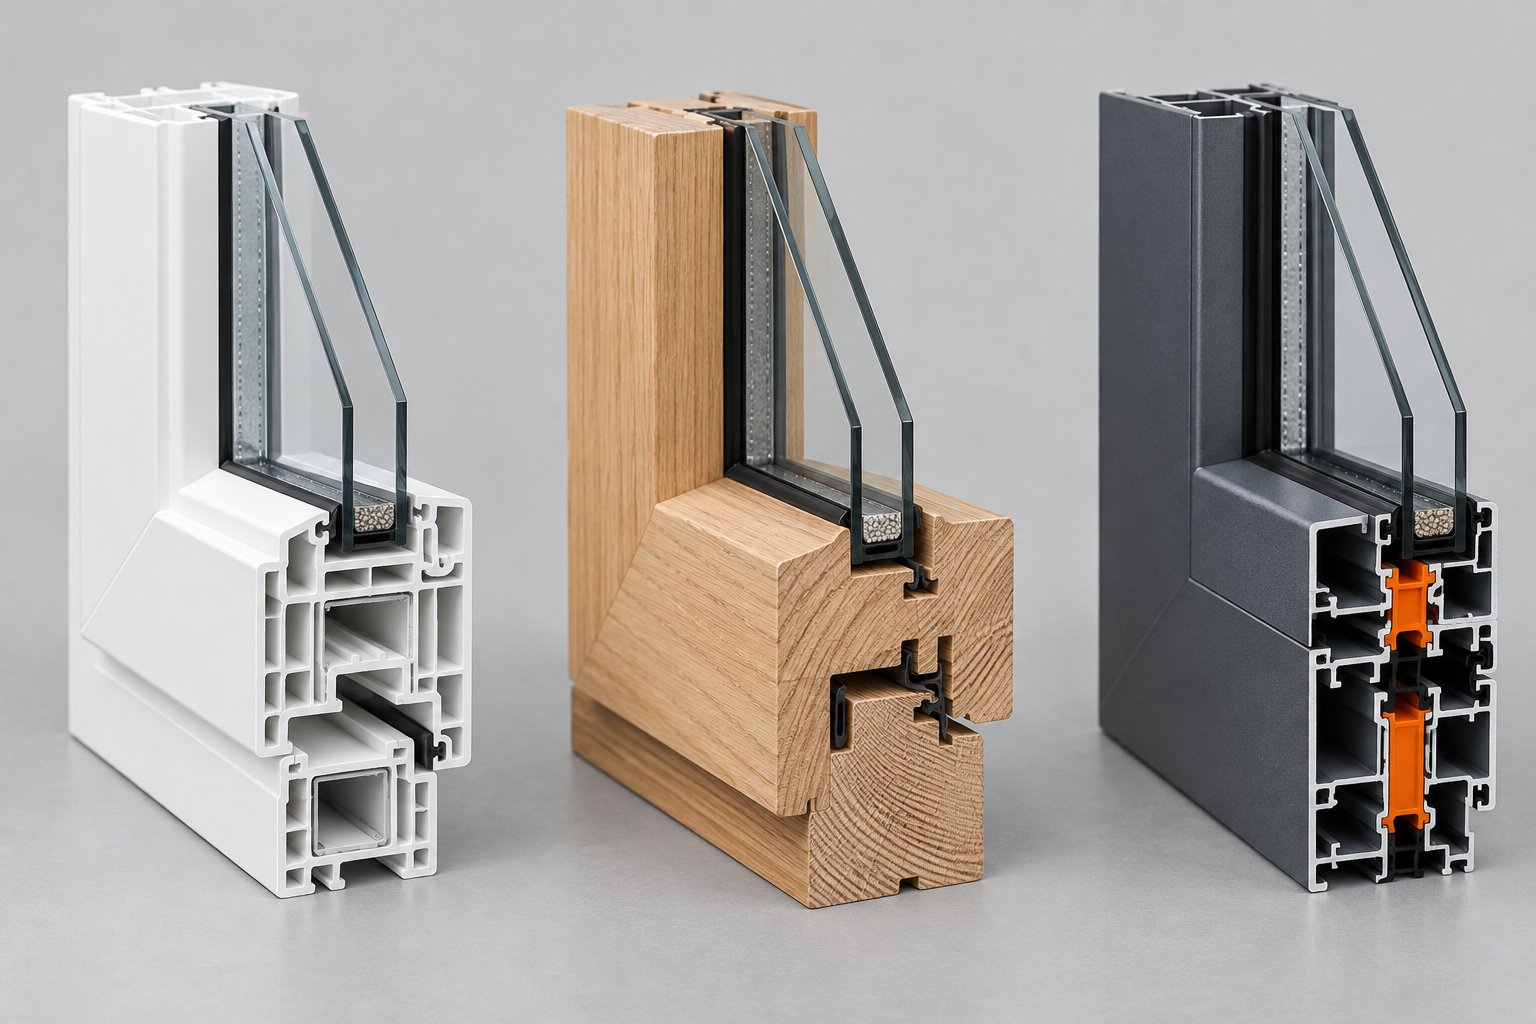
Your window frames are not all made equal — and neither is the process of cutting ventilation slots into them. The frame material dictates everything from the tools you will need, to the risks you face, to whether a confident DIYer can tackle the job or a specialist should be called in. Getting this wrong is not like choosing the wrong paint colour. A poorly executed slot through your window's head rail is permanent, and the consequences range from a cosmetic eyesore to a structurally compromised frame that lets water pour in during the next rainstorm.
Before ordering any retrofit trickle vent kit, you need to understand exactly what your specific frame material demands. The three most common residential window frame types — uPVC, timber, and aluminium — each present distinct challenges and opportunities. Let's walk through them one at a time.
If you are going to retrofit vents to any frame type, uPVC is the one you want to be working with. These frames are by far the most forgiving for aftermarket modification, and there is a good reason: the way they are constructed.
uPVC window profiles are hollow, multi-chambered extrusions. When you look at a cross-section of a uPVC frame, you will see a series of internal walls creating separate air pockets. This chambered design provides structural rigidity and thermal insulation, but it also means there is open space inside the profile — space you can drill or route through without removing solid material that the frame depends on for strength.
The target area for your vent slot is the frame head — the top horizontal rail. Most surface-mounted retrofit kits require you to drill a series of overlapping or closely spaced holes through this section, then clean up the resulting slot so the internal and external vent components can seat flush against the frame surfaces. The frame head must have sufficient depth — typically a minimum of around 40mm clear drilling depth from face to face — to accommodate the slot and allow both vent components to fix securely.
Here is the critical consideration that separates a successful uPVC retrofit from a damaging one: steel reinforcement. Many uPVC frames contain galvanised steel inserts within their hollow chambers. These steel sections add rigidity to the frame, particularly in larger windows and doors. If you drill blindly into the head rail and hit reinforcement steel, you will dull your drill bit instantly, potentially crack the surrounding plastic from the sudden resistance, and compromise the frame's structural performance if you force through it.
The simplest way to check? Run a strong magnet along the inside face of the frame head. If it sticks or pulls noticeably, there is steel reinforcement behind the plastic. Once you know where the steel sits, you can position your vent slot to avoid it — most reinforcement runs centrally within the profile, leaving clear plastic on either side. If the steel cannot be avoided, you will need TCT (tungsten carbide tipped) drill bits rated for metal, and you should proceed with extra caution.
Beyond the steel question, uPVC retrofits are relatively straightforward. The material drills cleanly, does not split or crack under normal circumstances, and the hollow chambers mean you are unlikely to compromise the frame's thermal performance as long as the vent's internal baffles provide a reasonable air seal when closed. For most homeowners asking can you add trickle vents to existing windows, the answer is a confident yes — provided the frame dimensions and reinforcement allow it.
Timber frames bring a different set of considerations entirely. The good news is that timber windows generally have wider profiles than their uPVC or aluminium equivalents, which means there is usually ample physical space in the head rail to accommodate a vent slot. The challenge lies in how timber behaves when you cut into it.
Wood is a natural material with a grain structure. That grain direction matters enormously when you are routing or drilling a horizontal slot across the frame head. Cutting across the grain is more predictable and less likely to cause problems. Cutting along or at an angle to the grain risks splitting — a crack that can propagate well beyond your intended slot, potentially running the full length of the frame head. Softwood species commonly used in window frames, such as pine and redwood, are particularly prone to splitting if the cutting tool is blunt, if excessive force is applied, or if the timber has dried out and become brittle.
A sharp router bit produces the cleanest results on timber frames. A jigsaw works but leaves rougher edges that need sanding. Whichever tool you use, the key is to take your time, use a guide or template for accuracy, and let the tool do the work rather than forcing it through the material.
The second critical factor with timber is moisture management. When you cut a slot through a timber frame, you expose raw end grain — the cross-section of the wood fibres. End grain absorbs water like a sponge. If you leave this exposed surface untreated, moisture will wick into the timber every time it rains, gradually softening the wood from the inside out and creating the conditions for wet rot.
Before fitting the vent components, apply a generous coat of wood preservative or exterior-grade primer to all exposed surfaces within the slot. Some installers also run a bead of flexible sealant around the vent housing where it meets the timber to create a secondary weather barrier. These steps add a few minutes to the installation but can add years — or decades — to the frame's lifespan.
Adding trickle vents to timber window frames is entirely practical, and the wider profiles often give you more flexibility in vent sizing than narrower uPVC or aluminium sections. Just respect the material: keep your tools sharp, seal every exposed surface, and do not rush the cut.
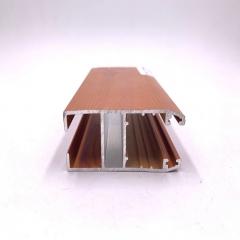
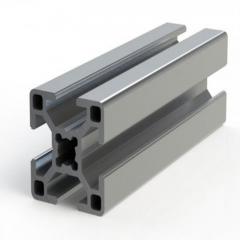
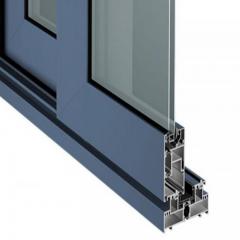
Aluminium frames are where retrofitting becomes genuinely specialist territory. While the metal itself machines beautifully — aluminium cuts cleanly and precisely — the design of modern aluminium window profiles introduces complications that uPVC and timber simply do not share.
The first challenge is wall thickness. Aluminium window profiles are typically much thinner-walled than uPVC equivalents. Where a uPVC frame head might have 40mm or more of depth to drill through, an aluminium profile might offer significantly less usable depth, with tighter tolerances for where a slot can be positioned without compromising the frame's structural capacity.
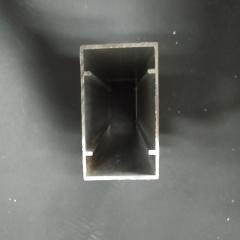
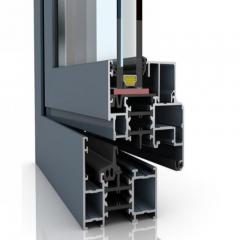
The second — and more critical — challenge is the thermal break. Modern aluminium windows achieve their thermal performance through a polyamide or polyurethane insulating strip that physically separates the interior and exterior aluminium sections of the profile. This thermal break prevents heat from conducting straight through the metal frame. If you cut a vent slot through the wrong area of the profile, you risk severing or damaging this thermal break. The result is a permanent cold bridge across the frame at that point, leading to localised condensation on the inside face of the frame — the exact problem you were trying to solve by fitting the vent in the first place.
Vent selection for aluminium frames must match the specific profile system the window was manufactured from. Unlike uPVC, where generic retrofit kits work across most major profile systems, aluminium windows vary dramatically between manufacturers. A vent designed for one system's profile geometry, chamber layout, and thermal break position may be completely incompatible with another. Fitting a mismatched vent risks poor sealing, inadequate weather performance, and visible gaps between the vent housing and the frame surface.
For this reason, retrofit trickle vents for aluminium windows almost always require professional assessment and installation. The profile system needs to be identified first — usually by checking the window manufacturer's documentation or examining the profile markings — and then a vent must be sourced that is engineered for that exact system.
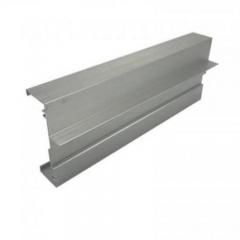
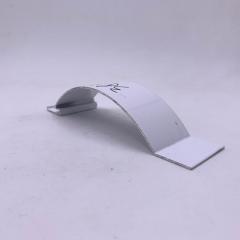
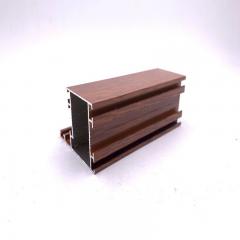
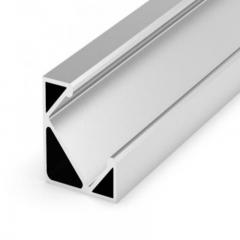
For fabricators, contractors, and project buyers working on aluminium retrofit at any scale, sourcing custom vents designed for the specific frame profile is not a luxury — it is a necessity. Shengxin Aluminium's custom window trickle vent range addresses this challenge directly, offering frame-specific integration support for both retrofit and new-build applications. Their vents can be engineered to match individual aluminium profile geometries, ensuring the thermal break remains intact, the housing seats flush against the frame surfaces, and the finished installation achieves consistent weather and acoustic performance across entire building projects.
If you are a homeowner with aluminium windows, the honest advice is this: do not attempt a DIY retrofit. The risk of damaging an expensive frame, compromising its thermal performance, or creating water ingress pathways is simply too high without specialist knowledge of the profile system involved. Consult a glazing professional who has experience working with your specific window brand.
Choosing your approach based on what your frames are made from? This comparison breaks down the key factors across all three materials, so you can assess what your project involves before committing to a purchase or booking an installer.
| Factor | uPVC | Timber | Aluminium |
|---|---|---|---|
| Ease of retrofit | Easiest — hollow chambers drill cleanly | Moderate — requires care with grain direction | Most difficult — thin walls and thermal break complications |
| Typical cost range (vent + fitting) | £15 - £50 DIY; £80 - £150 professional | £20 - £60 DIY; £100 - £180 professional | £80 - £200+ professional only recommended |
| Specialist tools required | Drill, TCT bits if steel-reinforced | Router or jigsaw, wood preservative, sealant | Profile-specific vent kit; professional CNC routing may be needed |
| Key risk | Hitting steel reinforcement; cracking plastic if forced | Splitting along the grain; moisture ingress into untreated end grain | Damaging the thermal break; mismatched vent-to-profile fit |
| DIY feasibility | High — suitable for confident DIYers | Moderate — achievable with woodworking experience | Low — professional installation strongly recommended |
Every frame material can accept a retrofit vent — but the route to getting there varies enormously. With a clear picture of what your specific frames demand, the next practical question becomes whether those frames actually have enough space for a vent. That means getting out a tape measure and checking some critical dimensions before any money changes hands.
Grab a tape measure, a notepad, and a strong magnet. These three items will tell you — in less than ten minutes — whether a retrofit trickle vent will fit your window frame or whether you are heading for an expensive mistake. Many guides mention frame width in passing and leave it at that. But will a trickle vent fit my window frame? The answer depends on three specific measurements and a careful check for hidden obstructions, not a single number.
The frame head is the horizontal top rail of the outer frame — the fixed section attached to the wall, not the opening sash. This is where virtually all through-frame retrofit trickle vents are installed, because it offers the longest uninterrupted run of frame material and sits above the glazing line where a slot will not interfere with the sealed glass unit.
You need three distinct measurements from this area. Each one serves a different purpose, and falling short on any of them can rule out a retrofit entirely.
1. Frame depth (front face to back face). Open the window and look at the head rail in cross-section. Measure from the inside face of the frame to the outside face — this is the total material your vent slot needs to pass through. Most standard through-frame vents require a minimum frame depth of around 24mm to sit securely without breaching the outer wall of the profile. Slimline models can work with as little as 18mm in some cases, but the comfortable working range for most kits is 35-45mm. If your frame depth falls below the vent manufacturer's stated minimum, a through-frame installation risks cutting right through the profile wall — and that is not a mistake you can undo.
2. Frame head height (visible from inside). This is the vertical measurement — the distance between the top edge of the glazing bead (the strip holding the glass unit) and the top of the frame. You are checking whether there is enough vertical space for the vent slot to sit above the glass without encroaching on the glazing rebate below or the external brickwork above. A typical through-frame vent requires 12-20mm of clear head height for the slot itself, plus additional space above for the external canopy to mount without being obstructed by a lintel, render, or cladding.
3. Clear internal width for slot placement. Measure the full width of the frame head from one side to the other. Then subtract the zones occupied by hardware — locking mechanisms, hinge brackets, espagnolette bars, and any other components that extend into the head section. The remaining unobstructed length is your usable width. Most standard retrofit vents require a slot length of 400-412mm. If your usable width falls below this, you may need a shorter vent (250-300mm options exist, though they deliver lower airflow) or a pair of compact vents positioned on either side of the obstruction.
Accurate external dimensions mean nothing if something hidden inside the frame blocks your slot. This is where most DIY measurement attempts fall short — the numbers look fine on paper, but the drill hits something unexpected halfway through.
Steel reinforcement in uPVC frames. As covered in the previous chapter, many uPVC profiles contain galvanised steel inserts for structural rigidity. The magnet test is your primary detection tool here. Run a strong neodymium magnet slowly along the full length of the frame head, right across the area where you plan to position the vent slot. Where the magnet grips firmly, steel sits directly behind the plastic. Where it slides freely, the section is unreinforced. Mark every steel zone with a pencil. If reinforcement runs across your entire intended slot position, you will either need to shift the vent laterally to find a clear zone or commit to HSS (High-Speed Steel) drill bits that can cut through metal — standard wood or plastic bits will snap on contact.
Thermal breaks in aluminium frames. Aluminium windows rely on an insulating polyamide strip separating the inner and outer sections of the profile. You cannot see this strip from outside, and its exact position varies between profile systems. Cutting through or too close to the thermal break destroys the frame's insulating performance and creates a cold bridge — condensation forming on the inside face of the frame itself. If you are working with aluminium, the frame manufacturer's technical documentation is the only reliable way to confirm where the thermal break sits relative to your proposed slot position. Without this information, do not proceed.
Concealed hardware and fixings. Open and close the window slowly while watching the head rail from the inside. Note where locking cams, mushroom pins, or keeps engage with the frame. Check whether the central locking rod (espagnolette bar) extends into the head section. On the hinge side, verify that no hardware brackets sit within your planned slot area. Routing through any of these components destroys the locking mechanism and compromises security.
With these checks done, you have everything you need to determine whether your frame can physically accept a vent. Here is a complete measuring checklist you can follow window by window:
If any measurement falls below the manufacturer's stated minimum — or if steel, hardware, or thermal break positioning makes a clean slot impossible — retrofitting a through-frame vent is not viable without risking damage to the frame. In these situations, over-frame vents (which mount on top of the frame rather than through it) or glazed-in vents (fitted within the sealed glass unit) may offer alternatives. But before exploring workarounds, an honest professional assessment is the safest next step. A qualified installer can evaluate options you may not have access to, including profile-specific vent models and non-standard mounting configurations that could make your frame workable after all.
Measurements confirmed and frame cleared? The next decision is whether to pick up the tools yourself or hand the job to someone who does this for a living — and that choice depends on more than just confidence with a drill.
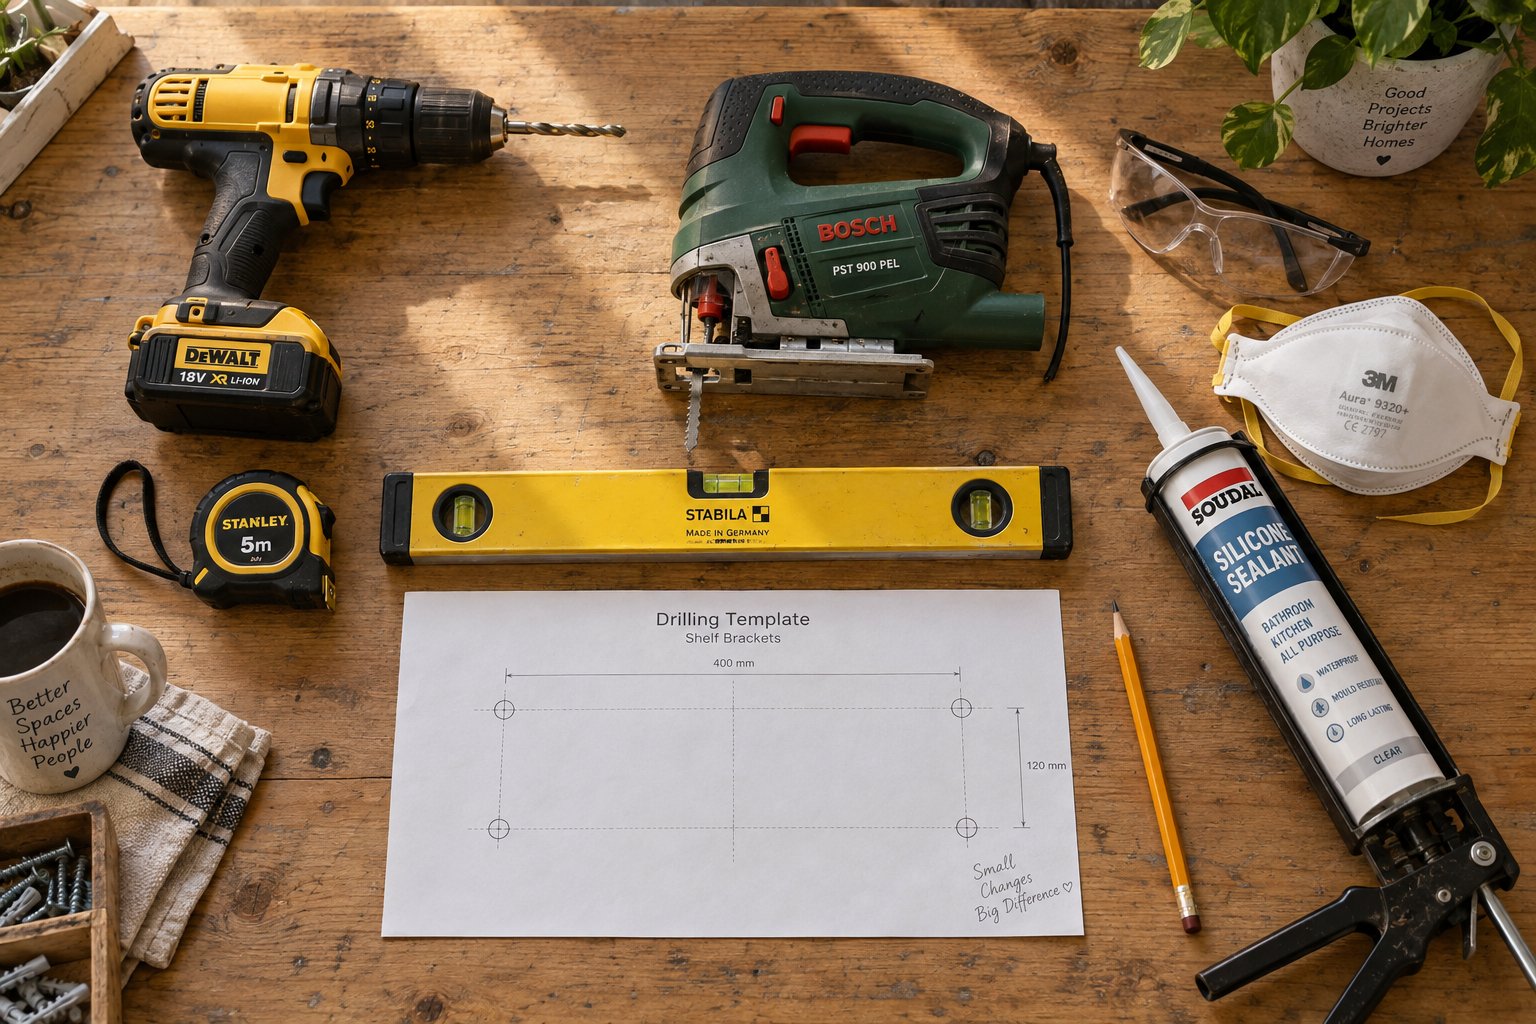
You have got your measurements, you know your frame material, and you are fairly sure a vent will fit. The temptation to save money and do it yourself is strong — and in many cases, it is entirely justified. But routing a slot through a window frame is not the same as hanging a shelf or painting a wall. It is irreversible. Cut in the wrong place, and you are not patching the mistake with filler. You are looking at a damaged frame, a potential security weakness, and a bill that dwarfs what a professional would have charged in the first place.
So can I fit trickle vents myself? The honest answer is: it depends on your frame material, your tool collection, and — most importantly — your comfort with a job that offers zero room for error.
Confident DIYers with some experience using a drill, jigsaw, or router can often handle a retrofit on timber frames and many uPVC frames without professional help. The core task is straightforward in concept: mark the slot position using the manufacturer's template, drill or rout through the frame head, clean up the aperture, fit the internal grille and external canopy, and seal the assembly. A typical window takes 15 to 30 minutes once you have done one and found your rhythm.
Here is what you will need in your toolkit:
Timber frames are arguably the most satisfying for a DIYer because the material responds predictably to sharp tools and gives tactile feedback as you cut. uPVC is also manageable, provided you have checked for steel reinforcement with a magnet (as described in the measuring chapter) and positioned your slot to avoid it. The Federation of Master Builders confirms that installing trickle vents is often a straightforward DIY task involving precise openings in the frame and fitting the vent units, though they recommend checking warranty terms before proceeding.
The word to underline in every DIY trickle vent installation guide is precise. A slot that is 2mm too wide produces a vent that rattles and leaks air when closed. A slot that is misaligned by a few millimetres means the external canopy does not sit flush, creating a water ingress pathway. And a slot cut to the wrong depth can breach the structural chamber of a uPVC profile or nick the glazing seal behind the frame head. Each of these mistakes is permanent. There is no "undo" button. If that level of precision feels comfortable to you, DIY is a genuine and cost-effective option. If it gives you pause, read the next section carefully.
Some situations call for professional hands regardless of how handy you are with power tools. The risk-to-reward ratio simply does not favour a DIY approach in these scenarios, and getting it wrong carries consequences that go well beyond cosmetics.
Watch for these red flags — any one of them is a strong signal to put the router down and pick up the phone:
There is no shame in recognising that a job sits outside your skill set. The entire reason professionals exist is to handle the situations where the stakes outweigh the savings. As practical installation experience confirms, routing into an unfamiliar frame material — particularly aluminium with its thermal break constraints — is one of the most common sources of costly retrofit failures. A professional assessment before the first cut costs far less than frame remediation afterwards.
Hiring a professional to install trickle vents is not the same as hiring any general handyman with a drill. The job requires specific knowledge that not every tradesperson carries: familiarity with Approved Document F ventilation requirements, experience routing into your specific frame material, and an understanding of how the vent interacts with the window's existing hardware and weather seals.
When evaluating installers, prioritise these qualities:
What about trickle vent installation cost UK homeowners should expect? Prices vary by region, frame material, and access difficulty, but as a general guide, professional supply-and-fit typically ranges from £30 to £80 per window for uPVC and timber frames. Aluminium frames and upper-floor installations tend to sit at the higher end — or above it — due to the additional skill and access equipment involved. For a whole-house retrofit across eight to ten windows, budgeting somewhere between £240 and £800 is a realistic range, though volume discounts are common when multiple windows are done in a single visit.
When requesting quotes, ask specifically what is included. A comprehensive quote should cover vent supply, routing and fitting, sealant application, cleanup of debris, and removal of waste material. Some installers quote labour only and expect you to supply the vents separately — which is fine, but you need to know upfront to avoid surprises on the day. Getting at least three quotes from different installers gives you a baseline for comparison and highlights any outliers that warrant further questioning.
Whether you tackle the retrofit yourself or hand it to a professional, one thing remains true: a trickle vent does not work in isolation. Its performance depends on how it fits into your home's broader ventilation picture — alongside extractor fans, mechanical systems, and the way air moves through your rooms as a whole.
A trickle vent on its own does not ventilate your home. That might sound like a strange thing to say after six chapters explaining why you need them, but it is an essential truth that changes how you think about the whole system. A trickle vent supplies fresh air into a room. It does not extract stale, moisture-laden air out. For moisture to actually leave your home, something else has to pull it — and if that "something else" is missing or underperforming, even perfectly installed retrofit trickle vents will deliver disappointing results.
Think of your home's ventilation like breathing. Inhaling without exhaling achieves nothing useful. Trickle vents are the inhale. Extractor fans, mechanical extract ventilation systems, and even open windows are the exhale. Both halves need to work together, or the whole process stalls.
Every kitchen extractor fan and every bathroom extract unit shares the same basic operating principle: it pulls air out of the room and pushes it outside. Simple enough. But here is the part most people overlook — where does the replacement air come from?
When an extractor fan removes air from a sealed room, it creates negative pressure inside that space. The room now has slightly less air than the surrounding rooms and the outdoors. Physics demands balance, so air rushes in to equalise the pressure. In a draughty older home, that replacement air leaks in through gaps around windows, under doors, and through floorboards. The system works — crudely, uncontrollably, and often uncomfortably — but it works.
In a modern home with airtight double glazed windows? There are no gaps. The extractor fan still tries to pull air out, but it struggles to draw replacement air in. The result is a cascade of problems. As Energy Vanguard explains in the context of kitchen exhaust systems, when exhaust air exits a building, an equal volume must enter to replace it — a cubic foot out always equals a cubic foot in. Without a deliberate supply path, that makeup air forces its way through whatever gaps remain: under doors, through flue pipes, around pipe penetrations, or via any other imperfection in the building envelope.
This is where retrofit trickle vents play a critical role. They provide that deliberate, controlled supply path. Fresh outdoor air enters through the vent's baffled canopy, passes through the frame slot, and trickles into the room at a gentle, manageable rate. The extractor fan then pulls the stale, moist air out. The two systems — passive supply and active extract — form a complete circuit.
Without adequate supply air, three specific problems emerge:
Trickle vents supply the fresh air that extractor fans and mechanical extract systems need to work effectively. Without controlled supply air, extract ventilation creates negative pressure, reduces its own performance, and forces air through unintended pathways.
Do trickle vents work with extractor fans? Absolutely — and in fact, extractor fans work better because of them. The relationship is symbiotic. The vent provides the supply; the fan provides the extract. Together, they create the continuous airflow circuit that prevents moisture from building up, keeps indoor air quality healthy, and avoids the pressure imbalances that cause draughts, noise, and — in worst cases — dangerous flue reversals.
For homes fitted with centralised mechanical extract ventilation (MEV) systems — where a single fan unit extracts air from multiple wet rooms through a network of ducts — the principle is identical but amplified. MEV systems extract larger volumes of air continuously, making the need for adequate background supply even more critical. Every room that the MEV system draws from needs a supply air path, and trickle vents in bedroom, living room, and kitchen windows are the standard method of providing it.
Mechanical ventilation with heat recovery — MVHR — is a different animal entirely, and getting this distinction right saves homeowners from installing vents that actively undermine their existing system.
An MVHR system provides both supply and extract air mechanically. It draws stale air out of wet rooms (kitchens, bathrooms, utility rooms) through one set of ducts, and simultaneously pushes filtered fresh air into habitable rooms (bedrooms, living rooms) through another set. The clever part is the heat exchanger at the core of the unit: outgoing warm air passes its heat energy to the incoming cold fresh air, recovering up to 90% or more of the thermal energy that would otherwise be lost.
These systems are specifically designed for airtight buildings. The tighter the building envelope, the more efficiently an MVHR system operates — because all ventilation air passes through the heat exchanger where energy is recovered. Introduce uncontrolled air leakage through trickle vents, and you bypass the heat exchanger entirely. Cold outdoor air enters the room without being warmed, while the system's carefully balanced airflows are disrupted by the additional uncontrolled supply.
As EnviroVent's technical guidance confirms, trickle vents are generally not required in homes with properly designed and commissioned MVHR systems. The MVHR itself fulfils both the supply and extract ventilation requirements of Part F. Adding vents to windows in an MVHR-equipped property is not just unnecessary — it can reduce the system's efficiency by allowing uncontrolled air leakage that the heat exchanger never sees.
There is a nuance here, though. If an MVHR system is poorly designed, incorrectly commissioned, or inadequately maintained — blocked filters, unbalanced airflows, damaged ductwork — it may not deliver sufficient ventilation to all rooms. In that scenario, the solution is not to add trickle vents as a workaround. The solution is to fix the MVHR system. Trickle vents and MVHR systems serve the same purpose through fundamentally different methods, and mixing the two approaches undermines both.
So how do you know which whole house ventilation strategy with trickle vents applies to your home? A simple rule of thumb: if your property has a central MVHR unit with ducted supply and extract to multiple rooms, trickle vents are almost certainly not needed and should not be added. If your home relies on individual extractor fans in kitchens and bathrooms (or a centralised MEV system) with no mechanical supply air, trickle vents are the missing piece your ventilation strategy needs.
Ventilation and noise control pull in opposite directions. Opening a window lets air in — and every decibel of traffic, train, or aircraft noise along with it. Standard trickle vents improve on this significantly by allowing air exchange while keeping the window closed, but their sound attenuation is modest. For homes near busy roads, railway lines, or airport flight paths, that modest attenuation may not be enough.
Acoustic trickle vents for noise reduction are engineered specifically for these situations. They incorporate internal baffles, sound-absorbing linings, and longer air pathways within the vent housing that force sound waves to lose energy before reaching the room. The result is measurably lower noise transmission compared to a standard open vent.
How much quieter? Independent testing by accredited laboratories measures acoustic performance using the Dn,e,w rating — the weighted element-normalised level difference, expressed in decibels. A higher number means better sound insulation. Standard trickle vents typically offer limited acoustic performance, while purpose-designed acoustic vents can achieve ratings of 40 dB or above, with high-performance models exceeding 50 dB. To put that in context, a 10 dB reduction is perceived by the human ear as roughly halving the loudness — so the difference between a standard and a high-performance acoustic vent is dramatic in subjective terms.
When specifying acoustic vents, look for products tested to the ISO 10140 series by UKAS-accredited laboratories, with published Dn,e,w values for both open and closed positions. Pay attention to Ctr correction factors too — these adjust the rating for low-frequency noise sources like traffic rumble, which is typically harder to attenuate than higher-pitched sounds.
For homeowners in noisy environments who have been avoiding trickle vents out of fear they will let sound flood in, acoustic-rated models offer a genuine solution: background ventilation that meets Part F requirements without sacrificing the acoustic comfort that sealed, closed windows provide. They cost more than standard vents — typically two to four times the price — but in noise-sensitive locations, the investment in livability is hard to argue against.
Getting the ventilation strategy right — matching supply to extract, choosing the appropriate vent type for your environment, and understanding when not to install vents — sets the stage for a system that works quietly and continuously in the background. But even a well-planned installation can develop issues once it is in service. Draughts, persistent condensation, and water tracking through the vent housing are all problems that real homeowners encounter after fitting, and knowing how to diagnose them quickly makes the difference between a minor adjustment and a growing frustration.
You fitted the vents, sealed the canopies, tested the sliders — and everything looked perfect. Then winter arrived. A cold draught curls across your neck every time you sit near the window. Or the condensation you expected to disappear is still streaming down the glass each morning. Or worse — rainwater is tracking through the vent housing and dripping onto your windowsill during heavy downpours.
These are real problems that real homeowners face after retrofitting, and they do not mean the project has failed. Most post-installation issues have identifiable causes and fixable solutions. The key is diagnosing accurately before reacting — because the wrong fix applied to the wrong problem wastes time, money, and patience.
Let's set a realistic expectation first: some airflow sensation when your vents are open is not a defect. It is the entire point. Trickle vents exist to move air into the room, and moving air feels cooler against skin than still air at the same temperature. A gentle, barely perceptible movement near the top of the window is the system working exactly as designed.
Excessive draughts — the kind that make a room feel noticeably colder or create an uncomfortable stream of cold air hitting you at desk or sofa height — are a different story. If trickle vents are causing draughts strong enough to disturb your comfort, one of three things is usually responsible:
Adjustable and closeable vents give you a practical response to changing conditions. On a calm, mild day, leave the vent fully open for maximum fresh air. During a gale, partially close the slider to reduce airflow without shutting it off entirely. Building regulations recommend that vents remain open whenever possible for continuous background ventilation, but the "hit-and-miss" slider exists precisely to let you manage comfort during extreme weather. You are not breaking any rules by partially restricting the vent on a stormy night — you are using the product as intended.
This is the most disheartening outcome: you go through the effort and expense of fitting vents, and the windows still fog up every morning. Before concluding the installation was pointless, consider that several factors influence whether background ventilation alone resolves your condensation problem.
Still getting condensation after fitting trickle vents? Here is what might be happening:
Your home needs time to dry out. If a property has been under-ventilated for months or years, moisture has saturated soft furnishings, plaster, carpets, and even masonry. That stored moisture continues releasing vapour into the air long after the ventilation improvement is made. It can take several weeks — sometimes longer in severe cases — for background humidity to drop enough that condensation on glass stops forming. Be patient. Monitor the situation over four to six weeks before concluding the vents are insufficient.
Extract ventilation is also inadequate. Trickle vents supply fresh air in, but they do not push moist air out. If your kitchen lacks a functioning extractor fan, or the bathroom fan is undersized, blocked with dust, or has a flap valve stuck shut, the moisture generated by cooking and bathing has no exit route regardless of how much supply air the vents introduce. Check that every wet room has a working, correctly rated extract fan or is served by a centralised MEV system. Without effective extract, supply-only ventilation cannot complete the airflow circuit.
The vents are too small for the room. A single vent providing 2,500 mm² EA in a large open-plan kitchen-diner that needs 8,000 mm² is doing barely a third of the required job. Revisit the Part F equivalent area calculations for each room (covered in the regulations chapter) and compare them against the installed vent ratings. If the numbers fall short, adding a second vent to another window in the same room — or replacing the undersized unit with a higher-capacity model — closes the gap.
Lifestyle factors are overwhelming the ventilation capacity. Drying laundry indoors on radiators is one of the biggest single sources of moisture in a home — a single load of washing releases several litres of water vapour as it dries. If this is a regular activity, even correctly sized trickle vents may struggle to keep humidity below the condensation threshold. Using a vented tumble dryer, drying clothes outdoors when possible, or running a dehumidifier during drying cycles makes a significant difference.
Water coming through a trickle vent is one of the most alarming post-installation problems — and one that demands immediate attention. Unlike condensation, which is moisture from inside the home depositing on cold surfaces, water ingress means external rainwater is physically entering the building through the vent assembly. Left unaddressed, it can damage plasterwork, stain decorations, and create precisely the damp conditions the vent was meant to prevent.
The most common cause is an incorrectly fitted or inadequately sealed external canopy. The canopy is your first line of weather defence — it deflects driven rain away from the slot opening. If it was mounted slightly off-level, if the screw fixings do not pull it flush against the frame, or if the sealant bead around its perimeter has gaps or has failed to cure properly, rainwater tracks behind the canopy, enters the slot, and drips through to the interior.
To fix water ingress:
As Checkatrade's window leak guidance confirms, missing or damaged sealant is the single most common cause of water entering through window components — the chemical compounds in silicone sealant break down over time and lose their waterproofing effectiveness, especially on south- and west-facing elevations exposed to the most weather.
Noise ingress is a separate concern and one that catches many homeowners off guard. Standard trickle vents provide minimal sound attenuation — typically only 25-30 dB. If you live on a quiet residential street, this is barely noticeable. If your home faces a busy road, sits near a railway line, or is under an airport flight path, the vent essentially becomes an open channel for noise to enter, even with the window tightly closed.
The fix here is not to close the vent permanently (which defeats the ventilation purpose) but to replace it with an acoustic-rated alternative. As discussed in the ventilation strategy chapter, acoustic trickle vents use internal sound-absorbing materials, multi-chambered designs, and optimised airflow paths to attenuate noise while maintaining adequate ventilation. Models rated at 40 dB Dn,e,w or above can make a substantial perceptible difference. For severe noise environments, dual-attenuator systems combining an acoustic internal vent with an acoustic external canopy push performance even higher.
When something feels wrong after fitting, rapid diagnosis saves you from applying the wrong fix. This table maps the most common post-installation complaints to their likely causes and the recommended corrective action.
| Problem | Likely Cause | Recommended Solution |
|---|---|---|
| Strong cold draught near window | Vent EA rating too large for the room; missing internal baffles; high wind exposure | Check EA against Part F room requirement; replace internal grille with baffled version; partially close slider during high winds |
| Condensation persists on glass | Inadequate extract ventilation; vent EA too small; home still drying out; high indoor moisture sources | Verify extract fans are working and correctly rated; check total EA meets room minimum; allow 4-6 weeks for moisture levels to stabilise; reduce indoor drying of laundry |
| Water dripping through vent during rain | External canopy not sealed properly; canopy not sitting flush; sealant deteriorated | Remove old sealant; clean surfaces; reapply continuous bead of low-modulus silicone along top and sides of canopy; replace canopy if warped or cracked |
| Excessive road or traffic noise through vent | Standard vent provides minimal sound attenuation (25-30 dB typical) | Replace with acoustic-rated vent (40+ dB Dn,e,w); consider dual-attenuator canopy combination for severe noise exposure |
| Vent slider jammed or stiff | Paint overspray, debris in track, or plastic distortion from overtightened screws | Clean slider track with a dry brush; loosen fixing screws slightly if housing is distorted; apply silicone spray lubricant to slide mechanism |
| Rattling or vibration noise from vent in wind | Loose-fitting internal or external component; missing gasket; slot cut too wide | Tighten fixing screws; add adhesive-backed foam gasket strip behind loose component; if slot is oversized, fit a larger vent model that fills the aperture |
| Insects entering through vent | Missing or damaged insect mesh in canopy | Check external canopy for integrated mesh; if absent, fit an aftermarket insect screen behind the canopy or source a replacement canopy with built-in mesh |
Most of these issues resolve with modest effort and minimal cost — a tube of sealant, a replacement grille, or a straightforward swap to a more appropriate vent model. The important thing is to identify the root cause rather than masking the symptom. Closing a vent permanently because it draughts, leaks, or lets noise in is not a solution — it returns you to the sealed, under-ventilated home that created the condensation and mould problems in the first place.
Troubleshooting assumes you are committed to keeping your existing windows and making the vents work within them. But what happens when the frame itself is the limiting factor — too narrow, too deteriorated, or simply too far gone for a retrofit to make sense? That is the point where a bigger question surfaces: should you be retrofitting vents at all, or is a full window replacement the smarter long-term investment?
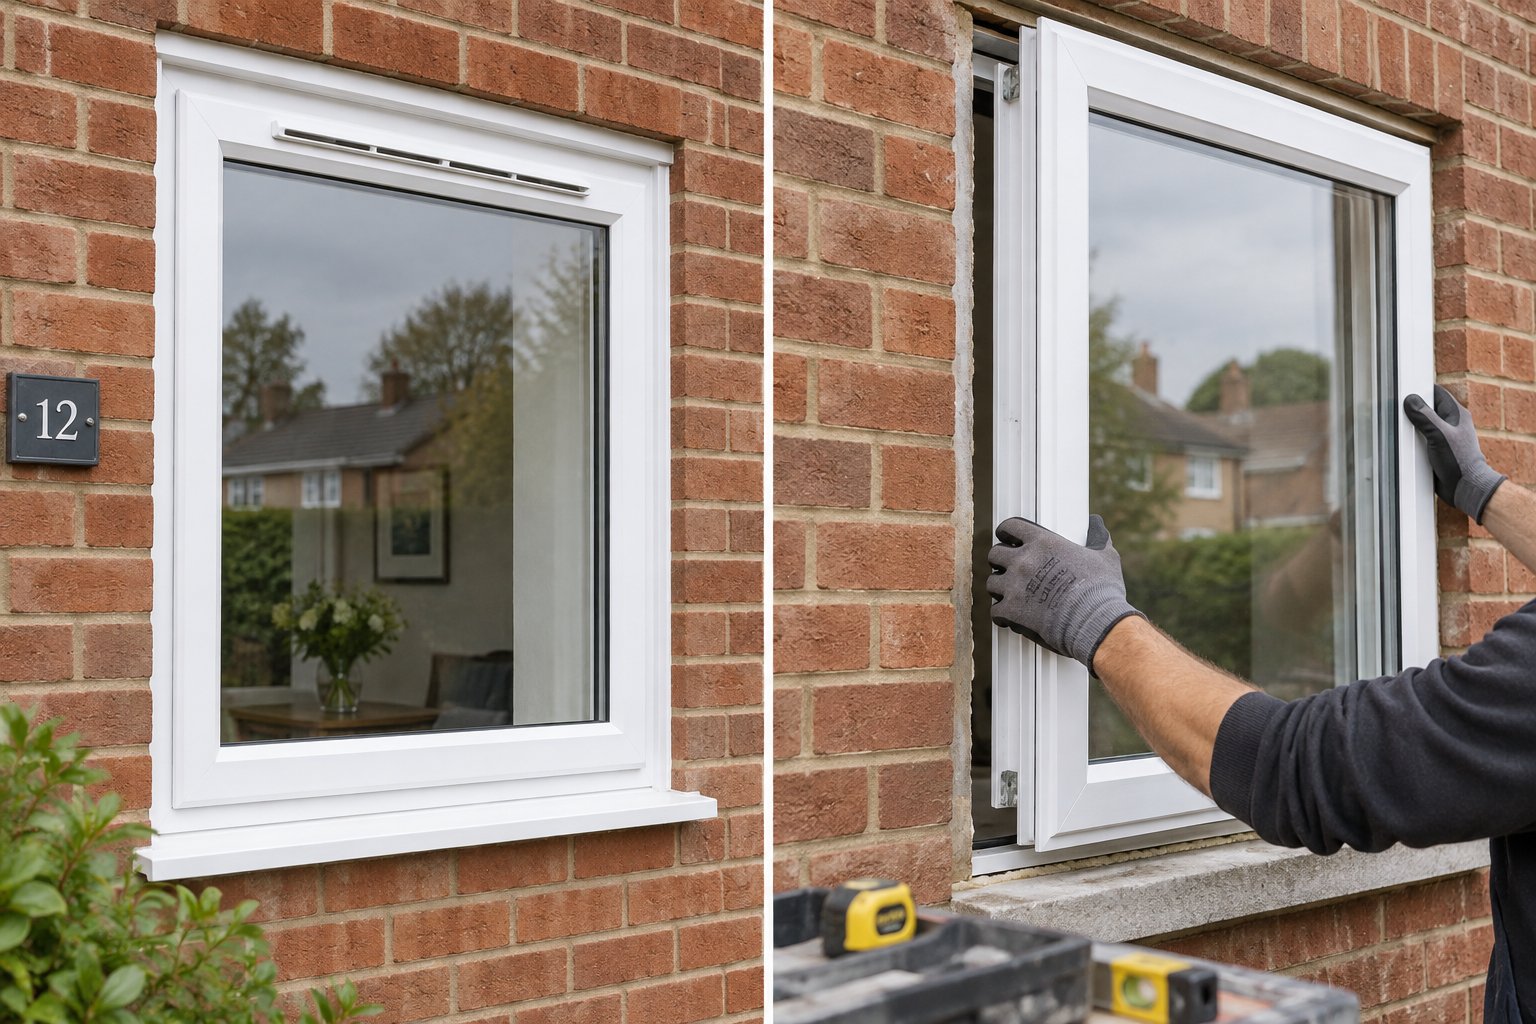
This is the question that sits behind every search, every measurement, and every quote request: is it worth adding trickle vents to old windows, or should you skip the retrofit entirely and invest in new windows that come with vents already built in? The answer is not universal. It depends on the condition of your existing frames, the scale of your project, your budget, and what you actually need the windows to achieve beyond just ventilation.
Most guides answering this question have a commercial stake in the outcome. Window companies push replacement sales. Vent manufacturers push retrofit kits. Neither gives you the full picture. What you need is a framework for making the decision yourself — based on your specific windows, your specific property, and what genuinely makes financial and practical sense.
Retrofit is the clear winner in several common scenarios, and recognising them early saves you from spending thousands on replacements you do not need.
Your windows are structurally sound. If the frames are intact, the seals are holding, the glass units are not misted, and the locking hardware operates smoothly, your windows still have years — potentially decades — of serviceable life ahead. Ripping out perfectly functional double glazing just to add ventilation is like scrapping a car because the radio does not work. Retrofit trickle vents solve the ventilation gap without discarding an asset that is performing well in every other respect.
Your property has many windows. Imagine a three-bedroom semi with 12 windows. Replacing all of them with vented units might cost anywhere from £5,000 to £12,000 or more depending on size, material, and specification. Retrofitting vents across the same 12 windows — even professionally — lands somewhere between £400 and £1,000 for a typical uPVC or timber project. The economics are not even close. For homeowners on a budget, or landlords managing multiple properties, retrofit delivers the ventilation improvement at a fraction of the replacement cost.
The windows have heritage or architectural value. Period timber windows in conservation areas, original sash windows in Victorian terraces, or architecturally distinctive frames that define a building's character are worth preserving. Replacement windows, even high-quality replicas, rarely match the proportions, profiles, and detailing of originals. Retrofitting vents into these frames keeps the character intact while bringing ventilation up to modern standards — often the only approach that satisfies both conservation officers and building regulations simultaneously.
You need a fast, targeted fix. Condensation complaints from tenants, a building control notice about inadequate ventilation, or mould developing around window reveals — these problems demand action now, not in six to eight weeks when replacement windows arrive. Retrofit vents can be sourced and installed within days, making them the practical choice when speed matters.
Honesty demands acknowledging the limitations too. Retrofit vents rarely look as seamless as factory-integrated ones. The external canopy sits on the surface of the frame rather than being recessed into the profile, and on some window styles — particularly slimline aluminium or flush casement designs — the visual impact is noticeable. Not every frame can accommodate a vent either. As the measurement chapter detailed, frames that are too shallow, too narrow, or heavily reinforced may simply lack the physical space for a through-frame slot. And a retrofit addresses ventilation only — it does nothing for windows that are also failing thermally, acoustically, or in terms of security.
Sometimes, adding vents to existing windows is like putting new tyres on a rusting chassis. The tyres are fine, but they cannot fix the bigger problem. Replacement becomes the more practical option when the windows themselves are failing — not just lacking ventilation.
Frames are deteriorating. Timber frames with active wet rot, uPVC profiles that have yellowed, warped, or become brittle, and aluminium frames with corroded thermal breaks are all approaching end of life. Cutting a vent slot into a frame that is already structurally weakened accelerates the deterioration rather than extending the window's usefulness. If you are going to spend money on these windows, spend it on replacing them with modern units that include integrated vents from day one.
Windows are single glazed and thermally poor. Retrofit vs new windows for ventilation is only one dimension of the comparison. Single-glazed windows lose heat at roughly five times the rate of modern double glazing. Adding a vent to a single-glazed frame gives you ventilation, but it does nothing about the enormous thermal deficit. If the primary goal is reducing energy bills and improving comfort, replacement delivers multiple performance upgrades simultaneously — better thermal insulation, improved acoustic performance, enhanced security hardware, and integrated ventilation — in a single investment.
Frames are too narrow to accommodate a vent safely. Some window profiles — particularly older aluminium systems and certain slimline uPVC designs — have frame head depths below the minimum 24mm required for through-frame vents. Attempting to force a retrofit into an inadequate frame risks breaching the outer wall, damaging the structural chamber, or compromising the weather seal. If measurements rule out a retrofit (as covered in the measuring chapter), replacement with a vented profile is the only reliable path to compliance.
Multiple performance upgrades are needed simultaneously. When a property needs better thermal performance, improved acoustics, upgraded security, and background ventilation, trying to retrofit each improvement individually quickly becomes more expensive and disruptive than a single comprehensive window replacement. This is especially true in whole-house renovation projects where new windows can be specified holistically — optimised for the building's orientation, room types, and local noise environment — in a way that piecemeal retrofits never achieve.
For individual homeowners, the decision usually comes down to a straightforward cost-benefit assessment. If the windows work well and only lack ventilation, retrofit is almost always the sensible choice. If the windows are failing in multiple ways, replacement makes more sense as a consolidated investment.
For contractors, fabricators, housing associations, and project buyers, the calculation shifts. Adding trickle vents to social housing windows across hundreds or thousands of units is a fundamentally different exercise from a single homeowner fitting a vent to their kitchen window. At scale, consistency matters: every vent must fit its frame profile precisely, every installation must meet Part F, and every unit must perform reliably for years without maintenance callbacks. As REHAU's social housing research highlights, with 80% of current UK housing stock set to remain in use through 2050, retrofitting existing building fabric — rather than wholesale replacement — will be a critical pathway to decarbonisation and compliance for local authorities managing tight budgets.
At this scale, sourcing vents designed for specific frame profiles becomes essential to ensure consistent fit and regulatory compliance across entire housing portfolios. Generic one-size-fits-all kits introduce variability — slightly different tolerances, inconsistent weather sealing, and installation complications that multiply across hundreds of units. Shengxin Aluminium's custom window trickle vent solutions support exactly this kind of large-scale retrofit by offering frame-specific custom vents with integration guidance. Their approach helps professionals match the right vent to the right profile — whether uPVC, timber, or aluminium — for both retrofit and new-build scenarios, reducing installation variability and ensuring each unit meets performance requirements from day one.
Whether your project involves a single kitchen window or a 500-unit housing block, the decision framework remains the same. Use this checklist to reach your own conclusion based on your specific circumstances:
Neither choice is universally right. A retrofit that saves a landlord £50,000 across a housing portfolio is a smart investment. A replacement that transforms a draughty, single-glazed Victorian cottage into an energy-efficient, quiet, secure home is equally smart. The mistake — the only real mistake — is doing nothing. Sealed, unventilated windows do not improve with time. The condensation gets worse, the mould spreads further, the air quality declines, and the remediation costs climb. Whether you pick up a retrofit kit or sign off on new windows, the important thing is that your home starts breathing again.
Yes, retrofit trickle vent kits allow you to add background ventilation to windows that were originally installed without vents. The process involves cutting a narrow slot through the frame head and fitting an external canopy, through-frame channel, and internal controllable grille. uPVC and timber frames are the most straightforward to retrofit, while aluminium frames typically require professional installation due to thin wall profiles and thermal break considerations. Before purchasing a kit, measure your frame head depth (minimum 24-45mm depending on the model), check for steel reinforcement using a magnet, and confirm there is enough clear width to position the vent slot away from locking hardware and hinges.
Under the revised Approved Document F of the Building Regulations — effective 15 June 2022 in England and 23 November 2022 in Wales — most replacement windows and doors must include trickle vents. The core principle is that you cannot reduce a property's ventilation provision when installing new windows. Even if your original windows lacked trickle vents, modern replacements are so much more airtight that fitting them without vents effectively reduces overall ventilation. Compliance must be demonstrated through either a FENSA certificate from an approved installer or local authority building control sign-off. Failure to comply can create issues during property sales and may require retrospective remedial work.
Trickle vents address the root cause of condensation by allowing a continuous trickle of fresh, drier outdoor air into the room, which gradually dilutes and displaces moisture-laden indoor air. A typical family of four produces 10-15 litres of water vapour daily through cooking, showering, and breathing. In airtight modern homes, this moisture has no escape route and condenses on cold surfaces like window panes. However, trickle vents alone are not a complete solution — they supply fresh air in, but extractor fans in kitchens and bathrooms are still needed to push moist air out. Both systems work together to create an effective airflow circuit that keeps humidity below condensation thresholds.
Professional supply-and-fit costs vary by frame material, region, and access difficulty. For uPVC frames, expect roughly £30-£80 per window. Timber frames sit in a similar range, sometimes slightly higher due to the additional sealing work on exposed end grain. Aluminium frames are the most expensive — often £80-£200 or more per window — because they require profile-specific vent selection and specialist knowledge to avoid damaging the thermal break. For a whole-house retrofit across 8-10 windows, a realistic budget is £240-£800. When requesting quotes, confirm whether the price includes vent supply, routing, sealant application, cleanup, and waste removal, as some installers quote labour only.
These are fundamentally different tasks. A true retrofit means your windows currently have no trickle vents at all — you need to measure the frame, check for obstructions, cut a new slot through the head rail, and fit all three vent components from scratch. A replacement means the slot already exists because vents were previously installed. You simply need to identify the original vent manufacturer, match the fixing centres and dimensions, and swap the damaged canopy or grille for a compatible part. Replacement is faster, cheaper, and carries far less risk since no new cutting is involved. To determine which applies, inspect the top of your window frame inside and out — if you see any slotted grilles or horizontal covers, even damaged ones, you likely need replacement parts rather than a full retrofit.



 Інтернет-сервіс
 0086 136 3563 2360
 sales@sxalu.com
 +86 136 3563 2360
 Українська
 English
 français
 Deutsch
 русский
 español
 português
 العربية
 ไทย
ไทย Việt
Việt