Ever noticed those slim, unassuming slots at the top of your window frames? You might have walked past them hundreds of times without giving them a second thought. Yet these small features play a surprisingly vital role in keeping your home healthy and comfortable. They're called window trickle vents, and understanding how they work could transform the way you think about your home's air quality.
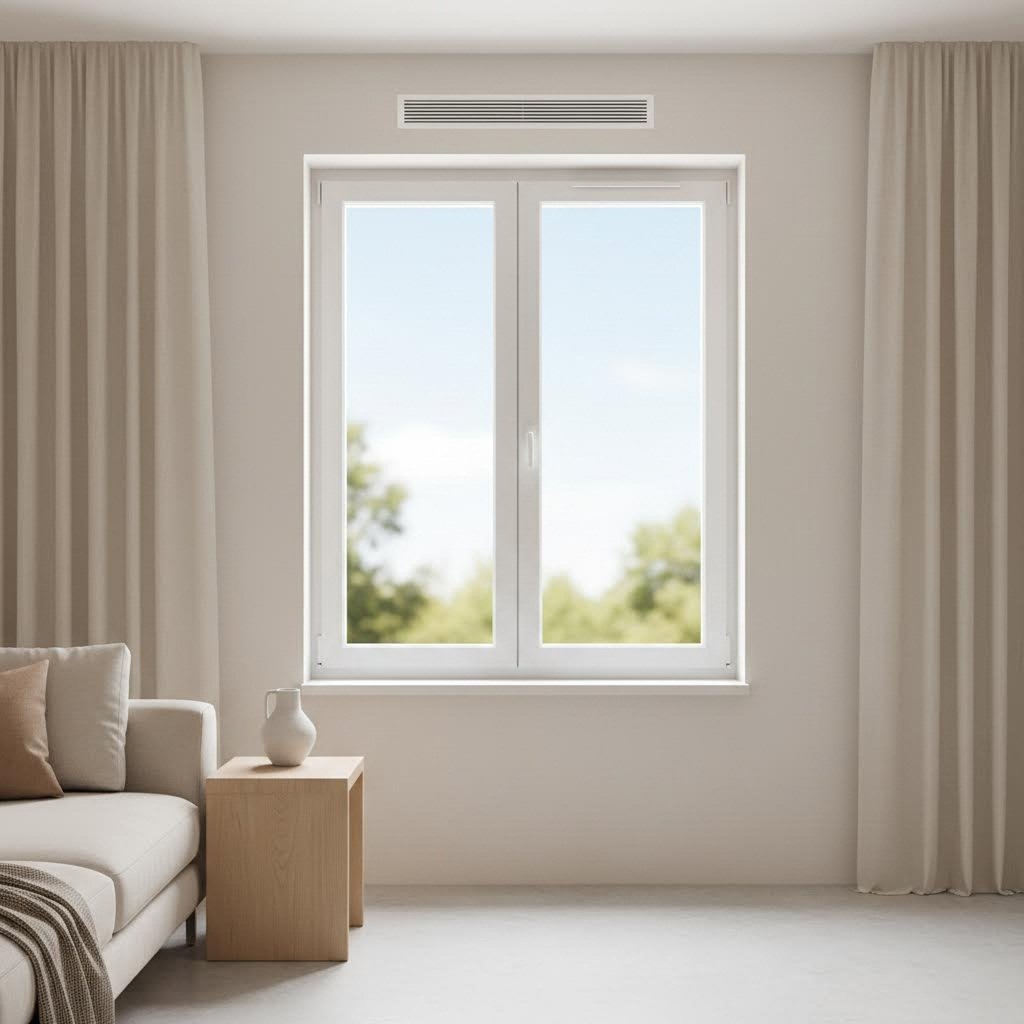
Window trickle vents are small, controllable openings integrated into window or door frames that provide continuous background ventilation even when the main window remains closed. Typically positioned at the top of the frame—known as the "frame head"—these narrow slots allow fresh outdoor air to enter your living space in a controlled, subtle manner.
A trickle vent is a relatively small opening in a window or other building envelope component to allow small amounts of ventilation in spaces intended to be naturally ventilated when major elements of the design—windows, doors, etc.—are otherwise closed.
Think of them as your home's built-in breathing system. Unlike opening a window fully, which can create drafts, security concerns, and significant heat loss, trickle vents provide a gentle, steady flow of fresh air. They're especially valuable in modern homes where improved insulation and double glazing have dramatically reduced natural air leakage—sometimes a little too effectively.
The beauty of trickle ventilation lies in its simplicity. These vents operate on a passive ventilation principle, requiring no electricity or mechanical components to function. Here's what happens:
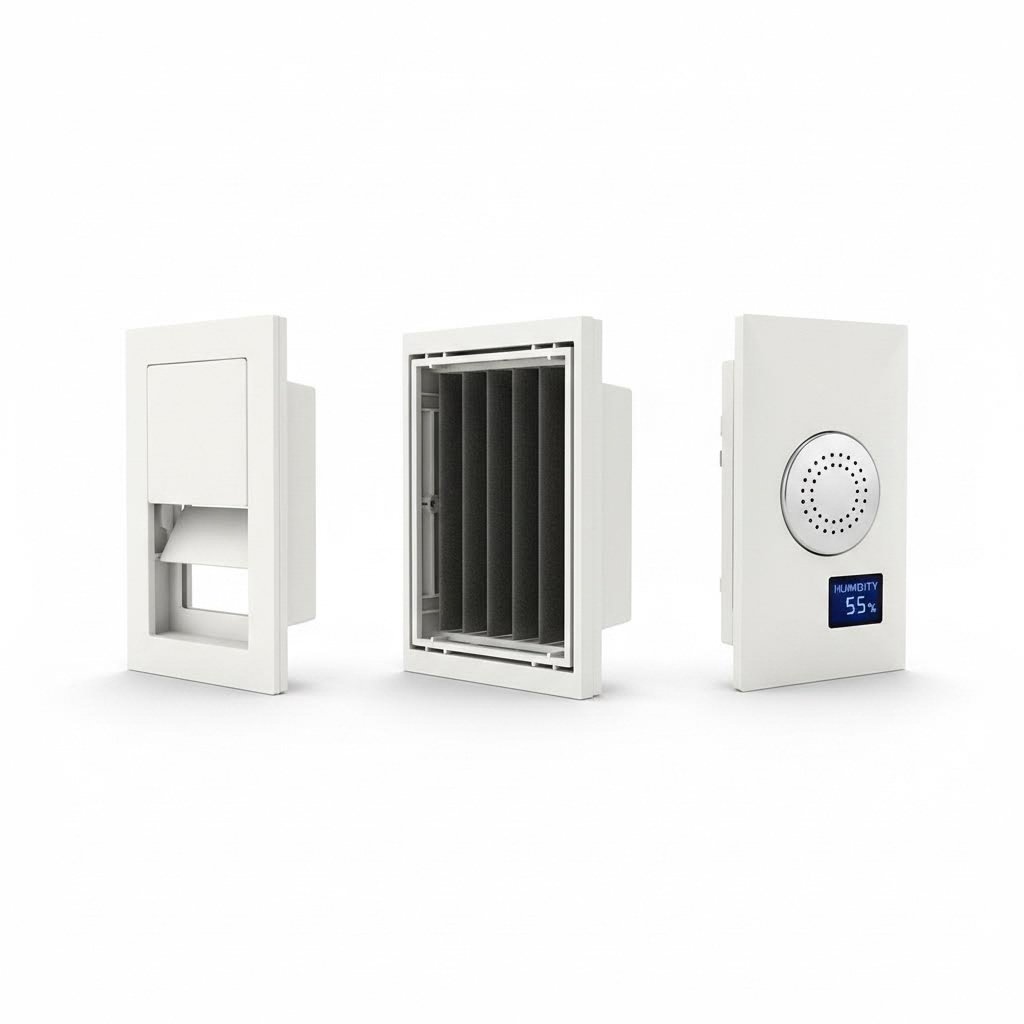
A typical trickle vent consists of three key components. The external canopy sits on the outside of your window frame, protecting the opening from rain and debris while allowing air to enter. Inside, you'll find the hit-and-miss cover—a sliding or rotating mechanism that lets you open, close, or partially adjust the vent according to your needs. Between these two components lies the slot itself, the narrow channel through which air travels.
Understanding the difference between window and ventilator functions helps clarify why these vents matter. While a window's primary purpose is to admit light and provide views, a ventilator specifically manages airflow. Trickle vents elegantly combine both functions, maintaining window security while delivering essential ventilation.
Why does this matter so much for modern homes? Today's energy-efficient construction creates remarkably airtight buildings. While this is excellent for reducing heating bills, it can trap moisture, pollutants, and stale air inside. Trickle vents solve this problem by ensuring a minimum level of background ventilation that helps prevent condensation, reduces indoor pollutants, and maintains a healthier living environment—all without compromising your home's thermal efficiency or security.
So you've decided to replace your windows or embark on a home renovation project. But here's a question that catches many homeowners off guard: do you legally need trickle vents in windows? The answer isn't always straightforward, and getting it wrong could mean failed inspections or costly retrofitting. Let's break down exactly what UK Building Regulations require and when these house window vents become mandatory.
The rules governing trickle vents windows fall under Approved Document F of the Building Regulations, which specifically addresses ventilation requirements for maintaining indoor air quality. Since June 2022, significant updates to Part F came into force, fundamentally changing how ventilation must be addressed in most window replacement projects.
Here's the core principle you need to understand: when you replace windows, you're likely increasing your home's airtightness. Modern double or triple glazing seals far more effectively than older windows ever did. While that's brilliant for energy efficiency, it can trap stale air, moisture, and pollutants inside. The regulations exist to ensure your home doesn't become less healthy after improvements.
The requirements differ depending on your project type:
Wondering whether your specific situation demands trickle vents in windows? According to guidance from LABC (Local Authority Building Control), here's a clear breakdown of when compliance is mandatory:
It's worth noting that exemptions for listed buildings and conservation areas don't mean you can simply ignore ventilation. The regulations state that work should comply "where reasonably practicable." Early consultation with your local authority's Listed Building Officer and Building Control Surveyor is essential if you're dealing with a heritage property. Interior door ventilation and internal door vents may sometimes provide alternative solutions in these sensitive contexts.
One common misconception deserves clearing up immediately: you cannot sign a disclaimer opting out of trickle vents. A window installer operating under a Competent Person Scheme must self-certify that work complies with Building Regulations—and that includes ventilation requirements. A homeowner's preference to skip venting windows simply isn't a valid compliance route.
Trickle vents don't work in isolation. They're designed to complement other ventilation methods throughout your home, creating a complete system that manages air quality effectively.
In kitchens and bathrooms, extract fans handle the heavy lifting—removing moisture-laden air and cooking odours at their source. Trickle vents support these fans by providing replacement air. Without adequate background ventilation, extract fans work less efficiently because they're fighting against negative pressure inside your home.
For homes with whole-house mechanical ventilation systems, the picture changes. If you have a properly designed MVHR system that controls ventilation throughout the dwelling, additional trickle vents may actually interfere with the system's balanced airflow. In these cases, the mechanical system takes precedence, and trickle vents become unnecessary—provided the system meets the required ventilation rates.
Similarly, internal door vents play a supporting role by allowing air to circulate between rooms. When bedroom doors are closed at night, for instance, interior door ventilation ensures that fresh air entering through window vents can flow throughout the living space rather than becoming trapped in a single room.
Understanding how these systems interact helps you make informed decisions about your ventilation strategy—and ensures your window replacement project meets both the letter and spirit of the regulations. With compliance requirements clear, the next consideration is choosing the right type of trickle vent for your specific needs.
Not all window vents are created equal. Walk into any building supply store, and you'll find trickle air vents for windows ranging from basic budget options to sophisticated smart devices. But which type actually suits your home? The answer depends on where you live, what problems you're trying to solve, and how much control you want over your ventilation. Let's explore the three main categories of trickle vents and what makes each one unique.
Standard trickle vents represent the most common and cost-effective solution for residential window air ventilation. These straightforward slot vents consist of a simple opening in the window frame with an adjustable internal cover that allows you to manually control airflow.
You'll typically find standard vents with equivalent area (EA) ratings ranging from 2,500mm² to 8,000mm². The EA rating tells you the effective size of the ventilation opening—the larger the number, the more air can flow through. For most habitable rooms like bedrooms and living areas, Building Regulations require a minimum of 8,000mm² EA, while kitchens and bathrooms with extract fans need at least 4,000mm² EA.
Standard vents work well in several scenarios:
The operating mechanism couldn't be simpler. A hit-and-miss cover slides or rotates to open and close the vent. When open, air flows freely through the slot. When closed, the cover blocks most airflow—though some minimal ventilation typically continues even in the "closed" position, which is actually intentional for maintaining baseline air quality.
One limitation worth noting: standard vents offer no noise reduction beyond what the basic construction provides. If you live near a busy road or under a flight path, every decibel of external noise will pass through an open vent essentially undiminished.
Imagine living near a railway line but still wanting fresh air without the rumble of passing trains. That's precisely the problem acoustic trickle vents solve. These specialised vented windows components look similar to standard vents from the outside but contain sophisticated internal engineering designed to reduce noise transmission while maintaining adequate airflow.
What makes acoustic vents different? According to Titon's comprehensive guide, the internal design incorporates several noise-attenuating features:
The acoustic performance is measured using the Dn,e,w rating—a single-number figure expressed in decibels that indicates overall sound reduction across various frequencies. Higher values mean better noise attenuation. Standard trickle vents might offer minimal reduction, while quality acoustic variants can achieve ratings of 35-49 dB, representing a significant difference in perceived noise levels.
When should you specify acoustic vents? Consider them essential for:
Local planning authorities often mandate acoustic ventilation in noise-sensitive locations. If you're developing property near significant noise sources, an acoustic survey will typically determine the required sound attenuation levels, which in turn dictates the vent specifications needed for compliance.
What if your trickle ventilation windows could think for themselves? Humidity-controlled vents—sometimes called hygro-controlled or demand-controlled ventilators—do exactly that. These smart devices automatically adjust their opening based on indoor humidity levels, providing ventilation precisely when your home needs it most.
The mechanism typically relies on a hygroscopic element, often made from polyamide, that expands or contracts in response to moisture in the air. When humidity rises—perhaps during cooking, showering, or simply from people breathing—the element expands and opens the vent wider. As humidity drops, the vent gradually closes to reduce unnecessary heat loss.
This responsive behaviour offers several advantages:
Humidity-controlled vents prove particularly valuable in properties prone to condensation problems, bathrooms without extract fans, bedrooms where occupants sleep with doors closed, and rental properties where tenants may neglect manual ventilation controls.
One consideration: these vents cost more than standard options and contain moving parts that could potentially fail over time. However, for properties where condensation is a persistent concern or where occupants are unlikely to actively manage their ventilation, the automatic operation often justifies the additional investment.
Choosing between vent types becomes easier when you can see their characteristics side by side. The following comparison highlights the key differences to help you select the right window vent for your specific situation:
| Type | Best For | Noise Reduction | Airflow Control | Typical Applications |
|---|---|---|---|---|
| Standard Trickle Vents | Budget-conscious projects in quiet areas | Minimal (no specific attenuation) | Manual open/close slider | Suburban homes, rural properties, rooms away from noise sources |
| Acoustic Trickle Vents | Properties near noise sources | Significant (35-49 dB rating typical) | Manual open/close with enhanced sealing | Urban developments, roadside properties, homes near railways or airports |
| Humidity-Controlled Vents | Energy efficiency and automatic moisture management | Minimal to moderate (depends on model) | Automatic based on humidity levels | Condensation-prone properties, rental homes, bedrooms, kitchens without extract fans |
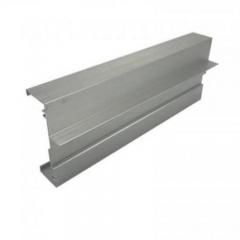
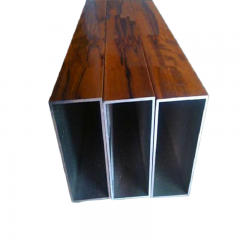
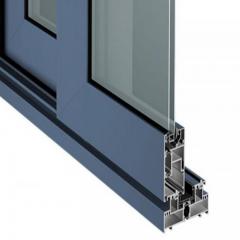
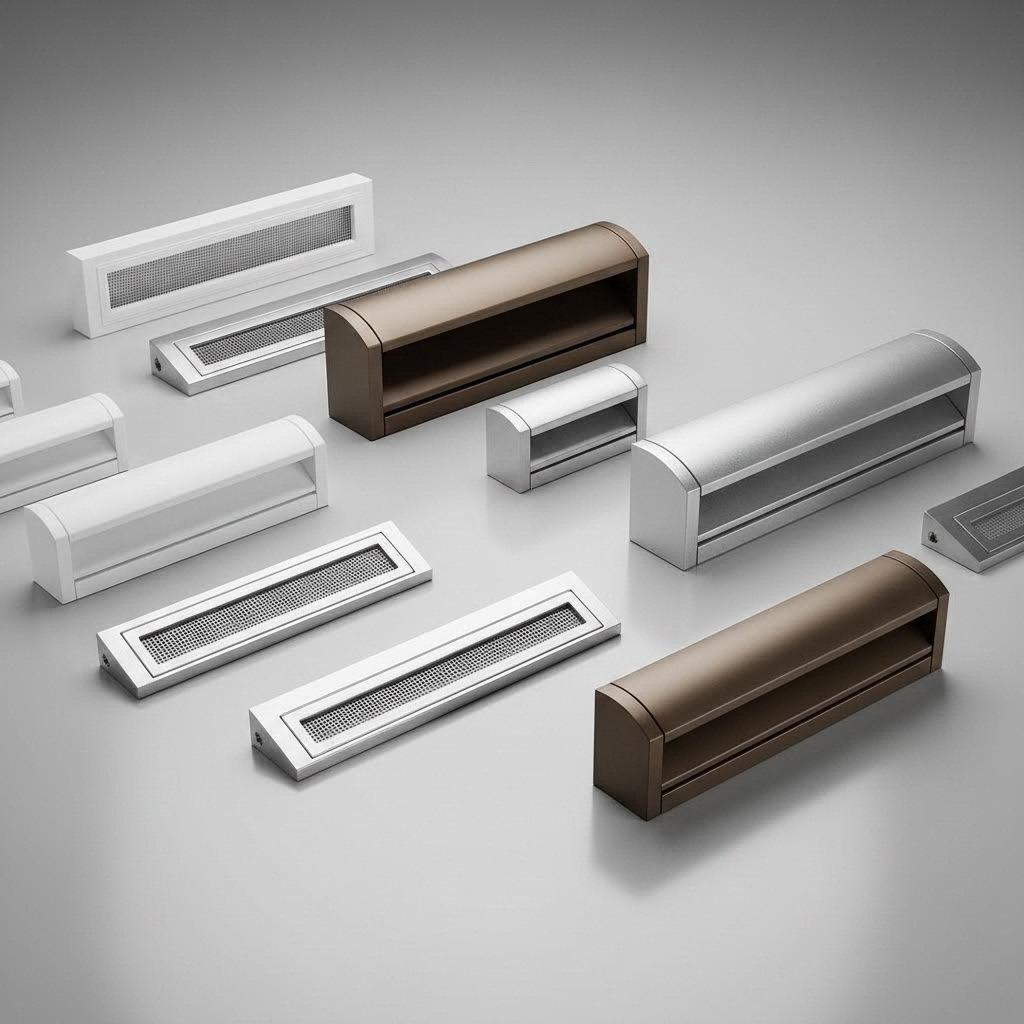
Beyond these three main categories, you'll encounter variations based on installation method—through-frame vents cut directly into the window frame, over-frame options mounted above existing frames for retrofit applications, and glazed-in designs incorporated into sealed glass units. Material choices also vary, with uPVC offering affordability and durability, aluminium providing superior longevity and a sleek appearance, and timber options suiting heritage properties where aesthetic consistency matters.
The right choice ultimately depends on your specific circumstances. A quiet suburban home might need nothing more than standard vents, while a city-centre apartment overlooking a busy junction would benefit enormously from acoustic versions. Properties plagued by condensation issues might find humidity-controlled vents transformative. Understanding these differences positions you to make an informed decision—and to ensure your trickle ventilation windows deliver exactly the performance your home requires.
Now that you understand the different types of trickle vents available, you're probably wondering: are they actually worth installing? It's a fair question. Every home improvement involves trade-offs, and window air vent systems are no exception. Let's cut through the marketing speak and examine both the genuine advantages and honest drawbacks of these ventilation solutions—so you can make a truly informed decision for your home.
Here's something many homeowners don't realize: the air inside your home is often more polluted than the air outside. According to the Federation of Master Builders, modern airtight homes can trap a cocktail of indoor pollutants that accumulate without adequate ventilation. Trickle vents address this problem by providing continuous background ventilation that dilutes and removes these contaminants.
What exactly are drip vents in windows helping to remove? Consider the invisible threats lurking in poorly ventilated spaces:
The connection between adequate ventilation and respiratory health is well-documented. Fresh air entering through a trickle vent window dilutes these pollutants while stale, contaminated air gradually escapes. For households with members who have asthma, allergies, or other respiratory conditions, this continuous air exchange can make a meaningful difference in daily comfort and long-term health outcomes.
Ever noticed water droplets forming on your windows on cold mornings? That condensation isn't just unsightly—it's a warning sign. When warm, moisture-laden indoor air meets cold window surfaces, water vapor condenses into liquid. Left unchecked, this moisture creates the perfect breeding ground for mold and mildew.
Air vents in double glazed windows tackle this problem at its source. By allowing a controlled flow of drier outdoor air to enter and pushing moisture-laden indoor air out, tickle vents (as they're sometimes colloquially called) help maintain humidity levels that discourage condensation. The result? Drier windows, healthier wall surfaces, and significantly reduced mold risk.
Why does this matter beyond aesthetics? Mold poses genuine health risks, particularly black mold species that can trigger respiratory problems, allergic reactions, and in severe cases, more serious health complications. It also damages window frames, paintwork, and surrounding walls—leading to costly repairs. According to ventilation specialists Venti Group, the connection between adequate ventilation and mold prevention is one of the primary reasons Building Regulations now emphasize trickle vent installation.
Properties most vulnerable to condensation issues include homes with high occupancy, kitchens and bathrooms where moisture is generated frequently, bedrooms where people sleep with doors closed, and older buildings upgraded with modern double glazing that suddenly become far more airtight than before.
No ventilation solution is perfect, and trickle vents come with legitimate limitations that deserve honest discussion. Understanding these drawbacks helps you set realistic expectations and choose appropriate solutions for your specific situation.
Let's address the energy efficiency concern directly, since it's often the primary objection raised. Yes, trickle vents allow some heat to escape. However, the ventilation benefits typically outweigh this relatively modest energy cost. Research consistently shows that controlled background ventilation is far more energy-efficient than the alternative—opening windows wide to clear stale air or deal with condensation problems that have already developed.
For those concerned about heat loss or noise, alternatives to standard trickle vents exist. Humidity-controlled versions only open fully when moisture levels rise, minimizing unnecessary heat loss during dry periods. Acoustic models significantly reduce noise transmission while maintaining airflow. These specialized options cost more initially but address the primary limitations that concern many homeowners.
Is there an alternative to trickle vents entirely? Mechanical ventilation with heat recovery (MVHR) systems offer a high-performance option that recovers up to 90% of heat that would otherwise be lost. However, these systems cost significantly more, require professional installation, and involve ongoing maintenance. For most standard residential applications, a well-chosen trickle vent window solution strikes the optimal balance between performance, cost, and practicality.
The honest assessment? Trickle vents aren't a magic solution to all ventilation challenges, but they deliver genuine benefits that outweigh their limitations for most homes. Understanding exactly what you're getting—and what trade-offs you're accepting—positions you to make the right choice for your specific circumstances. Next, we'll explore how to calculate exactly what size and quantity of vents your home actually needs.

Here's where many homeowners hit a wall. You understand what window trickle vents do, you know the different types available, and you're convinced they're worth installing. But how many do you actually need? What size should they be? And will they even fit your windows? These practical questions rarely get answered clearly—yet getting them wrong means either inadequate ventilation or wasted money on oversized solutions. Let's demystify the sizing calculations once and for all.
Before you can calculate anything, you need to understand the measurement that governs trickle vent sizing: equivalent area, abbreviated as EA. This figure, expressed in square millimeters (mm²), tells you how much air can actually flow through a ventilator—and it's not as straightforward as measuring the slot's physical dimensions.
Why does equivalent area differ from actual area? Modern trickle vent designs incorporate baffles, screens, and other internal components that restrict airflow. A vent with a 400mm x 12mm slot might have a physical opening of 4,800mm², but its equivalent area could be significantly lower because air doesn't flow unimpeded through those internal structures. According to Norrsken's guidance on Building Regulations Part F, equivalent area measures the aerodynamic performance of a ventilator—essentially, how much air can actually pass through given the limiting factors of its design.
When shopping for fitted vents, you'll encounter EA ratings clearly marked on product specifications. Common ratings include:
The regulations specify minimum total EA requirements per room, which you can achieve through a single large vent or multiple smaller ones. For instance, if a bedroom requires 8,000mm² EA, you could install one 8,000mm² vent or two 4,000mm² units—the choice often depends on your window sizes and aesthetic preferences.
So how do you determine exactly what your home needs? The calculation depends on room type, existing ventilation, and dwelling size. Building Regulations Part F provides clear guidance, though the specifics can seem complicated at first glance.
For dwellings using natural ventilation (the most common residential scenario), the minimum requirements break down as follows:
| Room Type | Minimum EA Required | Typical Vent Specification | Notes |
|---|---|---|---|
| Habitable rooms (bedrooms, living rooms) | 8,000mm² EA | 1 x 8,000mm² or 2 x 4,000mm² | Based on rooms up to 20m² floor area |
| Kitchen with extract fan | 4,000mm² EA | 1 x 4,000mm² or 2 x 2,500mm² | Extract fan must meet minimum rates |
| Bathroom with extract fan | 4,000mm² EA | 1 x 4,000mm² or 2 x 2,500mm² | Extract fan must meet minimum rates |
| Utility room | 4,000mm² EA | 1 x 4,000mm² | If fitted with extract ventilation |
| Open-plan kitchen/living area | 8,000mm² EA minimum | At least 3 ventilators recommended | Distributed across the space |
Beyond room type, the regulations also specify minimum numbers of ventilators for the entire dwelling. A one-bedroom property needs at least four background ventilators across its habitable rooms and kitchen. Properties with two or more bedrooms require a minimum of five ventilators. These requirements ensure adequate air distribution throughout the home rather than concentrating all ventilation in a single location.
What about larger rooms or higher occupancy? The base calculations assume standard room sizes and typical use patterns. For rooms significantly larger than 20m², or spaces regularly occupied by multiple people, you'll want to increase ventilation capacity proportionally. A master bedroom of 25m² might warrant 10,000mm² EA rather than the minimum 8,000mm². Similarly, a home office where you spend eight hours daily benefits from additional ventilation compared to a spare bedroom used occasionally.
Installing double glazed windows with ventilation in a basement window with vent presents unique considerations. Below-grade spaces often experience higher humidity and reduced natural air movement, making adequate ventilation even more critical. A basement bedroom might benefit from the higher end of ventilation capacity to compensate for these challenging conditions.
Knowing what EA you need is only half the battle. The other crucial factor? Whether your chosen vents will actually fit your window frames. Different frame materials and profiles present distinct challenges and opportunities.
uPVC window frames offer the most flexibility for ventilation windows installation. These hollow profiles typically provide ample space for routing a ventilation slot through the frame head. Standard trickle vents designed for uPVC are widely available in various sizes, and retrofitting is relatively straightforward since drilling through plastic is manageable with basic tools. Most manufacturers design their vents specifically for common uPVC profile dimensions, making compatibility straightforward.
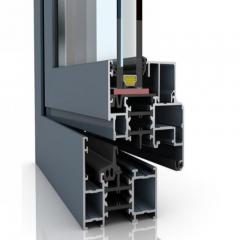
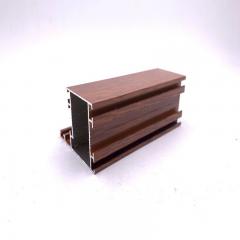
Aluminium frames present a different picture. While aluminium is easy to machine precisely, these frames tend to be slimmer than uPVC equivalents, potentially limiting the vent sizes that can be accommodated. Additionally, some aluminium profiles contain thermal breaks—insulating barriers that improve energy performance but complicate routing airflow through the frame. You'll need vents specifically designed for aluminium systems, often from the same manufacturer as your windows.
Timber frames require careful consideration of wood species, moisture management, and aesthetic integration. Cutting slots through solid timber is more labor-intensive than drilling uPVC, and the exposed cut surfaces need proper sealing to prevent moisture ingress and decay. Heritage properties often favor timber vents that match the window's original character, though these may cost more than standard options.
Before purchasing any window trickle vent, measure your available frame space carefully. Key dimensions to check include:
According to Handles and Hinges' measuring guide, the easiest location for retrofitting a trickle vent is in the head of an opening sash. This positioning allows drilling without disturbing wall finishes and makes it easier to count how many openers are available in each room for vent installation.
One final compatibility note: if your windows contain metal reinforcement within hollow uPVC profiles, retrofitting becomes more challenging. Galvanised steel inserts in particular can be difficult to drill through. Before committing to a DIY retrofit, check by removing a screw from an existing fitting—drill-point screws suggest metal reinforcement, while standard self-tappers indicate unreinforced plastic.
Armed with these sizing calculations and compatibility considerations, you're ready to specify exactly what your home needs. But understanding requirements is one thing—actually installing the vents is another matter entirely. The next section walks you through the practical steps of fitting trickle vents, whether you're tackling a retrofit project or ensuring new windows are correctly installed.

Ready to tackle this project yourself? Installing window air vents is surprisingly manageable for anyone comfortable with basic DIY tasks. Whether you're retrofitting vents to existing windows or checking that new installations are done correctly, the process follows a logical sequence that you can complete in under an hour per window. Let's walk through exactly what you'll need and how to get professional results without the professional price tag.
Before you start drilling, gather everything you'll need. There's nothing more frustrating than stopping mid-project because you're missing a crucial tool. Here's your complete checklist:
| Tools Required | Materials Needed |
|---|---|
| Cordless or corded drill | Trickle vent kit (internal and external components) |
| High-speed metal drill bits (for uPVC with reinforcement) | Screws (typically included with vent kit) |
| Wood drill bits (for timber frames) | Screw cover caps |
| Tape measure or ruler | Masking tape or duct tape |
| Pencil or marker | Silicone sealant (optional, for weatherproofing) |
| Screwdriver (Phillips and flat head) | Cleaning cloth |
| Spirit level | Fine sandpaper (for smoothing edges) |
| Safety glasses | Window sash (if working on opening windows) |
| Dust mask | |
| Step ladder (if needed for height) |
A quick note on drill bits: the correct bit makes all the difference. For uPVC frames, high-speed metal drill bits work best because some profiles contain galvanised steel reinforcement. For timber frames, standard wood bits will do the job—just ensure they're sharp to prevent splintering.
Adding a vent window solution to existing frames requires careful measurement and steady drilling. The process differs slightly depending on your frame material, but the fundamental approach remains consistent. Here's how to get it right first time.
Safety first: Before you begin, put on your safety glasses and dust mask. Drilling creates fine particles that you don't want in your eyes or lungs. If you're working above ground level, ensure your ladder is stable and positioned correctly—never overreach. For upper-floor windows, consider whether the job is safe to attempt from inside or whether you need scaffolding or professional assistance.
uPVC frames offer the most straightforward retrofit experience. The hollow profiles typically provide ample space for ventilation slots, and drilling through plastic is relatively forgiving. Follow these numbered steps for best results:
Timber frames demand more care during installation. Wood can split if drilled incorrectly, and exposed cut surfaces need protection from moisture. The basic sequence mirrors uPVC installation, but with these important differences:
Small vent windows in compact spaces—such as cloakrooms or utility areas—follow the same installation principles. The main difference is working in tighter confines, which may require shorter screwdrivers or right-angle drill attachments to access awkward positions.
If you're having new windows installed, vent window replacement is typically handled by your installer. However, it pays to know what to check. Many new windows arrive with pre-cut slots or factory-fitted vents, but that doesn't guarantee correct installation. Improper alignment during installation can lead to air leakage, reduced ventilation efficiency, and increased condensation risks, according to ventilation specialists Venti Group.
Here's what to verify when new windows with trickle vents are installed:
Even experienced installers occasionally make errors. Knowing what to look for helps you catch problems before they cause issues:
For optimal performance, always prioritise correct installation—ventilation is invisible until it fails.
Whether you're retrofitting vents yourself or supervising a professional installation, these guidelines ensure your window trickle vents perform exactly as intended. With properly installed vents in place, the next step is understanding how to maintain them for years of trouble-free operation.
You've installed your window trickle vents—but your job isn't quite finished. Like any component of your home, these ventilation systems need occasional attention to keep performing at their best. The good news? Maintenance is straightforward and takes just minutes. The bad news? Neglect them, and you'll wonder why your condensation problems have returned or why there's suddenly a draft whistling through your bedroom. Let's cover everything you need to know about keeping your vents in top condition and solving common problems when they arise.
Here's something many homeowners overlook: trickle vents gradually accumulate debris that reduces their effectiveness. Think about what's floating around in the air both inside and outside your home—dust particles, pollen, cooking residue, and even tiny insects looking for shelter. Over time, this material builds up inside the vent channels, restricting airflow and potentially blocking the mechanism entirely.
According to Anglian Building Products' maintenance guide, trickle vents are positioned at the top of windows and should be operated by sliding the vent to open or close. But if debris accumulates, that sliding mechanism becomes stiff—or stops working altogether. The result? You either can't open the vent when you need ventilation or can't close it when you want to reduce drafts.
How often should you clean your window vent covers? A good rule of thumb is to inspect and clean them at least twice yearly—once in spring and once in autumn. However, certain situations call for more frequent attention:
The cleaning process itself couldn't be simpler. Start by sliding the internal vent cover to the fully open position. Using a soft, damp cloth, wipe down both the internal and external components, removing visible dust and grime. For stubborn deposits, a mild solution of warm water and washing-up liquid works well—just avoid harsh chemicals or abrasive cleaners that could damage plastic components or finishes.
For deeper cleaning, a vacuum cleaner on a low suction setting removes dust from within the slot itself. Use the crevice tool attachment and work gently along the length of the vent. This approach is particularly effective for dislodging insect debris, spiderwebs, or accumulated lint that wiping alone won't shift. Once clean, slide the vent mechanism back and forth several times to ensure smooth operation, then wipe away any residual moisture with a dry cloth.
One often-overlooked maintenance task: check that drainage slots remain clear. Water can occasionally enter through trickle vents during heavy rain, and these drainage channels ensure it escapes rather than pooling inside your window frame. A quick visual inspection during your regular cleaning confirms these routes remain unobstructed.
Should you close your window vents in winter? It's tempting when temperatures plummet and heating bills climb. But according to Ideal Home's expert guidance, keeping vents closed actually contributes to the very problems—condensation, damp, and mold—that thrive during colder months.
Here's the logic: modern homes are designed to be airtight. Your trickle vents act as the "lungs" of the property, allowing it to breathe without the massive heat loss associated with opening a full window. Closing them might retain a tiny amount of heat, but it traps stale, moisture-heavy air inside. That trapped moisture then condenses on cold surfaces—particularly your windows—creating the perfect environment for mold growth.
Ideally, vents should remain open throughout the day and night because they provide gentle, continuous airflow without causing significant heat loss. However, effective seasonal management means adjusting how you use them rather than simply leaving them at one setting year-round:
During humid conditions (typically spring and autumn):
During extreme cold (winter months):
During warm weather (summer months):
The only times you might genuinely consider closing vents completely are during extreme weather events—severe storms with driving rain, or exceptionally high winds that create uncomfortable drafts despite partial closure. Otherwise, consistent ventilation serves your home's health far better than sealing it shut.
Even well-maintained trickle vents occasionally develop issues. Before calling a professional or considering replacement, work through this troubleshooting checklist. Many problems have simple solutions you can implement yourself.
Problem: Excessive noise coming through the vent
Problem: Uncomfortable drafts even with vent closed
Problem: Water entering through the vent
Problem: Vent mechanism stuck or stiff
Problem: Vent not providing adequate ventilation
Problem: Condensation persists despite open vents
If you've tried blocking a window vent temporarily using a trickle vent blanking plate to diagnose draft issues, remember to remove it once testing completes. Permanently blocking vents defeats their purpose and can lead to the air quality and moisture problems that proper ventilation prevents.
Easy glaze trickle vents and similar retrofit products typically require the same maintenance approach as factory-fitted options. The key difference is paying extra attention to the junction between retrofit components and existing frames, where gaps are more likely to develop over time.
Most troubleshooting solutions require nothing more than basic tools and a few minutes of your time. However, if problems persist after working through these steps—or if you suspect damage to the window frame itself—consulting a window specialist ensures issues are properly diagnosed and resolved. With your vents now clean, properly adjusted, and functioning smoothly, you're well-positioned to enjoy years of healthy indoor air quality.
You've learned how window trickle vents work, understood the regulations, and even explored maintenance requirements. But here's the question that matters most when you're ready to buy: how do you actually choose the right product? With dozens of options on the market—ranging from budget basics to premium solutions—making the wrong choice means either inadequate performance or money wasted on features you don't need. Let's cut through the confusion and identify exactly what separates a smart purchase from a regrettable one.
Walking into a building supply store or browsing online, you'll encounter trickle vents for windows that look remarkably similar on the surface. The differences that matter lie in the specifications—features that directly impact how well your ventilation performs day after day. Here's what deserves your attention before making any purchase.
Equivalent Area Rating: This is your starting point. As discussed earlier, the EA rating tells you how much air can actually flow through the vent. But here's what many buyers miss: you need to match the rating to your specific room requirements. A 4,000mm² vent might be perfect for a bathroom with an extract fan, but woefully inadequate for a master bedroom that requires 8,000mm² minimum. Always calculate your needs first, then shop accordingly.
Material Compatibility: This factor trips up more homeowners than almost any other. A vent designed for uPVC frames won't necessarily fit aluminium profiles—and forcing an incompatible product into your window frame risks damage to both the vent and the frame itself. Before purchasing, confirm that your chosen vent explicitly lists compatibility with your frame material.
Noise Reduction Properties: If you live anywhere near traffic, railways, or flight paths, standard vents may let in more noise than you're comfortable with. Acoustic models with internal baffles and sound-absorbing materials command higher prices but deliver genuine peace and quiet. Check the Dn,e,w rating—values above 35 dB indicate meaningful sound attenuation.
Ease of Operation: You'll be adjusting these vents regularly. A stiff slider or awkward mechanism quickly becomes an annoyance that leads to vents being left permanently closed—defeating their entire purpose. Look for smooth-operating controls that move freely and lock securely in position.
Weather Resistance: External canopies face everything British weather can throw at them. Quality vents feature UV-resistant materials that won't yellow or become brittle over time, along with robust construction that withstands wind-driven rain without allowing water ingress.
Why does choosing vents designed for your specific window frame material matter so much? Beyond the obvious fitting issues, material-specific designs account for differences in thermal movement, fixing requirements, and profile dimensions. An air ventilation window solution engineered for your frame type installs more easily, seals more effectively, and performs more reliably over its entire lifespan.
Not all trickle vents are built equal—and the differences become apparent over time. Cheap products might look identical to premium options when new, but within a few years, the gap in quality becomes impossible to ignore. Understanding what distinguishes durable products helps you avoid false economy.
Robust Construction: Quality window vents house feature thick-walled components that resist cracking, warping, and breakage. Press on the housing—it should feel solid, not flimsy. Hinges and sliding mechanisms should operate smoothly without excessive play or wobble.
Weather Resistance: Premium vents use materials specifically formulated to withstand prolonged UV exposure without degradation. They incorporate effective sealing systems—high-quality gaskets that maintain their flexibility over years of use rather than hardening and cracking. According to Shengxin Aluminium's homeowner guide, corrosion-resistant materials prove especially important in coastal areas or industrial environments where salt or pollutants accelerate deterioration.
Smooth Operation: A quality vent opens, closes, and adjusts effortlessly from day one—and maintains that smooth action for years. The mechanism should require minimal force to operate while staying securely in your chosen position without gradually drifting open or closed.
Long-Term Reliability: Look for products backed by meaningful warranties from established manufacturers. Certifications matter too—ISO 9001:2015 indicates quality management systems are in place, while RoHS compliance confirms the product meets environmental safety standards.
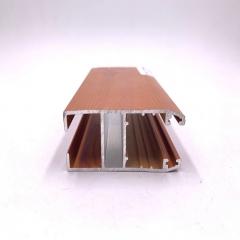
For homeowners seeking durable window trickle vents suitable for uPVC, aluminium, and timber windows, Shengxin Aluminium offers a range of versatile options designed to reduce condensation while maintaining energy efficiency. Their low-profile designs work well for both new builds and retrofit applications, with various sizes and finishes available. The manual slider provides simple airflow control, while robust aluminium construction ensures years of corrosion-resistant, maintenance-free service—backed by ISO 9001:2015 and RoHS certifications.
When evaluating any windows vents product, use this comprehensive checklist to ensure you're making an informed decision:
You've selected the perfect trickle vents—now comes the question of who should install them. The DIY versus professional debate has valid points on both sides, and the right choice depends on your specific circumstances.
When DIY Installation Makes Sense:
Tackling the installation yourself offers obvious cost savings—professional fitting typically adds £30-50 per window on top of product costs. If you're comfortable with basic tools and have successfully completed similar home improvement projects, retrofitting trickle vents to uPVC frames is genuinely manageable. The process, as detailed in the previous chapter, requires nothing more specialised than a drill, appropriate bits, and careful measurement.
DIY installation works particularly well when you're dealing with standard uPVC frames without metal reinforcement, you have experience with drilling and basic joinery, the windows are easily accessible without scaffolding, and you're installing just a few vents rather than a whole-house project. The satisfaction of completing the job yourself—plus the money saved—makes this a rewarding weekend project for capable DIYers.
When Professional Installation Is Worth the Investment:
Certain situations warrant calling in the experts. Professional installers bring experience that prevents costly mistakes, and they take responsibility if anything goes wrong. According to Titon's ventilation guidance, proper installation is critical for achieving the acoustic performance specified by manufacturers—something that requires precision that comes from fitting hundreds of units.
Consider professional installation when you're working with timber frames where incorrect drilling risks splitting, your windows contain steel reinforcement that complicates drilling, upper-floor installations require working at height, you need guaranteed compliance for building control sign-off, or acoustic performance is critical and incorrect installation could compromise sound attenuation.
Professional fitting also makes sense for larger projects. Installing vents throughout an entire property takes time that many homeowners simply don't have—and professionals complete the work far more quickly due to their familiarity with the process.
Finding a Competent Installer:
If you opt for professional installation, choose carefully. Window companies operating under FENSA or CERTASS Competent Person Schemes can self-certify compliance with Building Regulations—avoiding the need for separate building control inspections. Ask potential installers about their experience specifically with trickle vent fitting, request references from similar projects, and confirm they'll provide documentation proving compliance.
Whether you're fitting vents yourself or supervising professional installation, the goal remains the same: properly functioning ventilation that keeps your home healthy and comfortable for years to come. The time you invest in choosing quality products and ensuring correct installation pays dividends in reliable performance and peace of mind.
Yes, trickle vents offer significant benefits for modern homes. They improve indoor air quality by allowing continuous fresh air circulation, reduce condensation and mold growth on windows, and help manage humidity levels without requiring you to leave windows open. For energy-efficient double-glazed properties, trickle vents are particularly valuable because they prevent the health issues associated with overly airtight buildings while maintaining security. UK Building Regulations now require them in most replacement window installations for these reasons.
Yes, retrofitting trickle vents to existing windows is entirely possible provided your window frame head has sufficient width to accommodate them. The process involves carefully measuring the frame, drilling holes through the profile, and securing both internal and external vent components. uPVC frames are easiest to retrofit, while timber frames require additional care to prevent splitting and proper sealing of exposed wood. Shengxin Aluminium offers versatile trickle vents compatible with uPVC, aluminium, and timber windows for both new builds and retrofit applications.
Ideally, yes. Trickle vents should remain open throughout day and night because they provide gentle, continuous airflow without causing significant heat loss. Closing them during winter traps moisture-laden air inside, leading to condensation and mold growth—the exact problems they're designed to prevent. The heat loss from open trickle vents is marginal compared to opening full windows, and the ventilation benefits far outweigh this small energy cost. Only consider closing them temporarily during severe storms with driving rain.
Since June 2022, UK Building Regulations Approved Document F requires that replacement windows must provide equivalent or improved ventilation compared to what existed previously. For new builds and extensions, habitable rooms need minimum 8,000mm² equivalent area of background ventilation, while kitchens and bathrooms with extract fans require 4,000mm² EA. Exemptions exist for listed buildings, conservation areas, and properties with mechanical ventilation systems, but most standard window replacements now legally require trickle vents to be installed.
Standard trickle vents provide basic airflow through a simple slot with a manual slider control, offering no specific noise reduction. Acoustic trickle vents incorporate internal baffles, sound-absorbing materials, and complex air pathways that significantly reduce noise transmission while maintaining adequate ventilation. Acoustic models typically achieve 35-49 dB sound attenuation ratings, making them essential for properties near busy roads, railways, or flight paths where external noise exceeds comfortable levels.


 Інтернет-сервіс
 0086 136 3563 2360
 sales@sxalu.com
 +86 136 3563 2360
 Українська
 English
 français
 Deutsch
 русский
 español
 português
 العربية
 ไทย
ไทย Việt
Việt