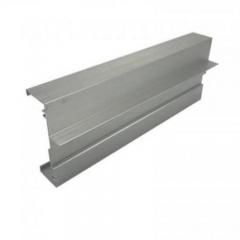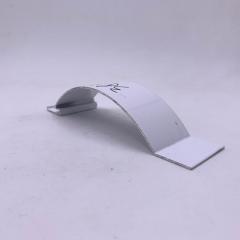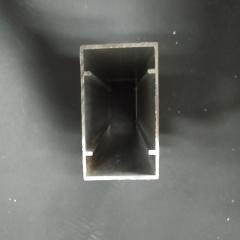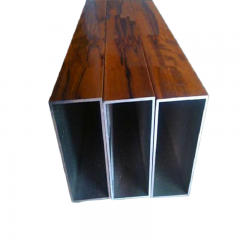
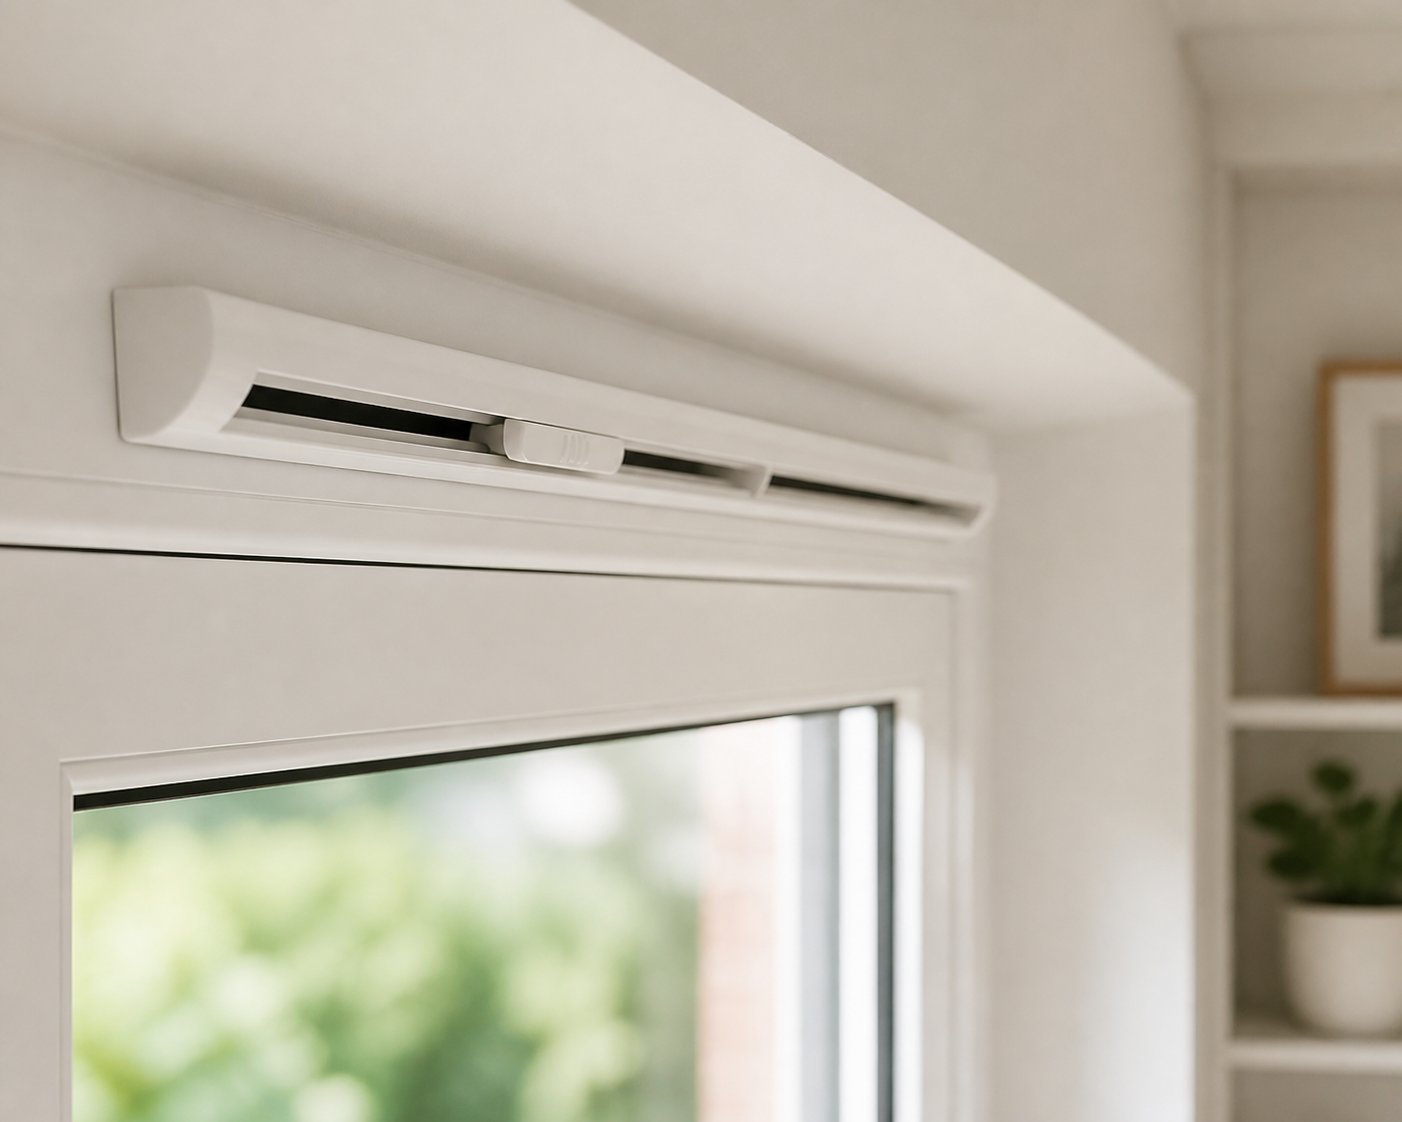
Ever noticed a narrow slot running along the top of your window frame? That small, easy-to-overlook feature is doing more for your home than you might think. uPVC window trickle vents are small ventilation units fitted into the head of a window frame, designed to allow a continuous, controlled trickle of fresh air into your home — even when the window is fully closed and locked. They quietly replace stale indoor air with filtered outdoor air, helping to manage moisture, reduce condensation, and keep your living spaces healthier.
A trickle vent is a small, manually controllable slot ventilator fitted into a window frame that provides constant low-level background airflow without requiring the window to be opened.
Since June 2022, these vents have been a legal requirement in most replacement window installations across England under UK Building Regulations, specifically Approved Document F. Wales suit in November of the same year. Their purpose is simple: modern homes are built tight to save energy, but that airtightness traps moisture and pollutants indoors. Trickle vents solve this by creating a deliberate, permanent airflow path that works around the clock — no open windows needed.
If you walk up to your uPVC window and look at the very top of the frame, you'll likely spot a long, slim unit stretching across it. This is your trickle vent, and it actually consists of two separate parts working together:
Between these two components sits a routed slot cut into the window frame itself — the actual airway. Fresh air enters through the external shield, passes through this channel, and exits through the internal canopy into your room. The beauty of this system is its simplicity: no motors, no electricity, and no moving parts beyond the manual slider. Air movement is driven entirely by natural pressure differences between the inside and outside of your home.
Search for information on these vents and you'll quickly run into a tangle of different names. "Drip vents," "slot vents," "background ventilators," and "trickle vents" all describe the same component. The confusion is understandable — everyday language, trade jargon, and regulatory terminology have each developed their own preferred term for identical hardware.
Here's the distinction that actually matters: "background ventilator" is the formal term used in Approved Document F, the section of UK Building Regulations covering ventilation. When you're reading official guidance, ordering replacement parts from a manufacturer, or discussing specifications with an installer, using the term "background ventilator" ensures everyone is on the same page. In casual conversation, though, "trickle vent" remains the most widely recognized name — and the one most likely to lead you to the right product when shopping online.
Understanding this naming overlap becomes especially important when your home's ventilation needs go beyond what a simple slot in the frame can deliver — a scenario that plays out more often than you'd expect in today's energy-efficient homes.

Imagine sealing a jar full of warm, damp air and leaving it overnight. By morning, water droplets cover the inside of the glass. That is essentially what happens inside a modern home without adequate ventilation — and it explains why trickle vents are needed in modern homes more than ever before.
Older timber windows were famously draughty. Gaps around the frames, worn-out putty, and loose-fitting sashes allowed air to leak freely in and out. That uncontrolled airflow was uncomfortable and wasteful, but it did one thing well: it let moisture escape.
Modern uPVC windows changed the equation entirely. With multi-chambered profiles, tight gasket seals, and thermal transmittance values dropping below 0.9 W/(m²K), today's windows create an almost hermetic seal. Pair that with cavity wall insulation, draught-proofed doors, and sealed loft spaces, and you have a building envelope that traps warmth brilliantly — but also traps everything else. As home improvement expert Mike Holmes puts it, everyday activities like cooking, showering, and even breathing produce significant amounts of moisture. In an airtight home without a deliberate ventilation strategy, that moisture has nowhere to go.
A family of four generates roughly 10 to 15 liters of moisture per day through normal activities — boiling a kettle, taking a shower, drying laundry indoors, even exhaling while asleep. Without an escape route, that moisture accumulates in the indoor air, steadily raising humidity levels until problems appear.
The science behind condensation is straightforward. Warm air holds more moisture than cold air. When warm, humid indoor air comes into contact with a cold surface — a windowpane, an external wall, or even the corner of a ceiling — it cools rapidly and releases its moisture as water droplets. You'll notice this most on winter mornings, when bedroom windows stream with condensation after a night of breathing in a sealed room.
Left unchecked, that persistent moisture creates the perfect breeding ground for black mould, which can damage plaster, stain window frames, ruin soft furnishings, and trigger respiratory problems. Do trickle vents help with condensation? Yes — by continuously exchanging a small volume of indoor air for drier outdoor air, they gradually lower the relative humidity inside your rooms. This steady, low-level air exchange keeps moisture below the threshold where condensation forms, protecting both your health and the fabric of your home.
It is worth emphasizing that trickle vents work as one part of a whole-house ventilation strategy. They supply fresh air into habitable rooms, but that air still needs an exit path — typically through extract fans in kitchens and bathrooms or through natural ventilation ducts. When both the supply and extract sides work together, humidity stays under control.
A question that comes up constantly: "Why not just open a window?" It is a fair point, and in mild weather, cracking a window certainly helps. But as a long-term ventilation strategy, trickle vents vs opening a window is not a close contest. Here is why:
As ventilation specialists at BWS note, trickle vents are not installed to save on energy bills — they exist to eliminate health and building problems caused by trapped moisture and stale air. The energy trade-off is minimal, but the protection they offer against condensation, damp, and mould is substantial.
Of course, knowing that background ventilation matters is only half the picture. The other half involves understanding when these vents are legally required — and how regulations determine the size and airflow rating your windows actually need.
Are trickle vents a legal requirement in the UK? The short answer is yes — in most replacement and new-build window installations across England, they are. But the detail behind that "yes" matters enormously, because the rules determine not just whether you need a vent, but how much airflow it must deliver and in which rooms. Getting this wrong can invalidate your installation certificate, leave you exposed to enforcement action, and even affect a future property sale.
Since 15 June 2022, Approved Document F, Volume 1 — the section of England's Building Regulations covering ventilation in dwellings — has required trickle ventilators in virtually all replacement windows fitted in habitable rooms. This closed a long-standing loophole that had previously allowed many installers to skip vents altogether.
The core principle is straightforward: replacing a window must not make the ventilation in your home worse than it was before the work was carried out. In practice, this means two things. First, if the existing window already had a trickle vent, the replacement must include one with at least the same equivalent airflow performance. Second, if the original window had no vent at all, the installer should still fit background ventilation to meet the minimum airflow values set out in Approved Document F — unless an alternative ventilation strategy, such as a whole-house mechanical ventilation with heat recovery (MVHR) system, is already in place and documented.
This requirement applies equally to new-build properties, where the architect's ventilation design will specify background ventilators as part of the overall strategy from the outset. For homeowners commissioning replacement windows on existing homes, the obligation falls squarely on the installer. LABC guidance makes clear that a homeowner cannot sign a disclaimer opting out of trickle vents — the installer carries the compliance duty, and Building Regulations must be met in full. Purchasing an indemnity policy is not an acceptable workaround either.
Approved Document F sets out the complete ventilation strategy for dwellings, and uPVC window trickle vents fulfil the "background ventilation" element within that strategy. Think of it as a layered system: extract fans handle moisture-heavy zones like kitchens and bathrooms, purge ventilation (opening a window wide) deals with occasional high-pollution events, and background ventilators provide the quiet, constant baseline airflow that keeps everything ticking over between those moments.
The regulations require background ventilators in each habitable room — living rooms, bedrooms, studies, and dining rooms — as well as in kitchens, bathrooms, utility rooms, and sanitary accommodation. The key difference lies in how each room type is treated. Habitable rooms rely primarily on background ventilators for fresh air supply. Wet rooms — kitchens, bathrooms, and utilities — need both a background ventilator and mechanical extract ventilation working together. The vent supplies make-up air, while the extract fan removes moisture-laden air at the source.
A point that catches many homeowners off guard: a night-latch position, where the window locks slightly ajar, is not an acceptable substitute for a trickle vent. The UK Government's own FAQ on Approved Document F confirms that windows locked on a night-latch do not provide sufficiently secure background ventilation. Similarly, wall-mounted ventilators can satisfy the requirement — but only if they deliver the minimum equivalent airflow area specified for that room type. If your room already has a compliant wall vent, no additional window vent is needed when replacing the glazing.
For properties in noisy environments, the official guidance recommends fitting noise-attenuating background ventilators rather than omitting vents entirely. Closing a standard vent to block noise also blocks ventilation, which pushes the home back into the condensation-and-mould cycle the regulations are designed to prevent.
Here is where the technical side gets genuinely useful — and where most homeowner guides fall silent. Every trickle vent carries an Equivalent Airflow (EA) rating, measured in square millimeters (mm²). This number tells you the effective open area available for air to pass through the vent. Crucially, the EA rating is not the same as the physical size of the slot. Internal baffles, rain deflectors, and controllable flaps all create resistance, so a vent with a 3,000 mm² physical aperture might have an EA of only 2,500 mm². Always reference the EA figure from the manufacturer's specification, not the visible slot dimensions.
Different rooms demand different minimum EA values, reflecting how much moisture each space typically generates. A bedroom produces far less humidity than a kitchen where pans boil and a dishwasher steams. The table below provides a general guide to typical minimum EA requirements by room type. These figures align with the framework in Approved Document F, but you should always verify current values against the latest edition before specifying or ordering vents.
| Room Type | Minimum EA Required | Additional Requirements |
|---|---|---|
| Living room | 8,000 mm² | Background ventilation only |
| Main bedroom | 8,000 mm² | Background ventilation only |
| Other bedrooms | 8,000 mm² | Background ventilation only |
| Study / home office | 8,000 mm² | Background ventilation only |
| Dining room | 8,000 mm² | Background ventilation only |
| Kitchen | 4,000 mm² | Plus mechanical extract fan |
| Bathroom | 4,000 mm² | Plus mechanical extract fan |
| Utility room | 4,000 mm² | Plus mechanical extract fan |
| WC / cloakroom | 4,000 mm² | Plus intermittent extract or humidistat |
Notice the pattern: habitable rooms need 8,000 mm² of background ventilation, while wet rooms need 4,000 mm² paired with mechanical extraction. The lower vent requirement in wet rooms reflects the fact that the extract fan actively draws air through the vent, making each square millimeter of opening work harder. In a bedroom with no extract fan, the vent alone must handle the full ventilation load — hence the higher threshold.
What does this look like in practice? A typical slot vent offers between 2,500 mm² and 5,500 mm² of equivalent area, depending on its length and design. So a bedroom might need two or three individual vents distributed across its windows to reach the 8,000 mm² total, while a bathroom could meet its 4,000 mm² target with a single vent. The EA values are cumulative within a room — you can split the requirement across multiple windows. A bay window with three separate panes, for example, could carry one vent per pane, with the combined EA satisfying the room's total.
One detail that often surprises installers: acoustic trickle vents, which incorporate sound-attenuating baffles, typically deliver a lower EA per unit than standard slot vents of the same physical size. The baffles that muffle noise also restrict airflow. If you're specifying acoustic vents in a habitable room, you may need an extra unit to reach the 8,000 mm² minimum — a trade-off worth understanding before you place an order.
With the regulatory picture clear and the numbers in hand, the natural next question becomes practical: what types of trickle vents are actually available, and how do their designs, airflow capacities, and noise-reduction capabilities compare?
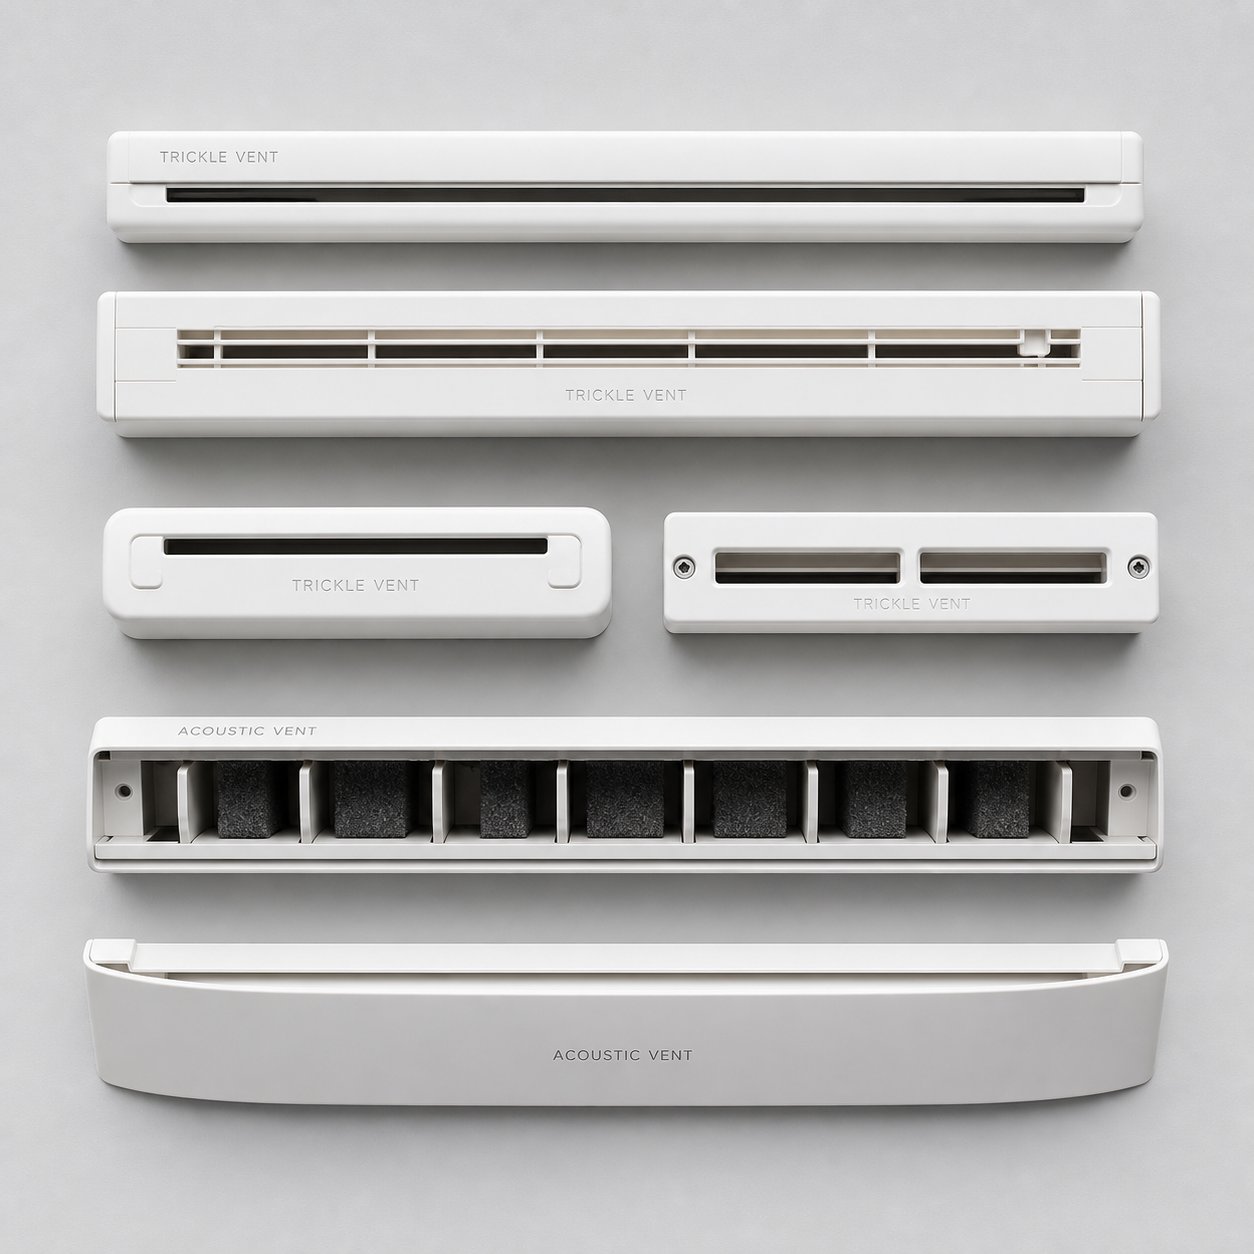
Not every window faces the same challenges. A bedroom on a quiet cul-de-sac and a living room overlooking a dual carriageway both need background ventilation, but the ideal vent for each is very different. Understanding the main types of trickle vents for uPVC windows helps you match the right product to your specific situation — whether that priority is cost, noise control, aesthetics, or retrofit simplicity.
The standard slot vent — sometimes called an over-frame vent — is the workhorse you'll find on the vast majority of residential uPVC windows. It consists of two parts: an internal controllable canopy with a manual slider and an external rain deflector, both fitted into a horizontal slot routed into the top rail of the window frame.
Installation is straightforward. The slot is cut into the frame head, the external canopy clips or screws into place from the outside, and the internal controller attaches on the room side. You open and close it by sliding a small lever — no electronics, no batteries, no fuss.
These vents typically deliver an Equivalent Airflow area between 2,500 mm² and 5,000 mm² per unit, depending on length and design. That range comfortably covers most room-by-room requirements when you combine multiple vents across a room's windows. They are also the most affordable option, making them the default choice for standard residential projects where external noise is not a significant concern.
If you live near a busy road, railway line, airport flight path, or commercial district, standard slot vents will let airflow in — and a noticeable amount of noise along with it. This is where acoustic trickle vents for noise reduction become essential.
From the outside, an acoustic vent looks similar to a standard one. Inside, however, the design is far more complex. Sound-absorbing foam linings, internal baffles, and multi-chamber structures force sound waves to travel a longer, more tortuous path before reaching your room. Each turn and absorption layer strips energy from the sound wave, reducing the noise that ultimately reaches your ears.
Acoustic performance is measured using the Dn,e,w rating — the element-normalized weighted sound level difference, expressed in decibels. A higher number means better noise attenuation. Standard slot vents might achieve a Dn,e,w around 30-34 dB, while a purpose-built acoustic vent can reach 42 dB or higher, making a genuinely perceptible difference in how quiet your room feels. For anyone searching for the best trickle vent for a noisy road, this metric is the single most important number on the specification sheet.
There is a trade-off to keep in mind. The same internal baffles that block sound also restrict airflow. An acoustic vent of the same physical length as a standard vent will typically deliver a lower EA rating. You may need an additional unit per room to hit the minimum background ventilation requirement — a point worth factoring into both your budget and your window layout.
What happens when there is not enough frame depth to rout a slot, or when you want the cleanest possible sightline? Two alternative designs address these scenarios.
Glazed-in trickle vents sit within the sealed glass unit itself, typically at the top edge of the pane. Because they are integrated into the glazing rather than the frame, they avoid any cutting or routing of the uPVC profile. This makes them a reliable alternative when frame space is limited — for instance, when internal steel reinforcement leaves insufficient room for a standard slot. The downside? Glazed-in vents generally need to be specified at the point of manufacture, so they work best for new or replacement windows rather than as a true aftermarket retrofit to existing glazing.
Over-frame canopy vents mount on top of the window frame rather than inside it. They sit proud of the profile and use the gap between the frame head and the structural lintel above. This approach works well where the window is recessed into a reveal with a generous lintel gap, but the visible canopy can look bulkier than a flush-fitted slot vent — a cosmetic consideration some homeowners find hard to accept.
When weighing glazed-in trickle vents vs slot vents, the decision usually comes down to whether you are ordering new windows or modifying existing ones. For new installations where aesthetics matter, glazed-in vents offer a sleeker finish. For retrofit projects on existing uPVC frames, the standard slot vent remains the most practical and cost-effective route.
The table below compares all four vent types across the criteria that matter most when choosing:
| Vent Type | Typical EA Range | Noise Reduction (Dn,e,w) | Ease of Retrofit | Relative Cost |
|---|---|---|---|---|
| Standard slot vent | 2,500 – 5,000 mm² | 30 – 34 dB | High — fits most uPVC frames with a routed slot | Low |
| Acoustic trickle vent | 2,500 – 5,000 mm² | 38 – 44+ dB | High — same slot fitting, but may need extra units for EA | Medium – High |
| Glazed-in vent | 2,500 – 4,000 mm² | 30 – 36 dB | Low — typically requires new or replacement glazing unit | Medium |
| Over-frame canopy vent | 2,500 – 5,000 mm² | 30 – 35 dB | Medium — needs adequate lintel gap above the frame | Low – Medium |
Keep in mind that these figures represent general ranges. Actual performance varies by manufacturer, vent length, and installation quality. Always check the specific EA and acoustic ratings on the product data sheet before committing to a purchase.
Choosing the right type is only half the job. The other half — and the part most guides skip entirely — is measuring your existing window accurately so you order a vent that actually fits.
Getting the right vent starts with getting the right numbers. A trickle vent that is 10 mm too long will not fit the slot. One that is too short may leave the routed channel partially exposed, letting in rain and draughts without the canopy to deflect them. Yet surprisingly few guides walk you through the actual measuring process. Here is exactly how to find the right size trickle vent for your uPVC windows — whether you are replacing a worn-out unit or sizing up a window that has never had one.
A like-for-like swap is the simplest scenario. Your window already has a routed slot and hardware in place — you just need to match the dimensions precisely. Start by carefully removing the existing vent. Most internal canopies are held by two small screws, often hidden beneath snap-on cover caps. Pop the caps off with a flat-head screwdriver, remove the screws, and lift the canopy away from the frame.
With the old vent removed, you can see the routed slot in the frame head. This is the measurement that matters most. Grab a tape measure and record three key dimensions:
1. Slot length. Measure the full length of the routed channel from end to end. Most uPVC window trickle vents fit into standardized slot lengths — common sizes include approximately 260 mm, 285 mm, 335 mm, 380 mm, and 530 mm. Your replacement vent must cover the entire slot, so it needs to be at least as long as the channel.
2. Slot width. Measure the width of the slot — this is the narrow dimension across the channel. Most routed slots are either 13 mm or 16 mm wide. This width directly affects the EA rating of the replacement vent, because the same canopy unit delivers different airflow values depending on whether it sits over a 13 mm or 16 mm opening. Product datasheets typically list EA figures for both slot widths, so knowing yours avoids guesswork.
3. Fixing centres. Measure the distance between the centre points of the two screw holes in the frame. This measurement — often overlooked — determines whether a new vent's screw positions will line up with the existing holes. If the fixing centres do not match exactly, a slightly wider replacement can sometimes work by drilling new pilot holes, provided the vent still covers the full slot and sits comfortably on the frame.
While you have the vent in hand, also note the overall canopy length, height, and how far it projects from the frame surface (its closed depth). These figures help you compare directly against a sizing table when shopping for replacements. One practical tip that saves time and frustration: take a clear photo of both the removed vent and the exposed slot, with a ruler or tape measure visible in the frame. When you contact a supplier, that image communicates more than any verbal description ever could.
Finally, check whether your vent is surface-mounted — sitting flat against the face of the frame — or recessed, with lugs that drop into the slot for alignment. Some vents have small plastic tabs on the back that slot into the channel. If these tabs are preventing a new vent from sitting flush, they can usually be trimmed with a craft knife, but knowing the mounting style upfront helps you select a compatible product from the start.
On virtually every uPVC window, the routed slot sits in the head — the horizontal top rail of the frame. This placement is by design: warm air rises, so positioning the vent at the highest point encourages a gentle convective circulation where fresh air enters at the top, mixes with the warmer room air, and displaces stale, moisture-laden air downward toward extract points.
Here is where things can get slightly tricky. Different uPVC profile systems — the branded extrusion designs from various manufacturers — may route their slots at slightly different positions within the frame head. One system might place the slot centrally, another might offset it toward the external face. The slot depth can also vary. These differences are usually small, but they matter enough that a vent designed for one profile system may not seat perfectly in another.
If you are unsure which profile system your windows use, look for a brand name or code stamped into the frame — it is often visible on the edge of the sash or at the bottom of the frame. Failing that, your original window installation paperwork should list the manufacturer. Armed with this information, you can check with the vent supplier to confirm compatibility before ordering. As Handle Store's sizing guide notes, starting with the fixing centres measurement and then cross-referencing the overall length and slot coverage is the most reliable way to narrow down the correct replacement model.
One additional consideration many homeowners miss: uPVC frames frequently contain internal steel or aluminium reinforcement to add rigidity. This reinforcement runs inside the hollow chambers of the profile and is invisible from the outside. It rarely interferes with an existing routed slot — that slot was cut during manufacture, deliberately avoiding the reinforcement. But it becomes a critical factor if you are considering adding a vent to a frame that was not originally designed for one.
Plenty of uPVC windows installed before the 2022 regulation changes have no trickle vents at all. If your windows fall into this category and you want to improve ventilation without replacing the entire unit, retrofit installation is possible on most frames — but it demands more skill and confidence than a simple like-for-like swap.
Retrofitting means routing or drilling a new slot into the frame head where none currently exists. This requires a steady hand, the right cutting tool, and a clear understanding of where the internal reinforcement sits within the profile. Cutting through steel reinforcement by accident will damage your drill bit, potentially crack the uPVC, and create a slot that is neither clean nor weatherproof. Many double-glazing repair specialists offer this as a service, and for anyone who is not comfortable working with power tools on an irreversible cut, professional installation is the safer route.
Before ordering any vent — replacement or retrofit — make sure you have recorded every measurement you will need. Missing even one dimension can mean a wasted purchase and a second trip to the supplier. Use this checklist as your pre-order reference:
With these numbers in hand and a clear photo for reference, you are ready to order with confidence. The measurements tell you what will fit — but the actual fitting process has its own set of steps, tools, and potential pitfalls that are worth walking through before you pick up a drill.
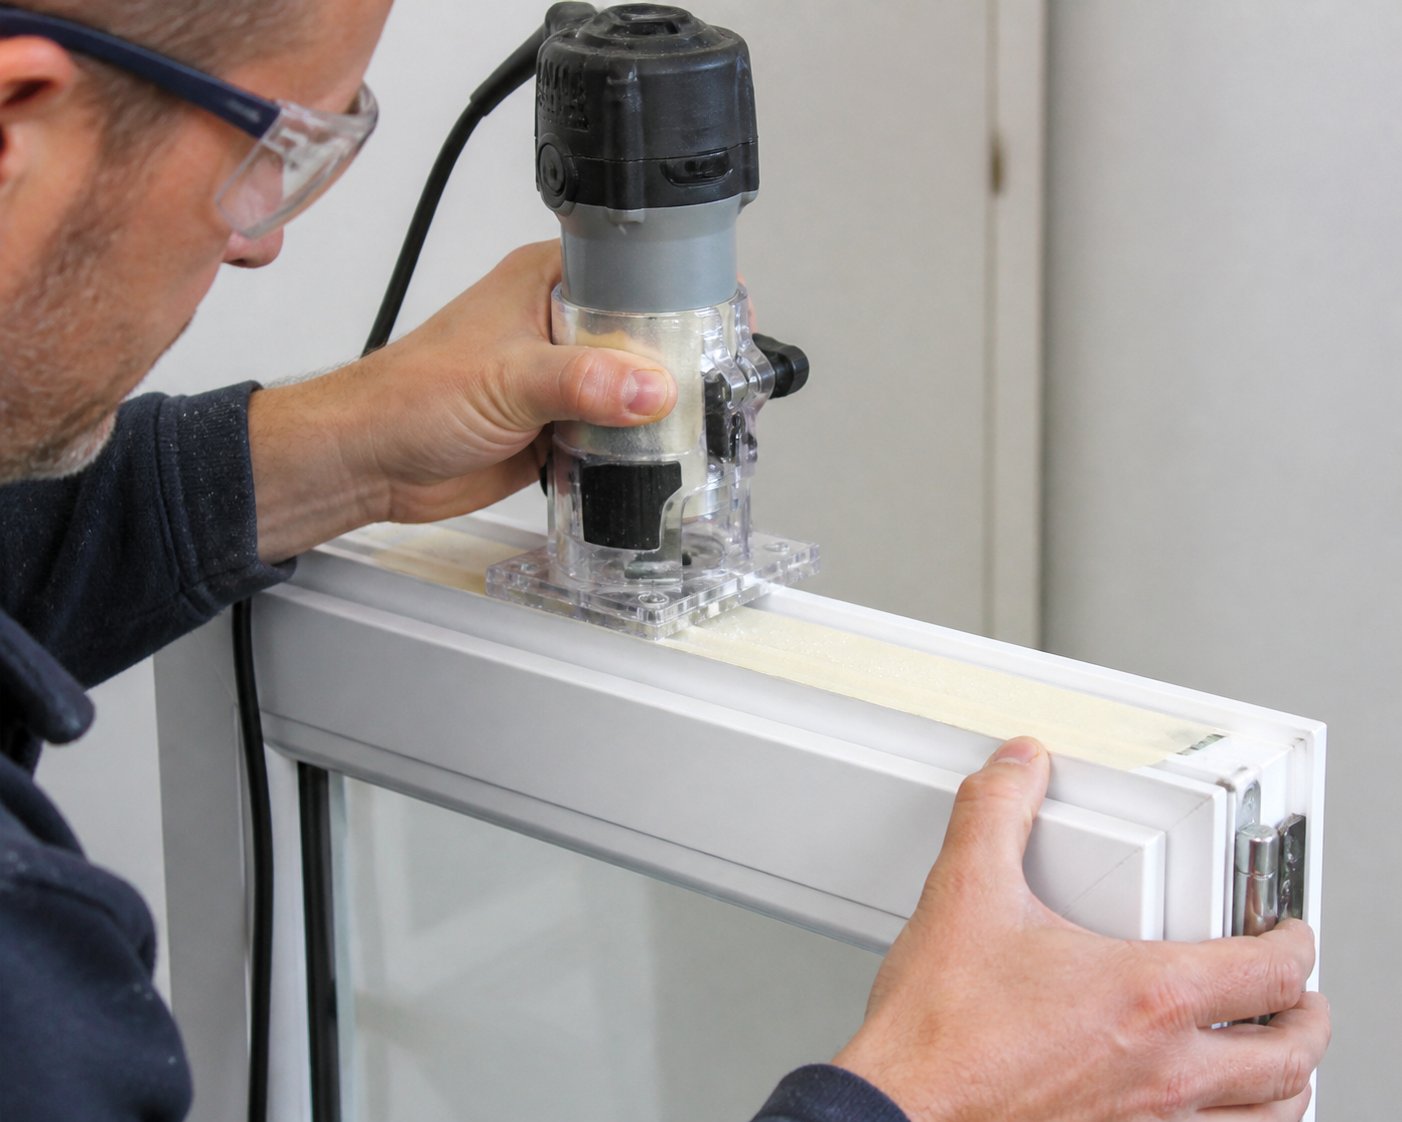
You have your measurements, your vent is sitting on the worktop, and the tape measure confirms everything lines up. The only thing left is the part most guides gloss over entirely — actually cutting into the frame and fitting the hardware. If you want to know how to fit trickle vents to uPVC windows yourself, this section gives you the full, honest walkthrough. No steps skipped, no assumptions about what you already know.
A quick reality check before you begin: routing a slot into a uPVC window frame is a permanent modification. There is no "undo" button. If the cut goes wrong — too deep, too wide, in the wrong position — you are looking at a damaged frame that may need professional repair or even replacement. That is not meant to scare you off. Thousands of homeowners complete this job successfully every year. It simply means the preparation stage deserves as much attention as the cutting itself.
Stopping halfway through an installation to rummage for a missing drill bit is the fastest way to introduce mistakes. Lay everything out within arm's reach before you make a single mark on the frame. Here is your complete DIY trickle vent installation checklist:
Many vent manufacturers include a paper or cardboard drilling template inside the box. This template shows the exact slot dimensions, screw positions, and recommended hole spacing. If yours came with one, use it — it eliminates the need to transfer measurements manually and significantly reduces the risk of marking errors.
Imagine cutting a letterbox-shaped opening in the top of your window frame. That is essentially what you are doing, and precision is everything. Start by identifying the centre point of the frame head — the horizontal top rail. Measure the total width of the head rail, divide by two, and make a light pencil mark. This centre mark becomes your anchor point for positioning the vent symmetrically.
If your vent came with a template, hold it against the frame head so that its centre line aligns with your pencil mark. Use small pieces of masking tape to fix the template in place, then verify with a spirit level that it is perfectly horizontal. With the template secured, mark the outline of the slot and the screw hole positions by pressing your pencil firmly through the template's pre-punched guides.
No template? Measure the slot length and width from the vent's specification sheet. From your centre mark, measure half the slot length to the left and half to the right, marking both ends. Connect these marks with a straight horizontal line — your spirit level doubles as a ruler here. Then mark the slot width above and below that line, giving you a clear rectangular outline.
Before cutting, apply a strip of masking tape along the entire cutting area. This does two things: it gives your pencil lines better visibility against the white uPVC, and it protects the frame surface from chipping as the cutting tool passes through. A clean cut through taped uPVC looks noticeably better than one made on a bare surface.
Set your router or multi-tool to the correct cutting depth. For most through-frame trickle vents, the slot needs to pass completely through the uPVC profile — typically 20 mm to 30 mm deep, depending on your frame's wall thickness. Check the vent manufacturer's instructions for the specified depth. Cut slowly. uPVC is a thermoplastic, and aggressive cutting speeds generate friction heat that can melt the material rather than slice it cleanly. A steady, controlled pass produces a much better result than rushing.
If you are using a multi-tool, make multiple shallow passes rather than trying to cut the full depth in one go. Each pass should remove only 3 mm to 5 mm of material. Keep the blade moving steadily along the marked line — pausing in one spot creates localized heat buildup and risks deforming the plastic.
Once the slot is fully routed, remove the masking tape and clear all swarf — the small curls and chips of plastic — from the channel. A vacuum cleaner nozzle works well for this. Run your finger along the slot edges; if you feel any roughness or raised burrs, smooth them down with a fine file or deburring tool. A clean, burr-free slot ensures the vent components seat flush against the frame, which is critical for both weatherproofing and appearance. Astraframe's fitting guide reinforces this point, recommending that all holes are cleaned and smoothed before any vent components are offered up.
Test-fit the vent body in the slot before reaching for any screws. It should slide in without excessive force. If it feels too tight, a light pass with the file on the slot edges usually resolves the issue. If the slot is noticeably too loose, you will need to compensate with silicone sealant when fitting the external canopy.
With the slot clean and test-fitted, the external section goes on first. Walk around to the outside of the window — or if you are working on an upper floor, you may need to lean out carefully or use a ladder. Position the external canopy over the slot so the rain deflector lip faces downward. This orientation is essential: the deflector sheds rainwater away from the slot opening, preventing moisture from being driven into the frame channel during wind-driven rain.
Hold the canopy firmly against the frame and use your drill with the pilot-hole bit to create guide holes through the canopy's pre-drilled screw points and into the uPVC frame beneath. Pilot holes prevent the uPVC from splitting when you drive the screws home — skipping this step on plastic frames risks cracking the material around the fixing point. Drive the supplied screws in with a manual screwdriver, applying steady pressure without overtightening. uPVC is softer than timber; aggressive tightening strips the threads and weakens the fixing.
Before moving inside, apply a thin, continuous bead of silicone sealant around the perimeter of the external canopy where it meets the frame surface. This seal stops water from migrating behind the housing. Smooth the bead with a wet finger or a sealant tool for a clean finish, and wipe away any excess immediately.
Back inside, position the internal controller canopy over the corresponding face of the slot. Depending on the product, it will either clip directly onto alignment lugs protruding through the slot or fix with screws into its own set of pilot holes. Many internal canopies use a combination — clip-on alignment by a single locking screw at each end. Press the canopy into place, listen for the clips engaging, and drive any securing screws gently home.
The final check is the most satisfying. Slide the internal controller to the fully open position — you should feel smooth, even resistance with no sticking or grinding. Then slide it fully closed. In the closed position, the controller should sit flush and block visible daylight through the slot. If the slider feels gritty or catches at a certain point, remove the canopy, check for trapped swarf or a misaligned clip, and refit. A step-by-step resource from GB DIY Store notes that the entire fitting process — from first mark to final test — typically takes 15 to 20 minutes per window once you are comfortable with the method.
Confidence with a drill and a steady hand will carry you through most straightforward installations. But honesty about your limits protects both your windows and your wallet. Routing a slot for a trickle vent in a uPVC frame is irreversible — and certain situations raise the stakes high enough that professional help is the smarter investment.
Consider hiring a qualified window installer if any of these apply:
A FENSA-registered installer can complete the job and self-certify that the work complies with Building Regulations — providing you with documentation that matters if you ever sell the property. The cost of professional fitting typically runs between 50 and 80 pounds per vent, and most installers will complete a full house in a single visit.
Incorrect routing can compromise weatherproofing, weaken the frame, and create draughts that defeat the entire purpose of the vent. Getting it right the first time — whether by your own hand or a professional's — is always cheaper than fixing a mistake after the fact.
Of course, even a perfectly fitted vent can develop quirks over time. Draughts that feel stronger than expected, condensation that refuses to clear, or a slider that sticks mid-travel are all common issues with practical solutions — and knowing how to troubleshoot them keeps your ventilation working the way it should.
Your vents are fitted, the sliders move, and fresh air is flowing. Job done — until something feels off. Maybe a cold stream hits your neck every time you sit near the window. Maybe condensation still pools on the glass despite the vent being wide open. Or maybe the slider that glided smoothly six months ago now refuses to budge. These are the everyday frustrations homeowners run into, and each one has a logical explanation and a practical fix.
A certain amount of airflow is the entire point — you are supposed to feel something. A faint, barely perceptible movement of air near the vent is normal operation, not a defect. The problem starts when that gentle trickle turns into an uncomfortable cold jet that makes the area near the window unpleasant to sit in.
If a trickle vent is causing a draught, start with the simplest check: is the internal slider stuck in the fully open position? Over time, paint overspray, accumulated dust, or a warped canopy can prevent the controller from closing completely. Slide it back and forth a few times to confirm it moves through its full range. In the closed position, you should see no daylight through the slot from inside the room. If light is still visible, the controller is not sealing properly.
Excessive draughts can also indicate that the vent is oversized for the room. A vent with a high Equivalent Airflow rating fitted in a small bedroom will move more air than the space needs, creating a noticeable cold stream — especially in winter when the temperature difference between indoors and outdoors is greatest. The fix here is not to block the vent permanently but to keep the slider partially closed, reducing the effective opening while still maintaining some background airflow.
A third possibility is a degraded external canopy seal. If the seal between the external housing and the frame has cracked or separated, wind can bypass the baffles entirely and push unfiltered air directly through gaps around the housing rather than through the controlled airflow path. Run your hand slowly along the edges of the external canopy on a breezy day. If you feel air escaping from the perimeter rather than through the vent slots, resealing with a thin bead of silicone usually solves the issue.
This is the one that frustrates homeowners most. You have done everything right — vents installed, sliders open, airflow confirmed — yet water still streams down the glass on cold mornings. What gives?
The answer lies in understanding what trickle vents can and cannot do. As London Damp Treatments explains clearly, a trickle vent is an inlet, not an extractor and not a damp repair. It forms one link in a chain: outside air enters through the vent into a habitable room, travels through internal transfer routes (under doors, through hallways), and exits via extract fans in kitchens and bathrooms. If any later link in that chain is restricted — a bathroom fan clogged with dust, an internal door sealed tight with no undercut, an extractor duct blocked by a bird's nest — opening another slot at the window will not clear humidity elsewhere. You may simply end up with a colder room that is still damp.
Condensation on windows even with trickle vents open often points to one or more of these underlying issues:
Before blaming the vents, audit the entire air route. Check that extract fans operate at their rated flow, that internal doors allow air transfer, and that moisture-generating habits are not overwhelming the system. A dehumidifier can provide short-term relief while you address the root causes, but it should supplement your ventilation strategy, not replace it.
Do trickle vents let in too much noise? For homeowners on quiet streets, the answer is usually no — the sound transmission through a standard vent blends into the ambient background. But if you live near a busy road, a railway, or under a flight path, you will notice it. Any opening in the building envelope is a potential sound path, and a standard slot vent offers minimal resistance to noise.
The instinctive response is to close the vent. That works for noise, but it stops ventilation entirely — and within days, you are back to condensation streaming down the glass and mould creeping into corners. This trade-off should be managed, not ignored.
The most effective solution is upgrading to acoustic trickle vents with internal baffling. As discussed in the vent types section, these units incorporate sound-absorbing chambers that attenuate noise by 38 dB to 44+ dB, compared to 30-34 dB for standard slot vents. That difference is genuinely audible. In most cases, an acoustic vent can be fitted into the same routed slot as a standard one, making it a straightforward swap rather than a new installation.
If replacing the vent is not immediately practical, a few interim measures can help. Fitting a heavier curtain that drops below the vent line reduces perceived noise by absorbing sound waves after they enter the room. Rearranging furniture so that seating or beds sit further from the vent also lessens the impact. Neither approach eliminates the noise, but both take the edge off while you plan a permanent upgrade.
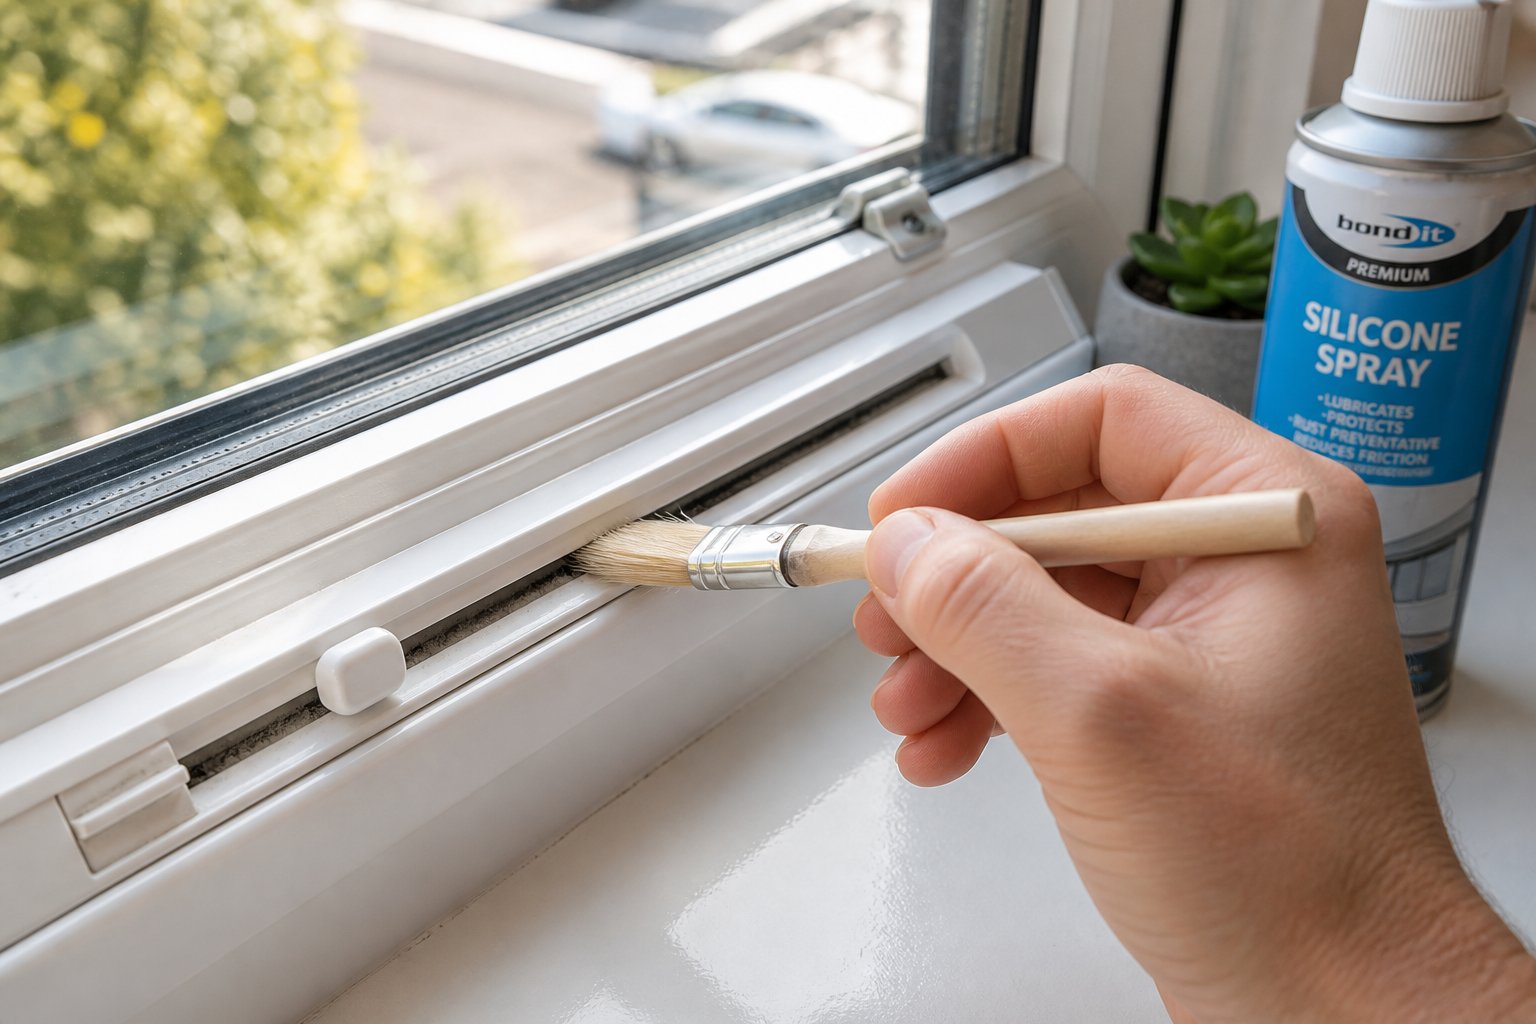
A slider that will not budge is the single most common trickle vent complaint — and usually the easiest to fix. How to fix a jammed trickle vent slider? Start with cleaning. Dust, pollen, cooking grease, and paint overspray accumulate in the slider track over time, gradually increasing friction until the mechanism seizes.
Use a soft-bristled brush — an old toothbrush works perfectly — to clear debris from the track and the slider edges. Follow up with a light application of silicone spray lubricant along the track. Avoid WD-40 or oil-based lubricants; they attract dust and create a sticky residue that makes the problem worse within weeks. Silicone spray dries clean and leaves a low-friction film that keeps the slider moving smoothly for months.
After cleaning and lubricating, work the slider back and forth several times through its full range. You should feel it loosen progressively with each pass. If the mechanism remains jammed after thorough cleaning, the slider track itself may be physically deformed — warped by UV exposure, cracked by impact, or bent by years of forced operation.
Here is the good news: the internal canopy assembly can usually be replaced independently without disturbing the external section. The external canopy and its seal remain in place while you unscrew the indoor unit, source a compatible replacement, and fit it onto the same mounting points. The critical step is matching the replacement canopy to your existing slot dimensions and fixing centres — the same measurements you would take for a full vent replacement. If you still have the original vent packaging or can identify the manufacturer's name stamped on the housing, sourcing an exact match is straightforward. Without those details, the slot length and fixing centres measurement will narrow the options to a handful of compatible products.
A cracked or visibly damaged canopy is beyond repair and should be replaced promptly. A broken controller that cannot close leaves the vent permanently open — fine for airflow, but it removes your ability to reduce ventilation during storms, extreme cold, or high-wind events. Conversely, a controller stuck in the closed position blocks all background ventilation, pushing your home toward the condensation and mould problems the vent was installed to prevent.
Keeping vents in good working order is half maintenance and half choosing the right product in the first place. A well-built vent with UV-resistant materials and a robust slider mechanism gives you years of trouble-free operation — which brings up an important question: what exactly should you look for when selecting a vent for your specific frame and project?
A vent that fits perfectly, operates smoothly, and lasts the lifetime of the frame does not happen by accident. It happens because someone asked the right questions before clicking "add to basket." How to choose the right trickle vent for uPVC windows comes down to five practical decision factors: frame material, EA rating, slot dimensions, noise exposure, and long-term durability. Get these right, and the vent quietly does its job for decades. Get them wrong, and you are back to troubleshooting within months.
This is the mistake that catches people out more often than any sizing error. Not all vents fit all frames. A product engineered for timber profiles will not seat correctly in a uPVC extrusion, and a vent designed exclusively for plastic frames may lack the fixings or dimensional tolerances needed for aluminium systems. Before anything else, confirm that the vent you are considering explicitly lists compatibility with your frame material.
Why does this matter so much? uPVC profiles and aluminium profiles differ in wall thickness, chamber layout, and thermal behavior. A vent designed for uPVC typically uses self-tapping screws suited to softer plastic, while an aluminium-compatible product may require different fixings to grip the harder metal substrate. Forcing an incompatible vent into the wrong frame risks cracked housings, stripped screw holes, and poor weatherproofing around the canopy perimeter.
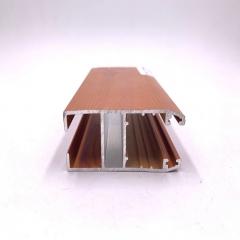
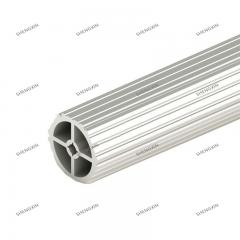
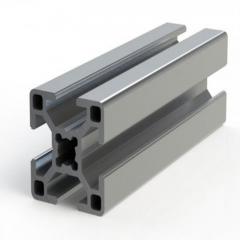
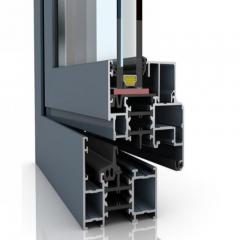
Properties with mixed frame types — uPVC on ground-floor windows and aluminium on bifold doors, for instance — face an additional challenge. Ordering separate vent ranges for each material means managing two sets of specifications, two suppliers, and potentially two different visual finishes. A trickle vent compatible with aluminium and uPVC frames simplifies this considerably. Products designed for dual compatibility use universal fixing systems and dimensional tolerances that accommodate both profile types without modification. Shengxin Aluminium's uPVC trickle vent is one example of this approach — engineered to fit standard routed slots across both aluminium and uPVC systems, it removes the need to source separate products for mixed-frame properties. For fabricators handling volume orders across different frame types, that kind of cross-compatibility also streamlines stock management and reduces the risk of fitting the wrong vent on site.
Frame compatibility gets the vent onto the window. The features below determine whether it still works well five or ten years from now. When evaluating any product — whether for a single replacement or a whole-house project — run through this checklist before committing:
Fabricators and installers evaluating vents for bulk projects should add two more criteria to the list: supply consistency and ease of bulk ordering. A product that is available one month and backordered the next disrupts production schedules and delays installations. Established manufacturers with dedicated trickle vent production lines — rather than suppliers who source from multiple third parties — tend to offer more reliable stock availability and consistent product quality across batches.
What to look for when buying a trickle vent ultimately comes down to matching the product to your frame, your room's airflow needs, and your tolerance for long-term maintenance. The best trickle vent for replacement uPVC windows is not necessarily the cheapest or the most feature-packed — it is the one that fits your slot, meets your EA target, and keeps operating without complaint year after year.
Selecting the right product is a one-time decision. Living with it, however, is an ongoing relationship — one that works best when you understand how to adjust your vents through the seasons and keep them clean enough to perform at their rated capacity.
A well-chosen trickle vent fitted into the right slot is only half the story. The other half plays out over years — through freezing January nights, humid summer afternoons, and every transitional week in between. How you manage and maintain your vents across the seasons determines whether they deliver a decade of quiet, reliable performance or become one more neglected component slowly failing behind the curtains.
Should trickle vents be open or closed in winter? This is the question that divides homeowners every October. The temptation to seal every opening when temperatures drop is understandable — why let cold air in when you are paying to heat the room? But closing your vents in winter is precisely the wrong move. As Ideal Home reports, industry experts are unanimous on this point: keeping vents shut traps stale, moisture-heavy air inside your home, creating the exact conditions condensation and mould need to thrive.
Winter is when condensation risk peaks. Cold external surfaces meet warm indoor air saturated with moisture from cooking, bathing, and breathing. Without a consistent trickle of drier outdoor air to dilute that humidity, water collects on windowpanes, creeps into frame corners, and feeds black mould colonies that can establish themselves in a matter of weeks. The small amount of warmth you lose through an open trickle vent is marginal compared to the heat that escapes through an open window — and it is insignificant next to the cost of treating a serious damp problem.
Here is a practical seasonal approach that balances comfort with moisture control:
For adjustable vents, partial closure during mild, still weather is perfectly acceptable. What you want to avoid is full closure for extended periods — days or weeks at a time — because this eliminates background ventilation entirely and allows humidity to climb unchecked. As ventilation specialist Jo Trotman explains, modern homes are designed to be airtight, and trickle vents act as the "lungs" of the property, allowing it to breathe without the massive heat loss of an open window.
How often should you clean window trickle vents? Twice a year is the minimum — once at the start of the heating season in early autumn and once in spring after winter has passed. Properties in urban areas with higher pollution levels, homes surrounded by trees that shed pollen and debris, or kitchens where cooking grease becomes airborne may benefit from quarterly attention. The good news is that each cleaning session takes only a few minutes per vent.
Here is a straightforward maintenance routine that keeps everything running smoothly:
Well-maintained uPVC window trickle vents can last the lifetime of the window frame with minimal intervention. Quality products built from UV-stabilized, weather-resistant materials resist the yellowing and brittleness that plague cheaper alternatives. Choosing a vent constructed from durable, low-maintenance uPVC — such as Shengxin's background ventilation unit — reduces long-term upkeep because the materials are engineered to withstand years of UV exposure and temperature cycling without degrading. When the slider still glides freely after five winters and the canopy still matches the frame colour, maintenance becomes a two-minute habit rather than a repair project.
The pattern is simple: clean twice a year, lubricate when stiff, reseal when needed, and replace only when cracked or broken beyond function. Follow this routine, and the small slot at the top of your window will keep quietly solving big problems — condensation, mould, stale air — for as long as the frame around it stands. If you are exploring new or replacement vents and want a practical starting point, Shengxin Aluminium's uPVC trickle vent offers dual-frame compatibility and the kind of build quality that makes long-term maintenance straightforward rather than stressful.
Yes. Since 15 June 2022, Approved Document F of UK Building Regulations requires background ventilators in most replacement window installations across England, with Wales following in November 2022. If your original window had a trickle vent, the replacement must include one with at least the same Equivalent Airflow (EA) performance. Even if the old window had no vent, the installer should fit one where reasonably practicable. Homeowners cannot sign a disclaimer to opt out, and indemnity policies are not an acceptable workaround. A FENSA-registered installer can self-certify compliance and provide documentation important for future property sales.
Ventilation experts strongly recommend keeping trickle vents open throughout winter. Cold weather creates the highest condensation risk because warm, moisture-laden indoor air meets cold window surfaces and releases water droplets. Closing vents traps that moisture inside, encouraging black mould growth and damp damage. The heat lost through a trickle vent is minimal compared to opening a window, and far less costly than treating a serious damp problem. If a vent creates an uncomfortable draught near a bed or sofa, partially close the slider rather than shutting it completely — maintaining some background airflow is always preferable to none.
Trickle vents supply fresh air into a room, but they are only one link in a whole-house ventilation chain. Condensation persists when other parts of that chain fail — a clogged bathroom extractor fan, tightly sealed internal doors blocking air transfer, or excessive moisture production from drying laundry indoors on radiators. A single load of wet washing can release several litres of water vapour, overwhelming what a trickle vent can dissipate alone. To resolve persistent condensation, audit your extract fans for adequate performance, ensure a 10 mm gap exists under internal doors for air transfer, and reduce indoor moisture sources before concluding the vents are at fault.
The Equivalent Airflow rating, measured in square millimetres (mm²), indicates the effective open area through which air can pass in a trickle vent. It differs from the physical slot size because internal baffles and rain deflectors create airflow resistance. Under Approved Document F, habitable rooms such as bedrooms and living rooms typically require a total of 8,000 mm² of background ventilation, while wet rooms like kitchens and bathrooms need 4,000 mm² paired with mechanical extract fans. Since a single vent typically provides 2,500 to 5,000 mm², you may need multiple vents across a room's windows to meet the minimum. EA values are cumulative, so the total across all vents in one room counts toward the requirement.
Retrofit installation is possible on most uPVC frames by routing a new slot into the frame head using a router or oscillating multi-tool. However, this is a permanent, irreversible modification that requires careful planning. You must identify where internal steel or aluminium reinforcement sits within the frame profile to avoid cutting through it, which could crack the uPVC and damage your tools. Standard slot dimensions — commonly 260 mm, 335 mm, or 400 mm in length and 13 mm or 16 mm in width — should be for compatibility with off-the-shelf vents. If you are unsure about reinforcement locations, your windows are still under warranty, or you are not confident with power tools, hiring a qualified installer is the safer and often more cost-effective choice.



 Інтернет-сервіс
 0086 136 3563 2360
 sales@sxalu.com
 +86 136 3563 2360
 Українська
 English
 français
 Deutsch
 русский
 español
 português
 العربية
 ไทย
ไทย Việt
Việt