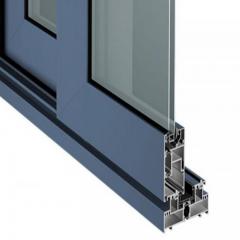
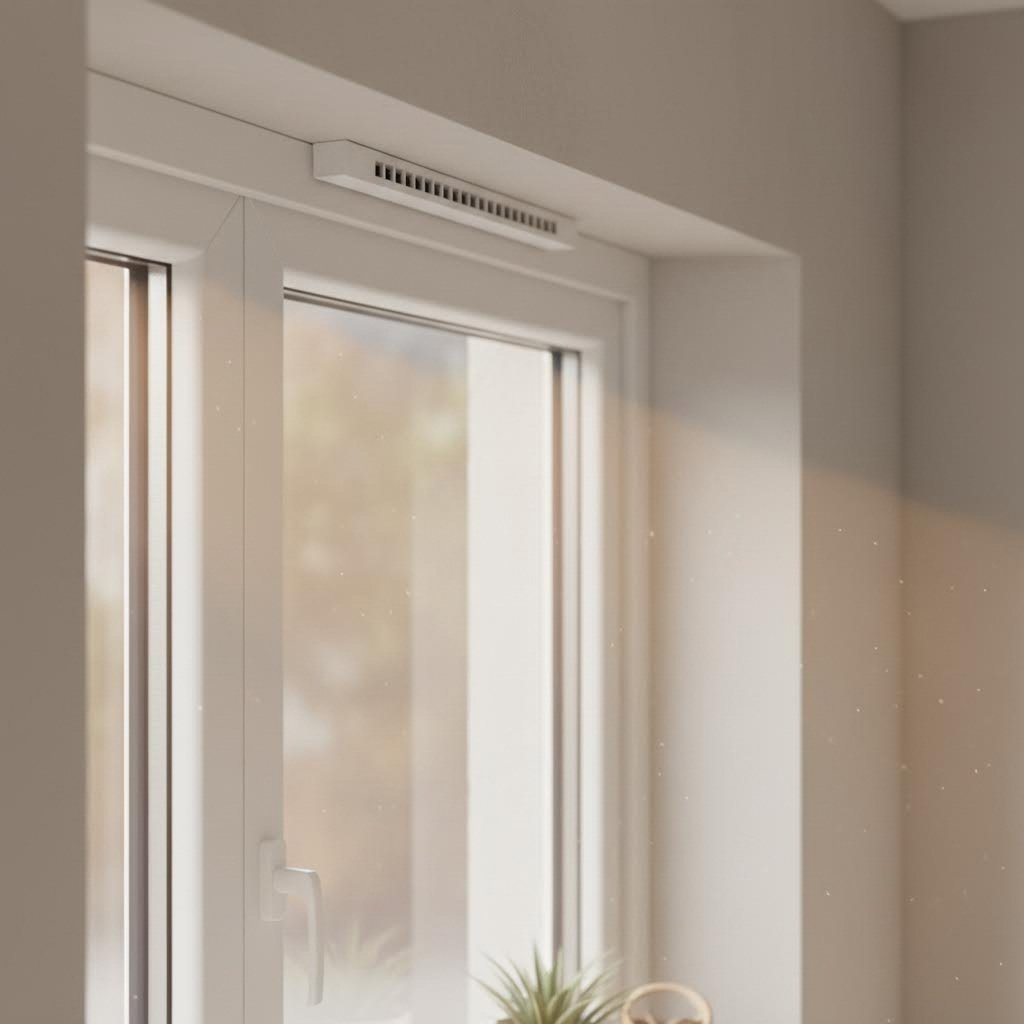
What is a trickle vent, exactly? Put simply, trickle vents are small, controllable openings integrated into window frames or door frames that allow a constant "trickle-feed" of fresh air into your home while your windows remain securely closed. According to Everest, these background ventilators consist of a slit in the frame, staggered on the inside and outside, with a cover that can be opened and closed as needed.
The fundamental purpose of trickle air vents for windows is straightforward: they provide essential background ventilation that improves indoor air quality, reduces condensation buildup, and prevents the growth of harmful mold. Unlike opening a window fully, these vents offer a controlled, secure way to keep fresh air circulating throughout your living spaces.
When considering window ventilation options, you'll encounter two main approaches: passive ventilation and mechanical systems. Passive ventilation, which includes trickle vents, relies on natural forces to move air without requiring electricity or complex equipment. Mechanical systems, on the other hand, use fans and motors to actively push or pull air through a building. Understanding the difference between window and ventilator systems helps you make informed decisions about your home's air quality strategy.
Imagine you're in a sealed room. Without any air exchange, the atmosphere quickly becomes stale, moisture builds up, and pollutants accumulate. Trickle vents solve this problem elegantly by harnessing natural air movement principles.
These simple devices utilize pressure differences between indoor and outdoor environments to create gentle, continuous airflow. When wind passes across the exterior of your home, it creates slight variations in air pressure. Higher pressure outside pushes fresh air through the trickle vent opening, while lower pressure zones allow stale indoor air to escape through other ventilation points or gaps in the building envelope.
The beauty of this system lies in its simplicity. There are no moving parts to maintain, no electricity required, and no complex controls to master. Although trickle vents can be closed when needed, they're designed to remain open continuously for optimal ventilation performance. This constant, subtle air exchange helps displace moisture-laden air before it has a chance to condense on cold surfaces like window panes and exterior walls.
Here's a challenge many homeowners face today: modern construction techniques have made our homes incredibly energy efficient, but this airtightness comes with an unexpected consequence. When buildings are sealed tightly to prevent heat loss, they also trap moisture, pollutants, and allergens inside.
Consider your daily activities. Showering, cooking, doing laundry, and even breathing release significant amounts of moisture into your indoor air. In older, drafty homes, this moisture would escape through gaps and cracks in the building structure. In a well-insulated modern home, however, this moisture becomes trapped, creating the perfect conditions for condensation and mold growth.
Modern homes are designed to be airtight for energy efficiency, but this creates a critical need for controlled ventilation. Trickle vents provide the perfect balance between retaining heat and maintaining healthy indoor air quality.
As Panasonic's indoor air quality experts explain, airtight homes without proper ventilation strategies can experience a buildup of allergens, carbon dioxide, volatile organic compounds (VOCs), and even radon gas. Poor indoor air quality has serious long-term health implications, potentially causing allergies, respiratory disorders, and other illnesses.
The difference between window and ventilator approaches becomes particularly important in this context. While simply opening a window provides immediate ventilation, it also allows uncontrolled heat loss during winter months and may introduce external pollutants, dust, and pollen. Trickle vents offer a more measured solution, providing continuous background airflow without the dramatic energy penalty of open windows or the installation complexity of mechanical ventilation systems.
For homeowners seeking to maintain healthy living environments while keeping energy bills manageable, understanding how trickle vents work represents the first step toward achieving that crucial balance between comfort, efficiency, and wellbeing.
So you understand what window trickle vents do and why they matter. But here's a question many homeowners ask: are they actually required by law? The answer changed significantly in June 2022, when updated Building Regulations transformed the rules around trickle ventilation in UK homes.
The short answer is straightforward. In most cases, yes, vented windows with trickle vents are now legally required when you install new windows or replace existing ones. However, the regulations contain important nuances that every homeowner should understand before starting a window project.
Building Regulations Approved Document F focuses on one core principle: ensuring adequate ventilation for people inside buildings. As stated in regulation F1(1), "There shall be adequate means of ventilation provided for people in the building." Sounds simple enough, right?
The practical application requires understanding a key concept called Equivalent Area (EA). This isn't about the physical size of your trickle vent. Instead, EA measures the aerodynamic performance of a ventilator, specifically how much air can actually pass through it. According to Approved Document F, equivalent area represents the area of a sharp-edged circular opening through which air would flow at the same rate under identical pressure conditions.
Different rooms require different minimum EA values for their house window vents:
| Room Type | Multi-Floor Homes (Minimum EA) | Single-Floor Homes (Minimum EA) |
|---|---|---|
| Living spaces | 8,000mm² | 10,000mm² |
| Kitchen | 8,000mm² | 10,000mm² |
| Bathroom | 4,000mm² | 4,000mm² |
| Utility room and toilet | No minimum | No minimum |
The regulations also specify placement requirements. Trickle vents should be positioned at least 1.7 meters above the floor to help prevent uncomfortable draughts at seating level. Additionally, living spaces and kitchens in most homes require no fewer than five separate ventilators to ensure proper air distribution throughout the room.
Interior door ventilation also plays a role in overall compliance. Document F requires internal doors to have adequate undercut or grilles to allow airflow between rooms, ensuring fresh air from trickle vents can circulate throughout the entire dwelling rather than remaining trapped in individual spaces.
Here's where many homeowners get confused. The requirements differ based on your specific situation. Let's break down exactly when trickle ventilation becomes a legal obligation.
According to official government guidance, you cannot reduce the ventilation capacity of a property during any window work. This is the fundamental principle driving all the specific requirements.
Can you sign a disclaimer refusing trickle vents? The government is absolutely clear on this point. As stated in the official FAQ, a homeowner disclaimer stating they don't want background ventilators or will install them later is not acceptable. Work must comply fully with Building Regulations, and purchasing an indemnity policy is also not a suitable alternative.
There are limited exceptions for listed buildings where trickle vents might harm historic character, properties with whole-house mechanical ventilation systems like MVHR, and some conservation area homes assessed on a case-by-case basis. However, these exceptions require proper justification and approval through FENSA or Building Control.
Interior door ventilation requirements complement the window regulations. Even with proper trickle vents installed, airflow cannot circulate effectively if internal doors create barriers. The regulations specify that doors between rooms must allow air movement, typically through an undercut gap or transfer grille.
Understanding these requirements helps you plan your window project correctly from the start. With the regulatory landscape now clear, the next important decision involves choosing the right type of trickle vent for your specific needs and circumstances.
Now that you understand the regulations, here's the next question: which type of window vent actually suits your home? Walk into any building supplier or browse online, and you'll discover that trickle vents come in several distinct varieties. Each offers different features, and choosing wisely can mean the difference between a ventilation solution that works seamlessly and one that creates new problems.
The good news? Once you understand the key differences, selecting the right trickle vents windows for your property becomes much simpler. Let's explore each type in detail so you can make a confident, informed decision.
Standard trickle vents represent the most common and economical choice for window air ventilation. These basic units consist of a slotted opening in the window frame with a controllable cover. They do exactly what they're designed to do: allow fresh air to enter while keeping windows closed. For properties in quiet residential areas away from major roads or flight paths, standard vents typically provide all the functionality you need.
But what if you live near a busy highway, railway line, or under an airport flight path? This is where acoustic trickle vents become worth considering. These specialized units incorporate sound-absorbing materials and baffled internal pathways designed to reduce noise transmission while still permitting adequate airflow.
Understanding how acoustic performance is measured helps you evaluate whether the investment makes sense for your situation. Manufacturers test acoustic vents according to ISO 10140-1:2021 standards in controlled laboratory conditions. The key figure to look for is Dn,e,w, which indicates how many decibels (dB) of noise reduction you can expect.
Here's what different dB ratings mean in practical terms:
To put these numbers in perspective, consider that normal conversation occurs at around 60 dB, while heavy traffic typically generates 80 to 85 dB. A high-performance acoustic vent with a 50 dB rating could reduce that traffic noise to the level of a quiet library.
Testing also reveals how different pitches of noise are attenuated. Low frequencies (125-250 Hz) include deep, rumbling sounds from heavy traffic and diesel engines. Mid frequencies (315-1000 Hz) cover everyday human speech and general traffic noise. High frequencies (2000-8000 Hz) encompass sharp sounds like emergency sirens and aircraft noise. Quality acoustic vents perform well across this entire spectrum.
Beyond the standard versus acoustic choice, you'll also need to decide between manual and automatic operation. This decision affects how much attention your window air vent requires day-to-day and how effectively it responds to changing conditions.
Manual trickle vents give you complete control. You decide when to open them, how wide to open them, and when to close them. This approach works well if you prefer hands-on management of your home environment and are willing to adjust vents seasonally or in response to weather changes. As noted by Aikon Distribution, manually operated vents are sometimes required in locations where regulations restrict the use of automatic options.
Humidity-controlled trickle vents, also called hygroscopic or hygrometric vents, take a different approach. These clever devices contain a polyamide tape that reacts automatically to changes in indoor humidity. When moisture levels rise above approximately 70%, the tape expands, opening the vent wider to expel humid air. When humidity drops below around 30%, the tape contracts, reducing the opening to minimize heat loss.
Pressure-controlled trickle vents offer another automatic option. These respond to pressure differences between inside and outside the room, increasing airflow when external wind pressure rises. Many models include a manual override for stormy weather when you might want to reduce airflow temporarily.
| Vent Type | Key Features | Ideal Applications | Important Considerations |
|---|---|---|---|
| Standard Manual | Simple operation, user-controlled opening, economical price point | Quiet residential areas, homeowners who prefer direct control, budget-conscious projects | Requires regular adjustment; may be left in wrong position; no automatic response to conditions |
| Acoustic Manual | Sound-absorbing materials, baffled design, dB-rated performance, user-controlled | Properties near busy roads, railways, flight paths, or industrial areas | Higher cost; still requires manual adjustment; verify dB ratings match your noise environment |
| Humidity-Controlled | Automatic response to moisture levels, no user intervention needed, polyamide sensor tape | Kitchens, bathrooms, laundry areas, homes with condensation issues, busy households | May respond slowly to rapid humidity changes; sensor tape can degrade over time; limited user override |
| Pressure-Controlled | Automatic response to wind pressure, self-regulating airflow, typically includes manual override | Exposed locations, high-rise buildings, areas with variable wind conditions | May not address humidity directly; performance depends on external conditions; mechanical parts may require maintenance |
| Fixed (Non-Adjustable) | Permanently open at set angle, no moving parts, minimal maintenance | Commercial buildings, areas requiring constant ventilation, supplementary ventilation | No user control; cannot be closed during extreme weather; may cause draughts in some positions |
When choosing between manual and automatic options for air vents in double glazed windows, consider your lifestyle and the specific rooms involved. If you work from home and can easily adjust vents throughout the day, manual control might suit you perfectly. However, if you're frequently away or simply want a set-it-and-forget-it solution, humidity-controlled vents eliminate the guesswork.
For high-moisture areas like kitchens and bathrooms, humidity-controlled vents often prove particularly valuable. They respond automatically when cooking steam or shower moisture raises indoor humidity levels, then close down once conditions normalize. This automatic response helps prevent condensation buildup even when you're not actively thinking about ventilation.
That said, humidity-controlled vents aren't perfect. As industry sources note, the polyamide tape sometimes reacts too slowly when humidity rises very quickly, meaning some moisture may condense before the vent fully opens. For most domestic situations, this limitation rarely causes significant problems, but it's worth understanding before you commit.
Whichever type you choose, quality matters significantly. Well-designed trickle vents from reputable manufacturers operate smoothly, seal properly when closed, and provide years of reliable service. Cheaper alternatives may stick, leak, or fail to deliver their advertised EA ratings. With the right vent type selected, your next consideration becomes whether to install them in new windows or retrofit them to your existing frames.
Already have double glazed windows with ventilation concerns? You're not alone. Many homeowners face a common dilemma: their windows are in perfectly good condition, but condensation keeps appearing, or they simply want to improve indoor air quality without replacing the entire frame. The good news is that retrofitting trickle vents in windows is often entirely possible, though the process varies significantly depending on your window material.
Before grabbing a drill, however, you need to understand what's involved. Adding a vent window feature to an existing frame means cutting into the material, which requires careful planning and the right approach for each window type. Get it wrong, and you risk damaging your frames, voiding warranties, or creating water ingress problems that are far worse than the condensation you were trying to solve.
uPVC remains the most common window material in UK homes, and fortunately, it's also one of the more straightforward materials for retrofit installations. That said, there are specific considerations you must address before proceeding.
Frame thickness is your first checkpoint. According to Astraframe, most standard uPVC frames can accommodate trickle vents, but the frame must have sufficient depth to house both the internal and external components. Measure your frame carefully before purchasing any vents. Typically, you need at least 25mm of frame depth, though requirements vary between manufacturers.
The routing process involves drilling through the uPVC frame to create an aperture for airflow. Unlike timber, uPVC doesn't require sealing or treatment after cutting, but the drilling must be precise. A high-speed metal drill bit works best for uPVC, and you'll need to drill from both sides to ensure clean entry and exit points that align perfectly.
Here's what the uPVC retrofit process typically involves:
Can you tackle this yourself? For confident DIY enthusiasts with good drilling skills, uPVC retrofit is achievable. However, if you're uncertain about your abilities or concerned about warranty implications, professional installation provides peace of mind. Many window companies offer retrofit services that ensure proper installation and maintain any existing frame guarantees.
Moving beyond uPVC, timber and aluminium windows present different challenges and require adjusted approaches. Understanding these differences helps you discuss the right options with installers or assess whether DIY remains realistic.
Timber frames offer flexibility but demand additional care. Wood is easier to cut than metal, making the physical installation straightforward. However, any cuts expose raw timber that must be properly sealed to prevent moisture ingress and rot. Professional installers typically apply wood preservative and sealant to all cut surfaces before fitting the vent components. They also ensure the vent canopy on the exterior provides adequate weather protection for the exposed timber edge.
When discussing timber retrofit with installers, ask about:
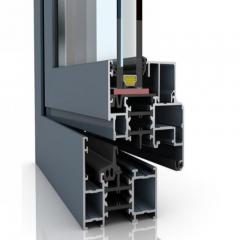
Aluminium frames present the greatest retrofit challenge. Cutting through metal requires specialized tools and expertise. The material is harder to drill, generates more heat during cutting, and the thin-walled nature of many aluminium profiles limits where vents can be positioned. Additionally, aluminium window systems often incorporate thermal breaks and complex internal chambers that installers must avoid damaging.
For aluminium windows, professional installation is strongly recommended. DIY attempts on aluminium frequently result in damaged frames, compromised thermal performance, or vents that don't seal properly. The cost of professional installation is typically justified by the complexity involved and the value of protecting your existing windows.
Interestingly, similar principles apply when considering a basement window with vent installation. These below-grade windows face unique challenges including higher moisture exposure and potential water pressure from outside. Whether uPVC, timber, or aluminium, basement window retrofit requires extra attention to waterproofing and may benefit from humidity-controlled vents that respond automatically to the typically damper basement environment.
Choosing where to position your ventilation windows and determining the correct size isn't guesswork. Building Regulations specify minimum Equivalent Area requirements that your retrofit installation must meet. Understanding these calculations helps you order the right products and plan appropriate placement.
The basic principle is straightforward. Each habitable room requires a minimum total EA of 8,000mm² for background ventilation, while bathrooms need 4,000mm². If you're installing multiple vents across several windows in one room, their combined EA must meet or exceed this threshold.
For example, if a standard trickle vent offers 2,000mm² EA, you would need four vents to achieve the 8,000mm² requirement for a living room. These could be distributed across multiple windows in the room rather than concentrated on a single frame. As VELFAC guidance notes, the total EA across all ventilators in a room determines compliance, not the capacity of any single vent.
Several factors influence your sizing decisions:
Placement matters too. Vents positioned at least 1.7 meters above floor level minimize draught discomfort at seating height. For rooms with multiple windows, distributing vents across different walls promotes better cross-ventilation and more even air circulation throughout the space.
When retrofitting a basement window with vent capability, consider that these spaces often lack alternative ventilation routes. Sizing generously rather than meeting bare minimums helps address the typically higher humidity levels found in below-grade rooms.
Should you DIY or call professionals? The answer depends on both the window material and your confidence level. For straightforward uPVC installations in accessible locations, competent DIYers can achieve good results. For timber requiring proper sealing, aluminium demanding specialized tools, or any situation where you're uncertain, professional installation protects your investment and ensures compliance. With sizing and materials sorted, the next step is understanding exactly how installation proceeds, whether you're doing it yourself or supervising a professional.

Ready to tackle the installation yourself, or wondering what to expect when a professional arrives? Either way, understanding the complete window trickle vent installation process helps you achieve better results and avoid costly mistakes. Whether you're a confident DIYer with a drill in hand or a homeowner supervising a contractor, this section walks you through everything that happens from start to finish.
The good news? Installing fitted vents isn't rocket science. Quality vents from reputable manufacturers come with clear fitting instructions and are designed for straightforward installation. According to DIY Direct, many homeowners complete the entire process in under an hour once they understand the steps involved. That said, attention to detail matters enormously. A poorly installed vent can leak, rattle, or fail to provide adequate ventilation.
Before picking up any tools, honestly assess your skill level. Have you successfully completed similar drilling projects before? Are you comfortable working at height if your windows are on upper floors? Do you understand how to identify and avoid reinforcement bars inside uPVC frames? If any of these questions give you pause, professional installation might be the wiser choice.
Assuming you're confident proceeding, here's what you'll need to gather before starting:
With everything assembled, follow this systematic process for venting windows with new trickle vents:
When should you stop and call a professional? Consider expert help if:
Hiring a professional for vent window replacement or new installations offers peace of mind, particularly for challenging materials like aluminium or situations where warranty preservation matters. But what exactly should you expect when an installer arrives?
A typical professional installation follows a structured process. First, the installer assesses your windows and confirms compatibility with the specified vents. They measure frame dimensions and check for reinforcement or other obstacles. As Home Secure Shop notes, this initial assessment determines whether the planned installation approach will work or requires modification.
The actual fitting usually takes 15-30 minutes per vent for straightforward installations. Complex situations involving difficult access, unusual frame profiles, or acoustic vents requiring precise positioning may take longer. Most installers can complete an entire property in a single visit, typically half a day for a standard three-bedroom house.
When speaking with potential installers, ask these important questions:
Professional installers should also help you avoid common installation mistakes that compromise performance:
| Common Mistake | Why It's Problematic | Professional Prevention |
|---|---|---|
| Overtightening screws | Cracks vent casing or frame material, creating gaps and weak points | Using torque-limiting drivers and following manufacturer specifications |
| Skipping measurements | Misaligned vents that don't seal properly or operate smoothly | Measuring twice, marking precisely, and checking alignment throughout |
| Ignoring manufacturer instructions | May void warranty and result in non-compliant installation | Following specific guidelines for each vent type and frame material |
| Installing in windy conditions | Difficult to hold components in position, debris blown into frame | Scheduling work for calm weather or using temporary covers |
| Using wrong drill bit size | Holes too loose cause rattling; too tight prevents proper fitting | Matching bit diameter exactly to screw size and checking fit before final assembly |
| Failing to seal timber cuts | Moisture enters exposed wood, causing rot and frame damage over time | Applying appropriate preservative and sealant to all cut surfaces |
Quality matters significantly in both the vents you choose and the installer you hire. Well-designed trickle vents from reputable manufacturers include clear fitting instructions, appropriately sized fixings, and components designed for straightforward assembly. Combined with competent installation, they provide years of reliable background ventilation with minimal maintenance required.
With installation complete, your focus shifts to getting the most from your new vents. The next section explores how to balance ventilation with energy efficiency throughout the year, addressing the seasonal adjustments that optimize both air quality and heating costs.
Here's the dilemma many homeowners face: you've invested in quality insulation, draught-proofing, and efficient heating, yet now you're being told to install openings that let outside air in. Doesn't that defeat the entire purpose? This tension between energy efficiency and adequate ventilation causes genuine confusion, but understanding how trickle ventilation windows actually work reveals why they complement rather than contradict your energy-saving efforts.
The reality is simpler than you might expect. Modern trickle vents are engineered specifically to provide controlled background airflow while minimizing heat loss. When used correctly throughout the year, they help maintain healthy indoor air quality without significantly impacting your heating bills. The key lies in understanding how to adjust them seasonally and why leaving them open often makes more sense than closing them tight.
Think about what happens in a sealed home during winter. Your family breathes, cooks, showers, and dries laundry. All these activities release moisture into the air. Without adequate ventilation, this moisture condenses on cold surfaces, creating the perfect environment for mold growth. Dealing with mold damage and its health consequences costs far more than any marginal increase in heating from properly functioning drip vents in windows.
Modern trickle vent designs incorporate several features that minimize heat loss while maintaining airflow. The staggered internal pathway between external and internal components forces incoming air through a longer route, allowing it to warm slightly before entering your room. Quality manufacturers also use materials with low thermal conductivity, reducing heat transfer through the vent housing itself.
How do trickle vents interact with your existing insulation and draught-proofing? Rather than working against these measures, they actually complement them. Well-insulated homes trap moisture more effectively than drafty older properties. Without controlled ventilation, this moisture accumulates and causes problems. Your air ventilation window provides the release valve that prevents humidity buildup while your insulation keeps the walls, roof, and main window areas thermally efficient.
Your heating system also benefits from proper ventilation. Boilers and gas fires require fresh air for combustion. In extremely airtight homes without adequate ventilation, combustion appliances can struggle to function efficiently or even pose carbon monoxide risks. As Homebuilding.co.uk explains, trickle vents help maintain the fresh air supply that ensures safe, efficient heating operation.
Any cooling of the internal temperature in winter from a trickle vent is marginal. The purpose of trickle ventilators is providing a consistent flow of fresh air rather than significant heat exchange.
Research consistently shows that the heat loss through properly designed trickle vents represents a tiny fraction of overall home energy consumption. Compare this to the heat lost when you open windows fully to clear condensation or the energy required to remediate mold damage, and the value proposition becomes clear. Background ventilation through trickle vents is an investment in long-term home health, not an energy waste.
While trickle vents are designed to remain open continuously, understanding how to optimize their use throughout the year helps you achieve the best balance between fresh air and comfort. Different seasons bring different challenges, and your approach can adapt accordingly.
During winter, the instinct to close every possible opening is understandable but often counterproductive. This is precisely when moisture accumulates fastest, as homes remain sealed, heating runs constantly, and activities like drying clothes indoors add significant humidity. According to Door and Window Experts, you should keep your trickle vents fully open at all times during the heating season. The gentle airflow they provide removes excess moisture before it causes problems, while the actual heat loss remains minimal compared to other ventilation methods.
Summer presents different considerations. With windows often open anyway, trickle vents play a smaller role in overall ventilation strategy. However, during hot nights when you might want windows closed for security, leaving trickle vents open provides welcome cooling airflow without compromising safety. On mild days when full window opening seems excessive, partially open trickle vents offer a middle ground.
You might wonder how this relates to other cooling systems. For instance, should you adjust window ventilation when running air conditioning? The question of window ac unit vent open or closed applies similar logic to trickle vents. While running AC, closing trickle vents temporarily prevents conditioned air from escaping and reduces the cooling load on your unit. Once AC operation stops, reopening the vents allows fresh air circulation to resume.
Transitional seasons like spring and autumn bring variable conditions. Mild, dry days require less active ventilation, while damp, cool periods benefit from full ventilation to prevent moisture accumulation. Pay attention to condensation on windows as an indicator. If you're seeing moisture form on glass, your indoor humidity is too high, and opening vents fully helps address this.
| Season | Recommended Setting | Reasoning |
|---|---|---|
| Winter (heating season) | Fully open | Maximum moisture removal during peak condensation risk period. Heat loss is minimal compared to benefits of preventing mold and maintaining air quality. Indoor activities generate most moisture during sealed winter months. |
| Spring (transitional) | Fully open to partially open | Variable conditions require flexibility. Open fully during damp spells; reduce to partial opening during dry, mild periods when windows may be opened anyway. Watch for condensation as your guide. |
| Summer (warm season) | Partially open to fully open | Less critical when windows open frequently. Keep fully open overnight for security-conscious cooling. Consider temporary closure only during active air conditioning to maximize cooling efficiency. |
| Autumn (transitional) | Fully open | Increasing moisture risk as heating resumes and outdoor temperatures drop. Humidity from rain and damp conditions makes continuous ventilation important. Resume winter settings as heating season begins. |
| Extreme cold snaps | Partially open | During unusually severe cold, reducing to partial opening balances heat retention with essential ventilation. Never close completely for extended periods. Monitor for condensation and reopen fully if moisture appears. |
| High humidity events | Fully open | After showering, cooking, or clothes drying, ensure maximum ventilation. If humidity-controlled vents are installed, they respond automatically. With manual vents, consciously open them fully during and after moisture-generating activities. |
What about the common fear that trickle vents create uncomfortable draughts? This misconception often stems from experiences with older, poorly designed vents or incorrect positioning. Modern units installed at the recommended height of 1.7 meters above floor level direct incoming air above head height, where it mixes with room air before descending. You shouldn't feel a direct cold draught at seating level from a properly installed air ventilation window.
Similarly, concerns about significant energy waste are largely unfounded. As industry experts confirm, any cooling effect from trickle vents is marginal. The controlled, gentle airflow they provide differs fundamentally from leaving a window open. Your heating system easily compensates for the minimal additional load while you gain substantial benefits in air quality and moisture control.
The same principle applies to questions like window ac unit vent open or closed during different operational modes. Understanding that background ventilation and active heating or cooling systems serve different purposes helps you make informed decisions. Trickle vents provide constant, low-level air exchange that complements rather than conflicts with your primary heating and cooling systems.
With your energy efficiency concerns addressed and seasonal strategies in place, maintaining your trickle vents properly ensures they continue performing optimally for years to come. The next section covers practical maintenance routines and troubleshooting solutions for common issues.

You've installed your trickle vents, adjusted them seasonally, and enjoyed fresher indoor air. But when was the last time you actually cleaned them? If you're drawing a blank, you're not alone. Most homeowners forget that these small devices need occasional attention to keep working at their best. The good news? Maintaining your tickle vents requires minimal effort, and troubleshooting common problems rarely demands professional help.
Think of your window vent covers as filters for your home's breathing system. Just like any filter, they accumulate dust, debris, and grime over time. Neglect them long enough, and airflow diminishes, mechanisms stick, and the ventilation benefits you installed them for gradually disappear. A few minutes of care several times a year prevents these issues entirely.
How often should you clean your trickle vents? According to Air Box, cleaning frequency depends on your local environment. Properties near busy roads, construction sites, or industrial areas accumulate debris faster than homes in quiet residential neighborhoods. As a general guideline, inspect your vents every three to four months and clean them whenever visible buildup appears.
The cleaning process itself couldn't be simpler. Start by opening the internal vent fully to expose the airflow slot. Use a thin duster, soft brush, or pipe cleaner to gently dislodge dust from inside the channel. A handheld vacuum with a brush attachment works brilliantly for removing loosened particles without pushing them deeper into the mechanism.
For stubborn grime that dusting won't shift, dampen a cloth with warm soapy water and wipe down the internal and external vent covers. Avoid harsh chemicals, bleach, or abrasive cleaners, which can damage plastic components and finishes. As Anglian's maintenance guide specifically warns, products like WD40 or solvent-based sprays contain chemicals that attack window components and should never be used.
Don't forget the external canopy. This component faces the elements and collects leaves, cobwebs, and insect debris that can block window vent covers completely. Check it during your regular cleaning routine and clear any obstructions. Pay attention to the small drainage channels in your window frames while you're at it, ensuring water can escape rather than pooling around the vent.
Here's a quick maintenance checklist to follow throughout the year:
How do you know when your vents need immediate attention? Watch for these warning signs: visible dust coating the airflow slot, difficulty moving the control mechanism, musty odors near the window despite the vent being open, or condensation returning after previously being under control. Any of these indicators suggests it's time to block window vent inspection and cleaning into your schedule.
Even with regular maintenance, issues occasionally arise. Before calling a professional, try these straightforward solutions that resolve most common trickle vent problems.
Stuck or stiff mechanisms frustrate many homeowners, but the fix is usually simple. Dust and lack of use cause sliders to seize up over time. Start by working the control back and forth gently while applying slight pressure. If resistance continues, clean the slider track with a dry cloth to remove any debris causing friction. For persistent stiffness, a tiny drop of silicone-based lubricant on the sliding mechanism often restores smooth operation.
Excessive noise, such as whistling or rattling, typically indicates loose components or improper sealing. Check that all screws are tight and the vent sits flush against the frame. According to Anglian's troubleshooting guidance, trickle vents are not designed to be completely airtight when closed, so some air movement is normal. However, loud whistling suggests air forcing through gaps where components don't meet properly. Repositioning or tightening the vent usually eliminates the noise.
Water ingress around vents after heavy rain signals either blocked drainage or compromised sealing. First, check that the external canopy sits correctly with its weather guard facing outward. Clear any debris blocking water runoff. If moisture still enters, inspect the seal between the vent and frame for gaps or deterioration. Small gaps may respond to a bead of appropriate sealant, though larger issues warrant professional assessment.
Reduced airflow despite the vent being fully open almost always traces back to blockages. Clean both internal and external components thoroughly, paying special attention to the mesh or grille elements designed to keep insects out. Sometimes spiders build webs inside the airflow channel itself, which aren't visible without close inspection.
Use this problem-solution guide for quick reference:
When should you call a professional? Persistent problems that don't respond to these solutions, water damage to surrounding frame areas, or vents that need complete replacement justify expert assistance. However, well-maintained vents from quality manufacturers typically provide years of reliable service with minimal attention required. Most homeowners find that a quarterly cleaning routine and occasional mechanism operation keeps everything functioning smoothly.
With maintenance mastered and common issues easily resolved, you might still have lingering concerns about whether trickle vents are right for your situation. The next section addresses the most frequent worries homeowners express about security, noise, and aesthetics.
You understand the benefits. You know the regulations require them. Yet something still holds you back from fully embracing window air vents in your home. Perhaps you've heard concerns from neighbors, read worrying comments online, or simply feel uneasy about creating any opening in your otherwise secure windows. These hesitations are completely understandable, and you're certainly not alone in having them.
The reality? Most concerns about trickle vents stem from misconceptions rather than actual problems. Modern designs address the very issues that worried earlier adopters, and understanding how these vents actually function provides genuine reassurance. Let's tackle the three biggest concerns head-on so you can make a confident decision.
Will trickle vents make your home easier to break into? This question tops the list of homeowner worries, and it deserves a direct answer: no, they won't.
Consider the physical dimensions involved. A typical trickle vent opening measures roughly 400mm long but only 10-15mm high. That's a slot barely wider than your finger. No intruder could possibly gain entry through such a narrow aperture, regardless of how determined they might be. The opening simply doesn't provide any realistic access point.
Trickle vents allow fresh air circulation without compromising security. Their small size and design physically prevent unauthorized entry while keeping your home ventilated around the clock.
As ATT Fabrications explains, one notable benefit of trickle vents is maintaining proper ventilation without leaving windows open. You gain fresh air circulation without the security vulnerability of partially opened windows, which actually makes your home more secure, not less. Many burglaries occur through windows left ajar for ventilation. With trickle vents handling background airflow, you can keep windows fully closed and locked.
Even if someone attempted to tamper with a trickle vent from outside, the construction prevents meaningful interference. External components are securely fixed to the frame, and the internal pathway offers no leverage point. You'd have better luck breaking through the glass itself, which proper window locks and security glazing already address.
Will outside noise flood into your home? Will cold draughts make rooms uncomfortable? These concerns make intuitive sense. After all, you're creating an opening to the outside. However, the reality differs significantly from expectations.
Modern trickle vent designs incorporate features specifically engineered to minimize both noise transmission and draught discomfort. The staggered internal pathway forces sound waves to change direction multiple times before reaching your room, significantly reducing their energy. According to industry guidance, quality vents include acoustic seals and insulation that further dampen external noise while permitting adequate airflow.
For properties in particularly noisy environments, acoustic trickle vents offer enhanced protection. These specialized units achieve noise reductions of 30-50 decibels or more, transforming busy road noise into barely perceptible background sound. If noise intrusion genuinely concerns you, investing in acoustic-rated vents provides measurable, testable protection.
What about draughts? The positioning requirements in Building Regulations exist precisely to address this concern. Vents installed at least 1.7 meters above floor level direct incoming air above head height, where it mixes with room air before descending. You won't feel cold air blowing directly on you while seated or sleeping. The gentle, continuous airflow differs fundamentally from the uncomfortable gusts you'd experience with an open window.
If you've fitted a trickle vent blanking plate to block an existing vent due to draught concerns, consider whether the installation was correct before permanently sealing it. Poorly positioned or incorrectly installed vents can cause discomfort that properly fitted units avoid entirely.
Do trickle vents ruin the appearance of windows? This worry particularly affects homeowners who've invested in attractive window styles or period properties where visual harmony matters. Fortunately, manufacturers have responded with increasingly discreet options.
Contemporary trickle vents feature low-profile designs that integrate seamlessly with modern window frames. Many sit flush with the frame surface, creating minimal visual disruption. From normal viewing distances, they're barely noticeable. Premium options like the Velfac trickle vent range demonstrate how good design combines functionality with aesthetics, appearing as subtle horizontal lines rather than obvious add-ons.
Color matching further reduces visual impact. Vents are available in white, brown, black, grey, and various woodgrain finishes to complement virtually any window style. As The Milford Window Company notes, manufacturers offer trickle vents in various colors to match your window frames seamlessly, making them far less noticeable than many homeowners expect.
For those who remain particularly concerned about appearance, concealed vent options exist. These designs incorporate covers that minimize visual impact while maintaining full functionality. Some premium window systems integrate ventilation pathways into the frame design itself, making them virtually invisible.
Modern trickle vents are designed to blend discreetly with your windows rather than detract from them. With proper color matching and low-profile designs, they become an unobtrusive part of your window system.
The aesthetic concern often diminishes once homeowners see actual installations rather than imagining worst-case scenarios. A brief visit to a showroom or neighboring property with modern vents typically provides reassurance that photographs and descriptions cannot convey.
With security, noise, draught, and aesthetic concerns addressed, you're well-equipped to make an informed decision about trickle vents for your home. The final step involves choosing quality products that deliver on these promises and knowing where to source them reliably.

You've learned what trickle vents do, why regulations require them, and how different types suit different situations. Now comes the practical question: which specific products should you actually buy? With countless options available from various suppliers, making the right choice feels overwhelming. Yet the decision becomes straightforward once you understand what separates quality trickle vent window products from inferior alternatives.
Whether you're fitting windows with vents for a new build project or retrofitting window vents house-wide to improve indoor air quality, the fundamentals remain the same. Quality matters. Compatibility matters. And choosing a reliable supplier saves headaches down the road. Let's break down exactly what to look for so you can move forward with confidence.
Imagine purchasing the cheapest trickle vents you can find, only to discover they stick after six months, crack in cold weather, or fail to deliver their advertised ventilation capacity. This scenario plays out more often than you'd expect when homeowners prioritize price over quality. Understanding the key quality indicators helps you avoid this frustrating outcome.
Durable construction stands as your first priority. Quality vents use UV-stabilized materials that resist fading and brittleness from sun exposure. They incorporate robust slider mechanisms that operate smoothly for years rather than seizing up after minimal use. External canopies feature proper weather guards and drainage channels that prevent water ingress even during driving rain. When examining any vent, check that components feel solid rather than flimsy, and that moving parts glide without excessive resistance.
Appropriate EA ratings ensure your vents actually meet Building Regulations requirements. Remember those minimum Equivalent Area figures we discussed earlier? A vent might look adequate, but if its EA rating falls short, you'll fail compliance checks or end up with insufficient ventilation. Always verify the specific EA value rather than relying on physical dimensions alone. Reputable manufacturers clearly state EA ratings in their product specifications.
Ease of operation matters for daily living. You'll adjust these vents seasonally, clean them regularly, and operate them throughout their lifespan. Controls should move smoothly without requiring excessive force. Opening and closing positions should be clearly defined so you know the vent is fully open or properly sealed. Some designs feature intuitive slider mechanisms while others use flip-down covers. Neither approach is inherently superior, but whichever you choose should feel natural and reliable.
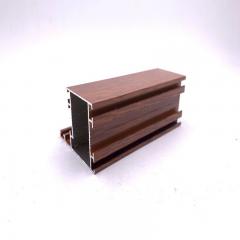
Compatibility with your window type prevents installation problems and ensures proper fit. Vents designed for uPVC frames differ from those engineered for timber or aluminium. Frame depth requirements vary between products. Color matching options determine whether your vents blend discreetly or stand out conspicuously. Before purchasing, confirm that your chosen vents work with your specific window material, frame dimensions, and aesthetic requirements.
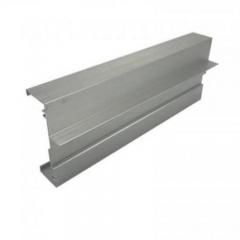
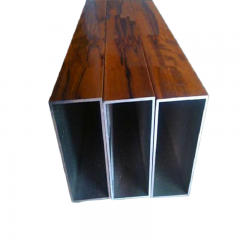
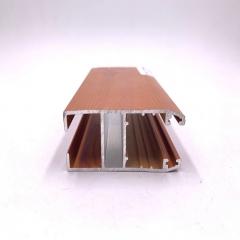
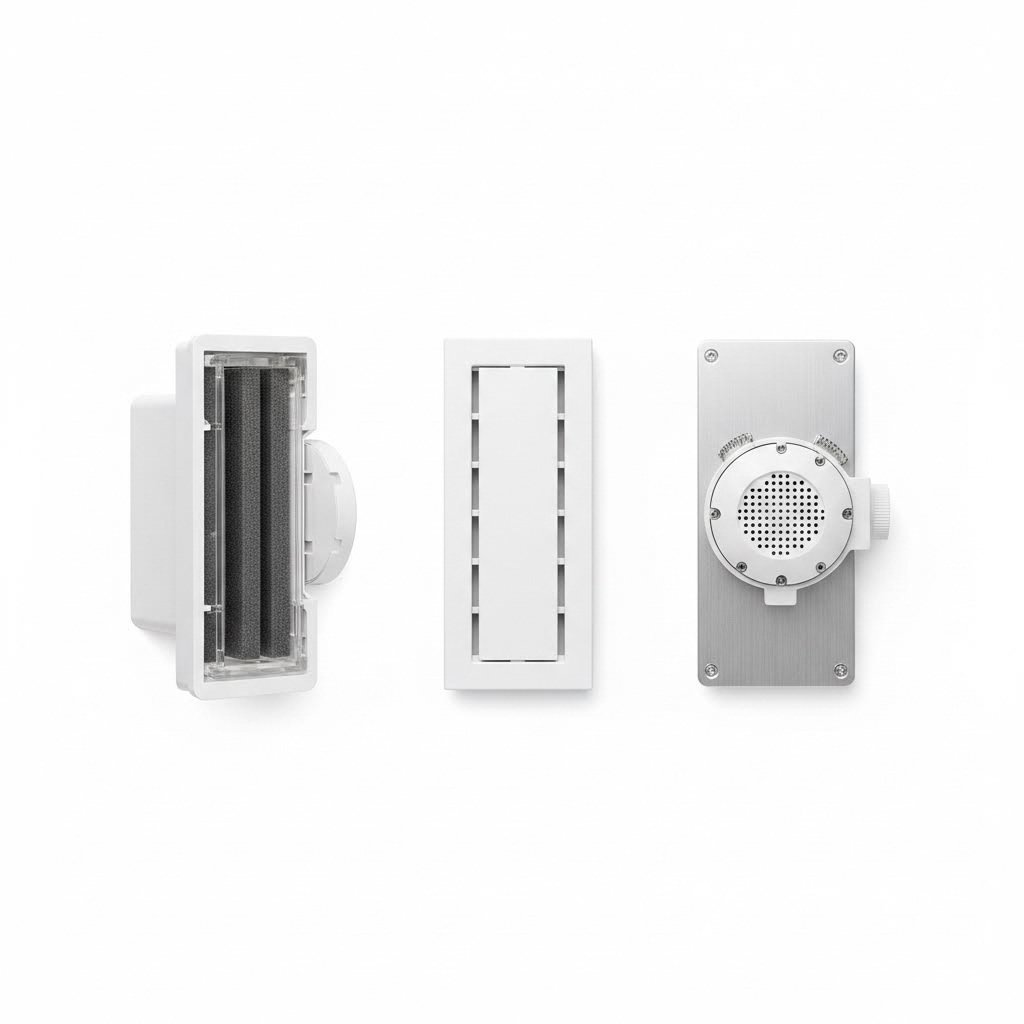
For homeowners seeking versatile solutions that address all these quality factors, manufacturers like Shengxin Aluminium offer purpose-built trickle vents suitable for uPVC, aluminum, and timber windows alike. Their range includes various sizes and finishes designed for both new builds and retrofit applications, with durable construction engineered to reduce condensation while maintaining energy efficiency. The low-profile designs integrate discreetly with modern window frames, and manual sliders provide straightforward control over airflow.
What about alternatives? Some homeowners wonder whether an alternative to trickle vents might better suit their situation. Mechanical ventilation systems like MVHR offer superior control and filtration but come with significantly higher costs and installation complexity. Extractor fans address moisture in specific rooms but don't provide whole-house background ventilation. Simply opening windows works temporarily but compromises security and energy efficiency. For most properties, particularly those requiring Building Regulations compliance, quality trickle vents remain the most practical and cost-effective solution.
When evaluating any alternative to trickle vents, consider ongoing costs, maintenance requirements, and whether the option actually meets regulatory requirements for background ventilation. In many cases, what seems like an attractive alternative proves impractical or non-compliant upon closer examination.
You've absorbed a lot of information throughout this guide. From understanding basic principles to navigating regulations, comparing vent types, planning installations, and addressing concerns, you now possess the knowledge needed to improve your home's ventilation effectively. The question becomes: what happens next?
Taking action doesn't require tackling everything at once. Start by assessing your current situation. Walk through each room and identify existing ventilation provisions. Check for condensation patterns that indicate inadequate airflow. Note which windows already have vents and which lack them. This assessment reveals your starting point and helps prioritize where improvements matter most.
For new build projects, your window supplier or contractor should guide you through compliant vent selection. Ensure they specify products with documented EA ratings meeting Document F requirements. Ask about the specific brands they install and verify these meet the quality criteria outlined above. Don't hesitate to request easy glaze trickle vents or similar reputable products rather than accepting whatever generic option the contractor prefers.
Retrofit situations require more hands-on decision-making. Measure your window frames to confirm compatibility with your preferred vents. Decide whether you'll tackle installation yourself or hire professionals. If DIYing, gather the correct tools and allow adequate time to work carefully. If hiring installers, obtain multiple quotes and ask about their experience with your specific window type.
Ready to move forward? Here's your action checklist for windows with vents that actually deliver results:
The investment you make in proper ventilation pays dividends every day you live in your home. Fresh air circulates continuously. Condensation diminishes or disappears entirely. That musty, stale feeling gives way to a healthier indoor environment. Mold risk drops significantly, protecting both your property and your family's health.
Whether you're building new, replacing windows, or retrofitting existing frames, the principles remain consistent. Choose quality products with appropriate ratings. Ensure proper installation following manufacturer guidelines. Maintain your vents with regular cleaning and operation. Follow seasonal adjustment recommendations to balance ventilation with energy efficiency.
Your home's ability to breathe properly shouldn't be an afterthought or a grudging regulatory compliance exercise. It's a fundamental aspect of healthy, comfortable living. With the knowledge you've gained and the practical steps outlined above, you're fully equipped to make informed decisions that benefit your household for years to come. Fresh air and a healthier home environment await. The only question remaining is when you'll begin.
Trickle vents should remain open most of the time, especially during winter when indoor moisture levels peak from heating, cooking, and daily activities. Keeping them open prevents condensation buildup and mold growth while causing minimal heat loss. Only close them temporarily during extreme cold snaps or when running air conditioning to maximize cooling efficiency. Quality vents from manufacturers like Shengxin Aluminium are designed to provide controlled airflow without creating uncomfortable draughts when installed at the recommended height of 1.7 meters above floor level.
Under UK Building Regulations Document F 2022, trickle vents are mandatory for most new build homes, extensions, and full window replacements. When replacing existing windows, you must provide at least the same level of background ventilation as before. Since modern sealed double glazing is far more airtight than older windows, this typically means adding trickle vents even if your original windows lacked them. Exceptions exist for listed buildings, properties with whole-house MVHR systems, and some conservation areas assessed case-by-case. Repair-only work does not trigger these requirements.
The main types include standard manual vents for quiet residential areas, acoustic vents with 30-50dB noise reduction for properties near busy roads or flight paths, humidity-controlled automatic vents that respond to moisture levels using polyamide sensor tape, and pressure-controlled vents that self-regulate based on wind conditions. Each type comes in various EA ratings to meet Building Regulations requirements. Versatile options like those from Shengxin Aluminium work across uPVC, aluminum, and timber frames in multiple finishes for both new builds and retrofit applications.
DIY installation is achievable for confident homeowners working with uPVC frames, requiring a drill, appropriate bits, and careful measurement. The process involves marking positions, drilling through the frame to create an airflow aperture, and securing internal and external components. Timber frames require additional sealing to protect exposed wood from moisture damage. Aluminum windows present the greatest challenge due to specialized cutting requirements and thermal break considerations, making professional installation strongly recommended. Always verify frame depth compatibility before purchasing vents.
No, trickle vents do not compromise security. The opening measures approximately 400mm long but only 10-15mm high, far too narrow for unauthorized entry. They actually improve security by eliminating the need to leave windows ajar for ventilation. Modern designs minimize draughts by positioning vents 1.7 meters above floor level, directing incoming air above head height where it mixes with room air before descending. Acoustic models with baffled pathways further reduce noise transmission while maintaining adequate airflow for healthy indoor environments.


 Інтернет-сервіс
 0086 136 3563 2360
 sales@sxalu.com
 +86 136 3563 2360
 Українська
 English
 français
 Deutsch
 русский
 español
 português
 العربية
 ไทย
ไทย Việt
Việt