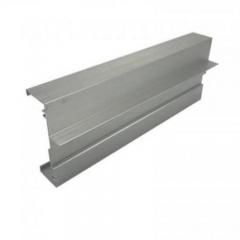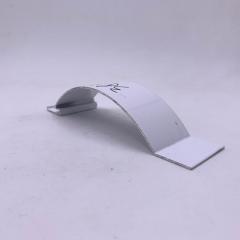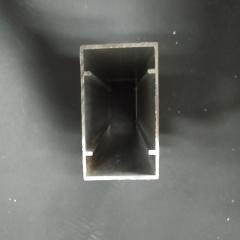
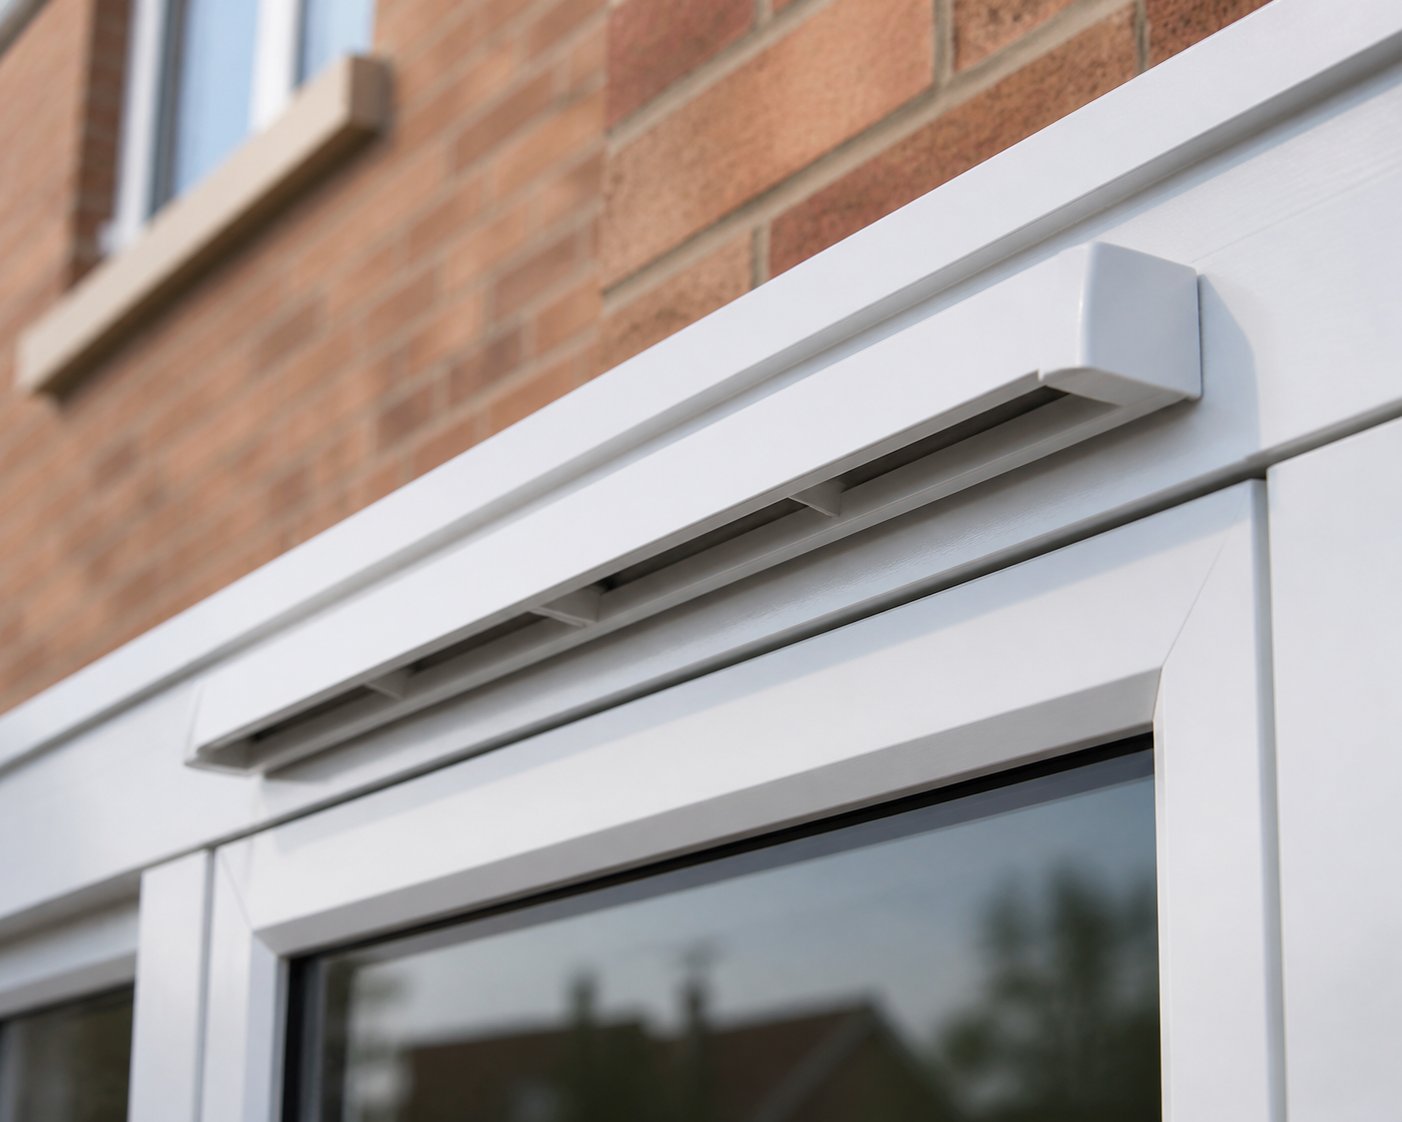
Look at the outside of almost any modern window and you will spot a slim, horizontal cover sitting along the top of the frame. Most people walk past it without a second thought. Yet that modest strip of plastic or aluminium — the trickle vent canopy — is doing more work than nearly any other visible component on the window's exterior face.
A trickle vent canopy is the external weatherproof cover mounted over the vent slot opening on the outside face of a window frame. It shields the opening from rain, wind-driven moisture, insects, and debris while still permitting a controlled stream of background airflow into the building.
That definition is short, but every word earns its place. The canopy is not the entire trickle vent — it is only the external cover. Inside the frame, a separate controllable grille (often called a hit-and-miss slider) lets occupants open or close the airflow path. Between these two parts sits the vent slot or sleeve routed through the frame's head rail. Together, these three components form the complete trickle vent assembly. The canopy is simply the outermost piece of that system.
Why does the distinction matter? Because homeowners, contractors, and even professional specifiers routinely confuse the canopy with the full vent assembly. Someone searching for a "replacement trickle vent" might actually need only a new external cover — or they might need the entire three-part kit. Mixing up these terms leads to wrong orders, incompatible parts, and wasted time. A canopy designed for one manufacturer's frame profile will not necessarily clip onto another brand's window, even when both frames are made from the same material. Knowing exactly which component you need is the first step toward getting the job done right.
Imagine the vent slot on a window frame without any cover at all. Every rain shower drives water straight into the frame cavity. Wind pushes dust and leaves into the opening. Insects find a direct route indoors. Within a single season, the unprotected slot would cause water damage, blockages, and compromised indoor air quality.
The canopy prevents all of that. Its baffled channels and drainage features deflect rain while allowing air to pass through. As Sternfenster explains, the hooded or canopy design "helps shield the vent from rain, wind-driven moisture and debris, while often incorporating insect screens to prevent pests from entering." It is the first line of defence, and it faces the toughest conditions — direct UV exposure on south-facing elevations, freeze-thaw cycles in winter, and constant wind pressure throughout the year.
That relentless exposure makes the canopy the component most likely to crack, discolour, or lose its clips over time. A failed internal grille is an inconvenience; a failed canopy is a leak waiting to happen. And because building regulations in many jurisdictions require background ventilation in habitable rooms, a damaged or missing canopy can quietly push an otherwise compliant window out of specification.
This article walks through everything you need to know about this small but consequential part: how the full vent assembly works, which regulations drive canopy selection, how frame material shapes your options, how to measure for a replacement, how to troubleshoot common failures, what acoustic canopies bring to the table, and how canopy-based ventilation stacks up against alternative approaches. The goal is straightforward — stop guessing and start making informed decisions.
Every one of those topics hinges on understanding the anatomy of the trickle vent system itself, and that is exactly where the canopy's role becomes clearest.
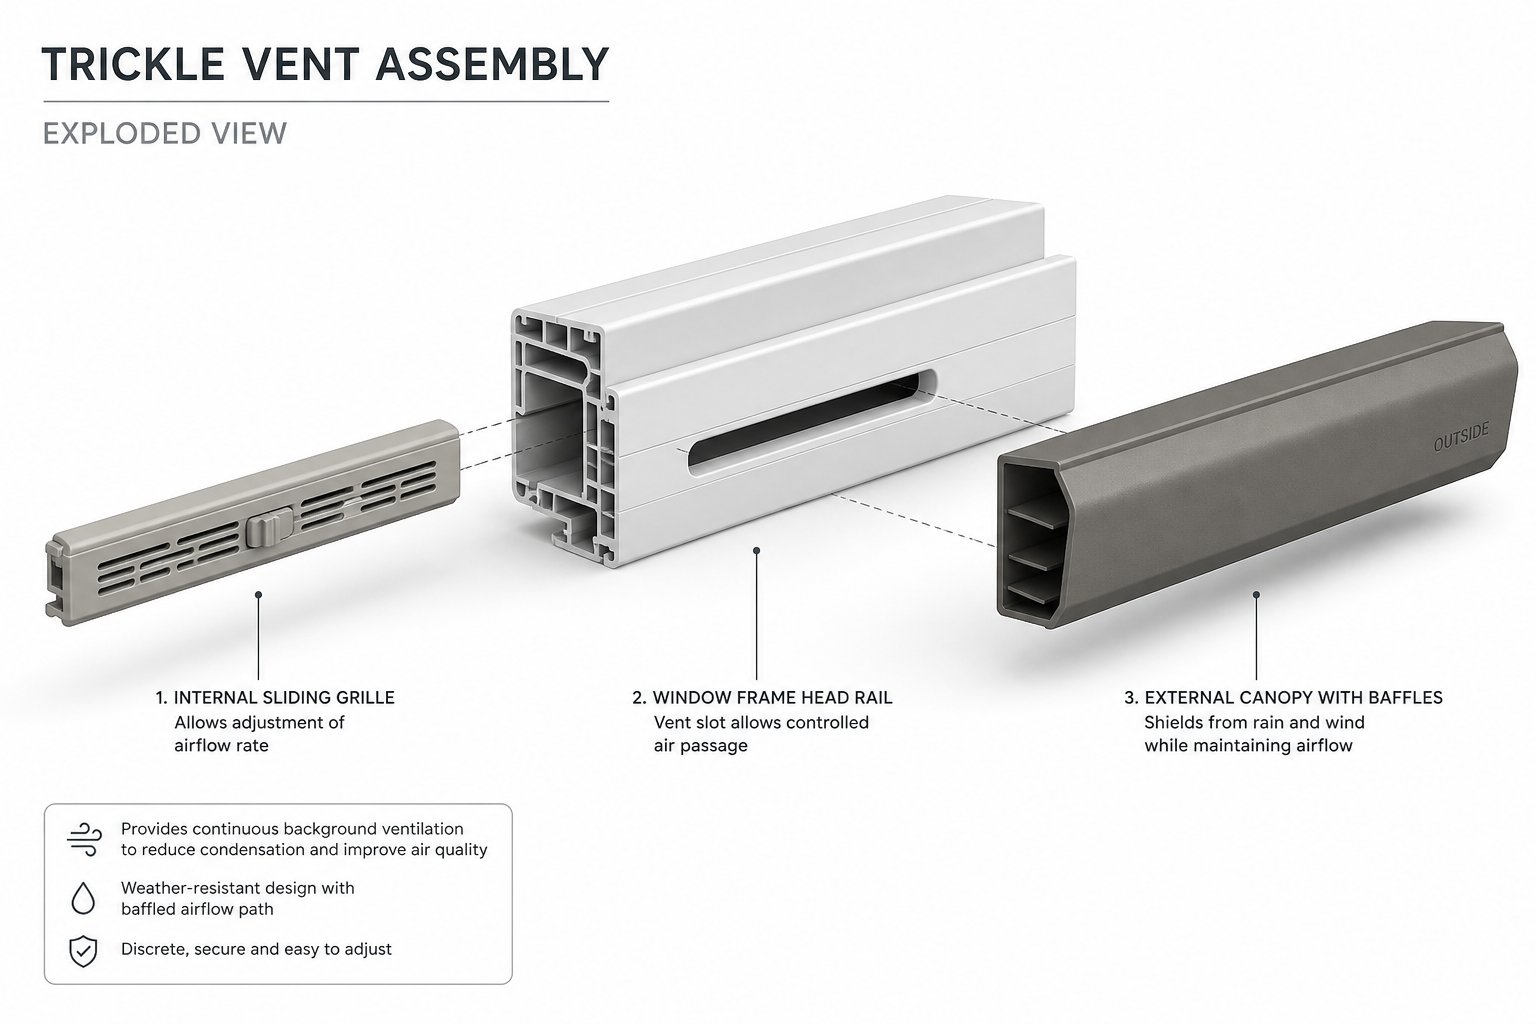
Strip a trickle vent down to its essentials and you find three distinct layers, each with a separate job. Most guides lump these layers together under a single label, which is exactly how wrong parts end up in shopping baskets. When the trickle vent system components are explained individually, selection, troubleshooting, and replacement all become dramatically simpler.
Picture yourself standing inside a room, looking up at the head of a window frame. You will see the internal grille — typically a slotted cover with a sliding mechanism. Step outside and look at the same window from the street, and you will see the canopy. Between those two visible pieces sits a channel hidden inside the frame itself. Each layer performs a distinct function:
Air travels this path in one direction during normal operation: it enters the baffled channels of the canopy, passes through the frame slot, and emerges past the internal grille into the room. Each layer adds a line of defence. The canopy handles weather. The frame slot sets the physical airflow limit. The internal grille hands control to the occupant.
Here is the detail that trips up most buyers: the canopy's baffle geometry, drainage channels, and material composition directly determine the system's equivalent area (EA) — the standardised measure of how much airflow the vent delivers at a given pressure difference. Two canopies that look identical from the street can have very different EA values because their internal baffle paths differ in length, angle, or cross-section. That is why the trickle vent equivalent area depends on the canopy as much as on the slot itself. Replace a canopy with a different manufacturer's model, and the tested EA may no longer match what building control expects.
Resistance to wind-driven rain follows the same logic. A canopy with longer, more tortuous baffle paths keeps water out more effectively — but those same paths create more friction against airflow, which can reduce the overall EA. Good canopy engineering balances both demands, delivering weather protection without strangling ventilation.
Not all canopies attach to the frame in the same way. The two primary configurations serve different scenarios, and confusing them leads to compatibility headaches.
A surface-mounted trickle vent canopy sits directly on the outer face of the frame, secured with screws or snap-on clips. You will see a visible canopy profile projecting slightly from the frame surface. This is the configuration most commonly found in retrofit projects — when a homeowner or contractor needs to add background ventilation to an existing window that either lacks a vent or needs a replacement cover. Surface-mounted units are also popular in timber frames, where the canopy screws into the head rail over a routed slot.
A through-frame trickle vent canopy, by contrast, is integrated into the window profile during manufacture. In many uPVC systems, the frame extrusion includes a dedicated channel that accepts a specific canopy designed to click or slide into the profile. The result is a flush, streamlined appearance where the canopy barely protrudes beyond the frame line. As HGW Solutions describes, frame-integrated vents are built directly into the extrusion profile, making them almost invisible from a distance — but they must be part of the initial window design and cannot be added later.
Sounds like a purely cosmetic difference? It goes deeper than that. Through-frame canopies are tested as part of the complete window system, meaning their EA, weather resistance, and acoustic performance are validated for that specific profile. Swap in a surface-mounted canopy from another manufacturer and you lose that tested certification. For new-build projects where building control inspectors check ventilation compliance, this distinction can be the difference between a sign-off and a rejection.
For homeowners replacing a damaged cover, the practical takeaway is simple: identify whether your existing canopy is surface-mounted or integrated before ordering a replacement. A surface-mounted unit can usually be sourced independently. An integrated one almost always needs to come from the original window system manufacturer — or a verified compatible supplier.
The canopy configuration also hints at a bigger question lurking behind every replacement or specification decision: what do building regulations actually require from the vent system, and how does the canopy factor into compliance?
A trickle vent canopy might look like a minor cosmetic detail on the outside of a window, but building regulations treat it as something far more consequential. In England and Wales, the law requires adequate background ventilation in habitable rooms — and the canopy is a tested, load-bearing part of the system that delivers it. Get the canopy wrong, and the entire vent assembly may fail to meet its certified performance. That is not a theoretical risk; it is a compliance issue that can stall building control sign-offs and leave homeowners exposed to moisture problems.
Approved Document F — the statutory guidance supporting Part F of the Building Regulations in England — sets out how dwellings must be ventilated to maintain acceptable indoor air quality. Trickle vents in window frames are one of the most widely used routes to compliance, particularly under what the document calls System 1: background ventilators combined with intermittent extract fans in wet rooms.
The critical metric is equivalent area (EA), measured in square millimetres. EA quantifies how much airflow a ventilator delivers under a standardised pressure difference. Regulations specify minimum EA values that vary by room type, reflecting the different ventilation demands of bedrooms, living spaces, kitchens, and bathrooms. You will notice that habitable rooms generally require larger equivalent areas than wet rooms, because they rely on background ventilators as the primary source of fresh air rather than on extract fans.
Here is a summary of typical minimum equivalent area requirements by room type for dwellings using background ventilators with intermittent extract, based on the guidance framework in Approved Document F, Volume 1. Always confirm specific values against the current edition of the document, as figures may be updated:
| Room Type | Typical Minimum Equivalent Area (EA) | Notes |
|---|---|---|
| Bedroom | 8,000 mm² | Background ventilator required in each bedroom |
| Living Room | 8,000 mm² | Background ventilator required; larger rooms may need more |
| Kitchen | 8,000 mm² | Also requires intermittent or continuous extract |
| Bathroom / Shower Room | 4,000 mm² | Extract fan usually provides primary ventilation |
| Utility Room | 8,000 mm² | Treated similarly to kitchens under most guidance |
Why does the canopy matter here? Because the EA printed on a vent's data sheet is not determined by the frame slot alone — it is the result of testing the complete assembly, canopy included. Swap a canopy with a longer baffle path or a narrower opening and the actual airflow drops, potentially pulling the installed EA below the regulatory minimum. The canopy is not optional decoration; it is a functional part of a tested system that must deliver a specified equivalent area to satisfy trickle vent canopy compliance requirements.
The official FAQ for Approved Document F, Volume 1 reinforces how seriously regulators take this. It explicitly states that building regulations requirements "must be met in full" — a homeowner cannot sign a disclaimer opting out of background ventilation, and a night-latch position on a window does not qualify as an acceptable substitute. Purchasing an indemnity policy is not a workaround either. If the vent system, including its canopy, does not deliver the required EA, the installation is non-compliant. Full stop.
The compliance picture changes depending on whether you are dealing with a new-build project or a retrofit scenario — and the canopy sits at the centre of both.
In new-build construction, trickle vents are specified at the design stage. Architects and window suppliers select a vent system — internal grille, frame slot, and canopy — that has been tested as a complete unit. The tested EA, weather resistance rating, and acoustic performance are documented and submitted to building control as part of the ventilation strategy. Everything is matched from the start: the canopy is purpose-designed for the frame profile, the clip geometry aligns with the extrusion, and the baffle configuration is validated. There is little room for error because the system arrives pre-certified.
In retrofit scenarios, things get more complicated. When a homeowner replaces windows or needs to swap out a damaged canopy on existing frames, the replacement component must match the original system's performance. The official FAQ confirms that when replacing windows, ventilation must not be made "less satisfactory" as a result of the work. A canopy sourced from a different manufacturer — even one that physically clips onto the frame — may have different baffle geometry and therefore a different EA. If the original vent delivered 8,000 mm² and the replacement canopy restricts airflow to 6,500 mm², the window no longer meets the minimum equivalent area trickle vent by room type that the regulations demand.
Retrofit trickle vent canopy regulations also come into play when adding ventilation to older windows that never had vents. As Colin's Sash Windows explains from practical installation experience, retrofitting is possible in nearly all windows — the real question is choosing the right method for the specific frame. Slimline frame-fitted vents requiring as little as 18 mm of frame height, as well as glazed-in solutions for frames without adequate head rail space, both exist as viable retrofit routes. Regardless of the method chosen, the installed system still needs to hit the EA targets set out in Approved Document F.
One detail catches many installers off guard: the FAQ also clarifies that existing wall ventilators can count toward the required background ventilation. If a room already has a wall vent meeting the minimum EA, replacing the window without adding a trickle vent may still satisfy building regulations. This nuance matters because it can eliminate the need for a canopy altogether in certain retrofit situations — but only if the existing ventilation is documented and verified.
Improperly fitted or mismatched canopies are not just a performance issue; they are a regulatory liability. A window that left the factory with a certified EA can quietly fall out of compliance the moment someone fits an incompatible cover. For competent person scheme installers, certifying non-compliant work carries real consequences — the schemes are required to monitor registrants and take action against those who sign off work that does not meet the Building Regulations.
Regulatory compliance defines what a canopy must achieve. The next practical question is which canopy fits your specific window — and that answer depends entirely on what the frame is made of.
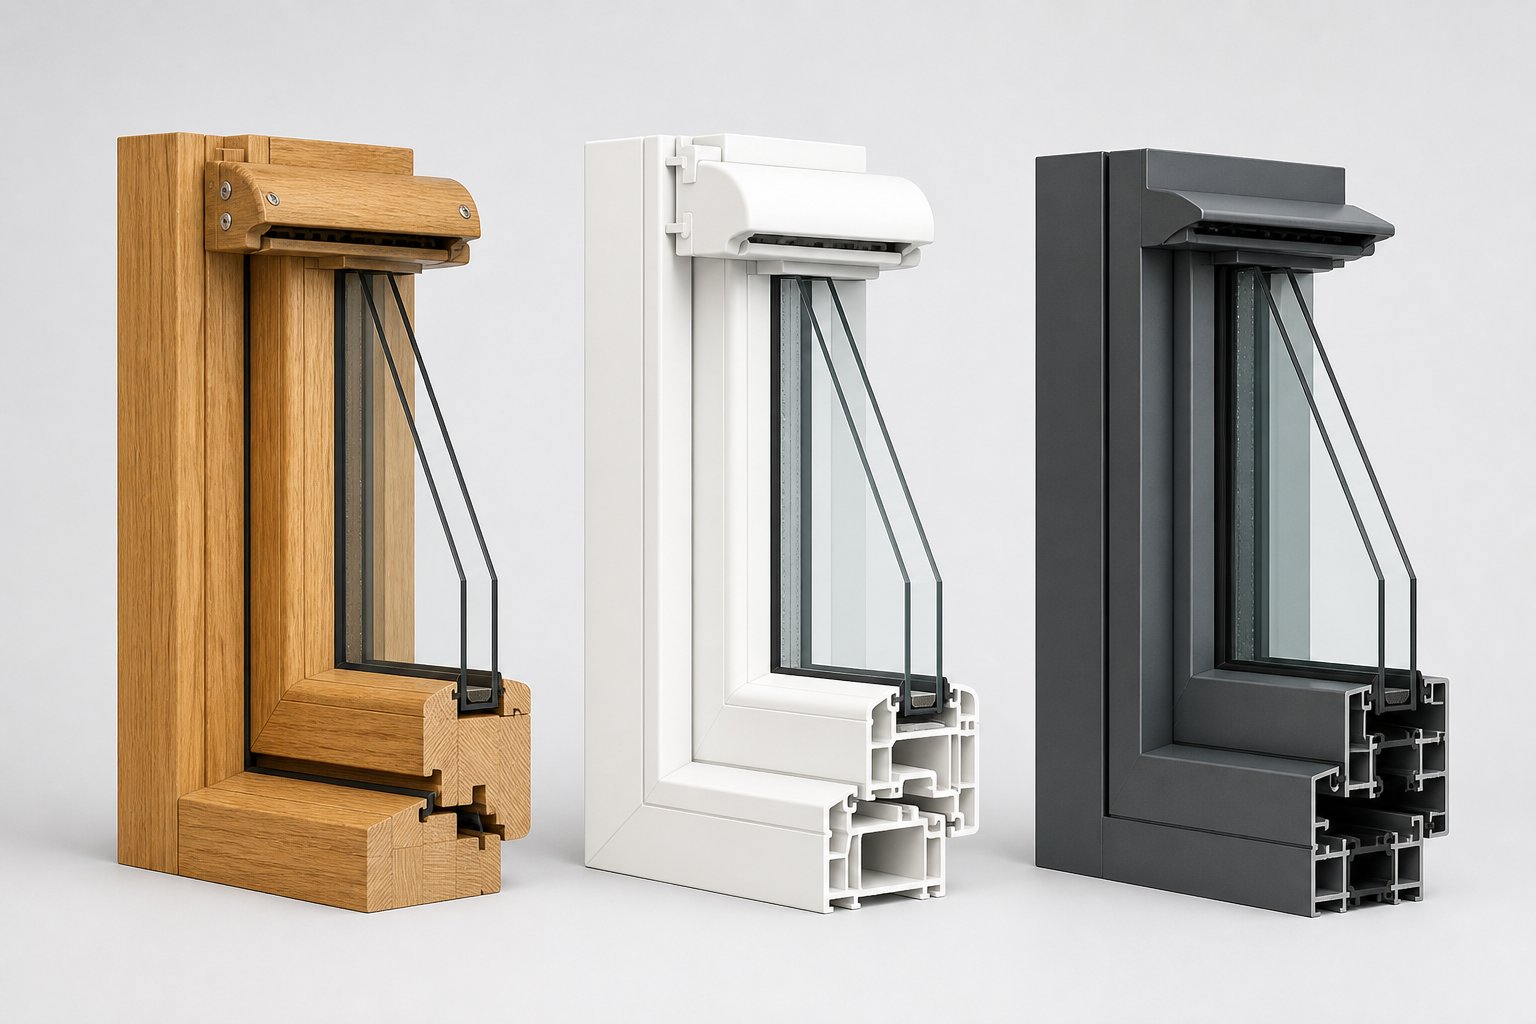
Frame material is not just a cosmetic detail — it dictates almost every practical decision you will face when selecting or replacing a trickle vent canopy. The profile shape, the way the canopy attaches, the fasteners it uses, the clip spacing, and even the colour-matching palette all change depending on whether your window is timber, uPVC, or aluminium. Pick a canopy designed for the wrong frame type and you will end up with a component that either refuses to fit or compromises weather performance the moment wind-driven rain hits the elevation.
The table below provides a side-by-side comparison of how canopy design differs across the three most common frame materials:
| Factor | Timber Frames | uPVC Frames | Aluminium Frames |
|---|---|---|---|
| Typical Mounting Method | Screw-fixed directly into head rail | Clip-on or snap-fit into extruded vent slot | Screw-fixed or slide-on; may require thermally broken fixings |
| Common Profile Shape | Flat-backed canopy with pre-drilled screw holes; adapts to various timber profiles | Contoured base shaped to match specific extrusion profiles | Narrow, low-profile canopy to suit slimline frame sections |
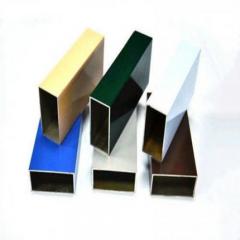
| Colour / Finish Options | Paintable white or brown; can be factory-sprayed or site-painted to match stained or painted timber | White, brown, caramel, anthracite grey, black, woodgrain foils | RAL colour powder coating; anodised silver or bronze; colour-matched to frame finish |
| Key Selection Considerations | Routed slot must be cut accurately; screw pilot holes prevent splitting; canopy length must match slot length | Must match specific manufacturer's clip geometry; universal canopies rarely fit all brands | Thermal break integrity must be maintained; narrower head rails limit canopy depth |
You will notice that every column tells a different story. A canopy that works beautifully on a timber casement is entirely wrong for a clip-on uPVC profile, and vice versa. Let's dig into each frame material to understand why.
Timber frames offer the most flexibility — and demand the most precision. A trickle vent canopy for timber frames is almost always screw-fixed. The installer routes a narrow slot into the top rail of the frame (or the slot is cut during manufacture), then positions the canopy over the slot on the external face and secures it with self-tapping screws or wood screws.
That sounds simple enough, but the details matter. The routed slot needs to be the correct width and depth to match the canopy's baffle geometry. Cut too narrow and the equivalent area drops; cut too wide and weather resistance suffers. Pilot holes should be drilled before driving screws into hardwood head rails — skip this step and you risk splitting the timber, which creates a moisture pathway that undermines the entire assembly.
Aesthetics play a larger role with timber windows than with any other frame type. Homeowners who have invested in painted or stained hardwood frames expect the canopy to blend in, not stand out. Most timber-compatible canopies ship in white or brown, but they can be painted on site or ordered with a factory-applied finish to match the frame colour. The Federation of Master Builders notes that wooden windows can accommodate trickle vents that are "discreetly incorporated" into the frame, preserving their aesthetic appeal. For heritage and conservation projects, this discreet integration is not just preferred — it may be a planning requirement.
One practical advantage of timber frames: because the canopy screws on rather than clipping in, there is less manufacturer lock-in. A replacement canopy from a different supplier can work as long as its slot dimensions and screw spacing align with the routed channel. That flexibility is a luxury you rarely enjoy with other frame materials.
If timber offers flexibility, uPVC frames offer convenience — with a significant catch. Most modern uPVC windows include an extruded vent slot moulded directly into the frame profile at the factory. The canopy simply clips or snaps onto this slot from the outside, requiring no screws, no drilling, and no routing. A clip-on trickle vent canopy for uPVC windows can often be installed in under a minute per window.
Here is the catch: that clip geometry is proprietary. Each window system house — the company that designs the uPVC profile — engineers its own clip shape, spacing, and retention mechanism. A canopy designed for one manufacturer's extrusion will not necessarily snap onto a different brand's frame, even when both frames are uPVC and both canopies look superficially identical. Imagine ordering what appears to be a matching white canopy online, only to discover that the clip tabs are 2 mm too far apart to engage the slots in your frame profile. This is one of the most common purchasing mistakes homeowners make.
The practical takeaway? Before buying a replacement canopy for a uPVC window, check for a manufacturer stamp or brand logo on the existing internal grille or on the inside of the old canopy. Many vent systems carry discreet branding that identifies the system house and model. If no branding is visible, measure the clip spacing and compare it to the product specifications of the canopy you intend to order. Some suppliers list compatible frame systems on their packaging — use that information rather than assuming a "universal" fit.
Colour matching on uPVC is typically straightforward. White remains the dominant choice, but the market has expanded dramatically into anthracite grey, black, Irish oak, rosewood, and other woodgrain foil finishes that coordinate with the coloured foils now common on uPVC frames. If your frames have a foil finish, look for a canopy with a matching foil wrap rather than a painted equivalent — foil-to-foil matching produces a far more convincing result under direct sunlight.
Aluminium windows present their own set of challenges. The defining characteristic of an aluminium window trickle vent canopy is the narrower profile it must accommodate. Aluminium frames are prized for their slim sightlines, but that slenderness leaves less room in the head rail for a vent slot and canopy. The canopy itself tends to be shallower and more compact than its uPVC or timber counterparts.
A subtler issue is thermal performance. Modern aluminium windows use a polyamide thermal break to prevent the frame from conducting heat (or cold) between inside and outside. Any canopy mounting that bridges that thermal break — for example, a long screw passing through the full depth of the frame — can create a cold spot and increase the risk of internal condensation. Well-designed aluminium canopy systems use fixings that anchor only into the external aluminium section, or they employ thermal isolators between the canopy and the frame. Colin's Sash Windows observes that aluminium frames are often described as "too slim" for trickle vents, but notes that the real limitation is usually a design choice rather than a feasibility barrier. Purpose-built aluminium canopies and glazed-in vent alternatives both address the challenge.
Finish options for aluminium canopies lean toward powder coating in RAL colours or anodised finishes. Because the frame itself is powder-coated, specifiers typically request the canopy in the same RAL code to ensure a seamless appearance. This is standard practice in commercial and architectural projects but can also be arranged for residential installations through most aluminium window suppliers.
Across all three materials, one rule holds true: identify your frame material, your vent slot type, and — ideally — the original vent manufacturer before purchasing a replacement canopy. A five-minute inspection of the existing components will save you from ordering the wrong part and discovering the mismatch only when you are standing on a ladder with a canopy that refuses to click into place.
Knowing the right frame material and canopy type gets you halfway to a successful replacement. The other half depends on accurate measurements — and that is where most DIY mistakes quietly begin.
A canopy that is 5 mm too short leaves a gap that lets rain straight through. One that is 10 mm too long may overhang the frame and refuse to clip in. Ordering blindly by colour and hoping for the best is the single fastest way to end up with a useless part and a second trip to the supplier. A proper replacement trickle vent canopy sizing guide boils down to four measurements and one piece of detective work — all achievable with a tape measure, a pair of eyes, and about ten minutes.
Before reaching for the tape measure, start with identification. Knowing how to measure a trickle vent canopy for replacement is only half the job; knowing what you are replacing is equally important. Follow this sequence:
You will notice that overall length alone is not enough. A canopy that matches on length but misses on fixing centres will leave you drilling new pilot holes at best — or discovering the screws land on an internal steel reinforcement at worst. Always cross-reference at least two measurements: fixing centres first, then overall length.
Trickle vent canopy standard sizes cluster around a handful of lengths that correspond to common window frame widths and vent slot configurations. The table below, drawn from data published in Handle Store's replacement vent sizing guide, shows how popular vent models map to key dimensions. Use it as a starting point for comparison, but always verify against your own measurements:
| Approx. Overall Length (mm) | Typical Fixing Centres (mm) | Common EA Rating (mm², 13/16 mm slot) | Typical Use Case |
|---|---|---|---|
| 265 | 242 | 2,000 | Small casements, secondary vents in bedrooms |
| 305 | 285 | 1,800 / 2,500 | Standard casement windows |
| 335 | 293 | 2,500 | Aluminium-bodied vents for mid-size frames |
| 352 – 366 | 335 | 4,600 | Wider casements needing higher airflow |
| 400 | 380 | 2,700 / 3,200 | Large casements and top-hung openers |
| 475 – 495 | 433 – 473 | 4,000 – 5,000 | Wide frames, higher EA requirements |
| 550 – 565 | 523 – 530 | 3,400 – 5,000 | Patio door frames, large fixed lights |
| 700 | 658 | 6,495 | Maximum airflow for rooms requiring 8,000 mm² EA (paired units) |
A few patterns stand out. Shorter canopies — around 265 mm to 305 mm — suit narrower casement windows and deliver lower equivalent areas, often in the 2,000 to 2,500 mm² range. For rooms that require an EA of 8,000 mm² under Approved Document F, a single short vent will not be enough; you may need two vents on separate windows or a single longer unit in the 550 mm to 700 mm range. This is why measuring the slot is only part of the job — you also need to confirm the EA target for the room before deciding whether a like-for-like canopy swap satisfies regulatory requirements.
Notice also how EA values vary between 13 mm and 16 mm slot widths. A 16 mm wide slot typically delivers a higher EA through the same canopy, simply because the wider opening permits more air through the baffle channels. If you are uncertain about your slot width, measure it directly — the difference between 13 mm and 16 mm is easy to misidentify by eye but significant for airflow calculations.
One term that causes persistent confusion is the difference between a "window vent cover" and a "canopy." In everyday language, people use them interchangeably. When ordering parts, though, "vent cover" sometimes refers to the internal grille rather than the external canopy. If an online listing says "trickle vent cover" without specifying internal or external, check the product images and dimensions carefully. The canopy will always be described with weather-facing features — baffles, drainage channels, insect mesh — while the internal cover will reference a sliding or hit-and-miss mechanism.
Then there is the trickle vent blanking plate — a small but essential accessory that many people overlook. Its purpose is simple: when a canopy is longer than the vent slot it covers, the blanking plate seals the unused portion of the canopy's airflow path. Without it, air bypasses the frame slot entirely and enters the gap between the canopy and the frame surface, defeating the weather resistance of the system. Blanking plates also come into play when two shorter slots sit beneath a single longer canopy; the plate blocks the section between the slots. If you are fitting a canopy that does not perfectly match your slot length, check whether blanking plates are included in the kit — and if not, order them separately.
So when is a straightforward canopy swap the right call, and when should you consider upgrading the entire vent system? A like-for-like replacement makes sense when the original internal grille and frame slot are both in good condition, the EA still meets the room's regulatory requirements, and a compatible canopy is available. Swap the canopy, confirm the clips or screws engage securely, and the job is done.
A full system upgrade becomes necessary in a few specific scenarios. If the internal grille's sliding mechanism is jammed or broken, replacing just the canopy leaves you with an uncontrollable vent. If the frame slot has degraded — cracked edges in a uPVC extrusion, or rot in a timber head rail — a new canopy will not seal properly against a damaged substrate. And if building regulations have changed since the window was installed, the original vent system's EA may no longer meet current minimums, making a higher-performance replacement the only compliant path forward.
Getting the measurements right and choosing between repair and upgrade prevents the most common ordering mistakes. But even a perfectly sized, correctly installed canopy can develop problems over time — and knowing how to diagnose those issues before they escalate is where practical ownership knowledge really pays off.
A trickle vent canopy lives outdoors, unprotected, year after year. It bakes in summer sun, freezes through winter nights, and absorbs the full force of wind-driven rain on exposed elevations. Sooner or later, something gives. The challenge is not whether problems will appear — it is figuring out exactly what has failed, whether the canopy itself is the culprit, and whether a quick repair will hold or a full replacement is the only sensible path forward.
When something goes wrong with a trickle vent, the symptoms usually fall into one of five categories. Each points to a different root cause — and each demands a different fix. Here is what to look for:
You will notice a pattern running through every item on that list: the first diagnostic step is always to determine whether the fault lies with the canopy, the internal grille, or the frame slot. A draught might be caused by an open slider inside. A leak might originate from a cracked frame rather than a failed canopy. Jumping straight to a canopy replacement without checking the other two components in the assembly wastes money and leaves the actual problem unresolved.
Some canopy issues are quick fixes. If you know how to fix a loose trickle vent canopy, you can often resolve the problem in minutes — press the canopy back into its clips until they click, or tighten the retaining screws a quarter turn. Replacing a single blanking plate that has fallen out is equally straightforward: slide or clip the new plate into the unused section of the canopy and confirm it sits flush.
Full replacement becomes the right call when the damage goes beyond a loose connection. A cracked canopy body cannot be reliably patched. Clips that have snapped off flush with the frame leave no engagement point for the canopy to grip. An obsolete clip system — where the original manufacturer no longer produces compatible parts — forces you to find a cross-compatible alternative or upgrade the complete vent assembly. As The Window Doctor points out, exact replacement designs can be tricky to source, but the range of styles on the market means a close match is almost always available.
One temptation to resist firmly: permanently sealing the canopy shut. It is understandable — a draughty, leaking vent feels like a problem that disappears if you fill the gap with silicone or mastic. Some draught-proofing services even suggest this approach. The short-term comfort gain is real. The long-term consequences are not trivial. Sealing a canopy removes the mandatory background ventilation that the vent system provides. In airtight modern homes, that background airflow is the primary mechanism for managing indoor humidity and preventing condensation. VENTI Group's research links failed or sealed vents directly to condensation, mould growth, and degraded indoor air quality — the very problems building regulations require vents to prevent. If a canopy is causing draughts or leaks, the correct response is repair or replacement, not elimination.
Beyond physical damage, there is one more dimension of canopy performance that many homeowners overlook entirely — and it becomes impossible to ignore the moment traffic noise, aircraft, or a busy street enters the picture.
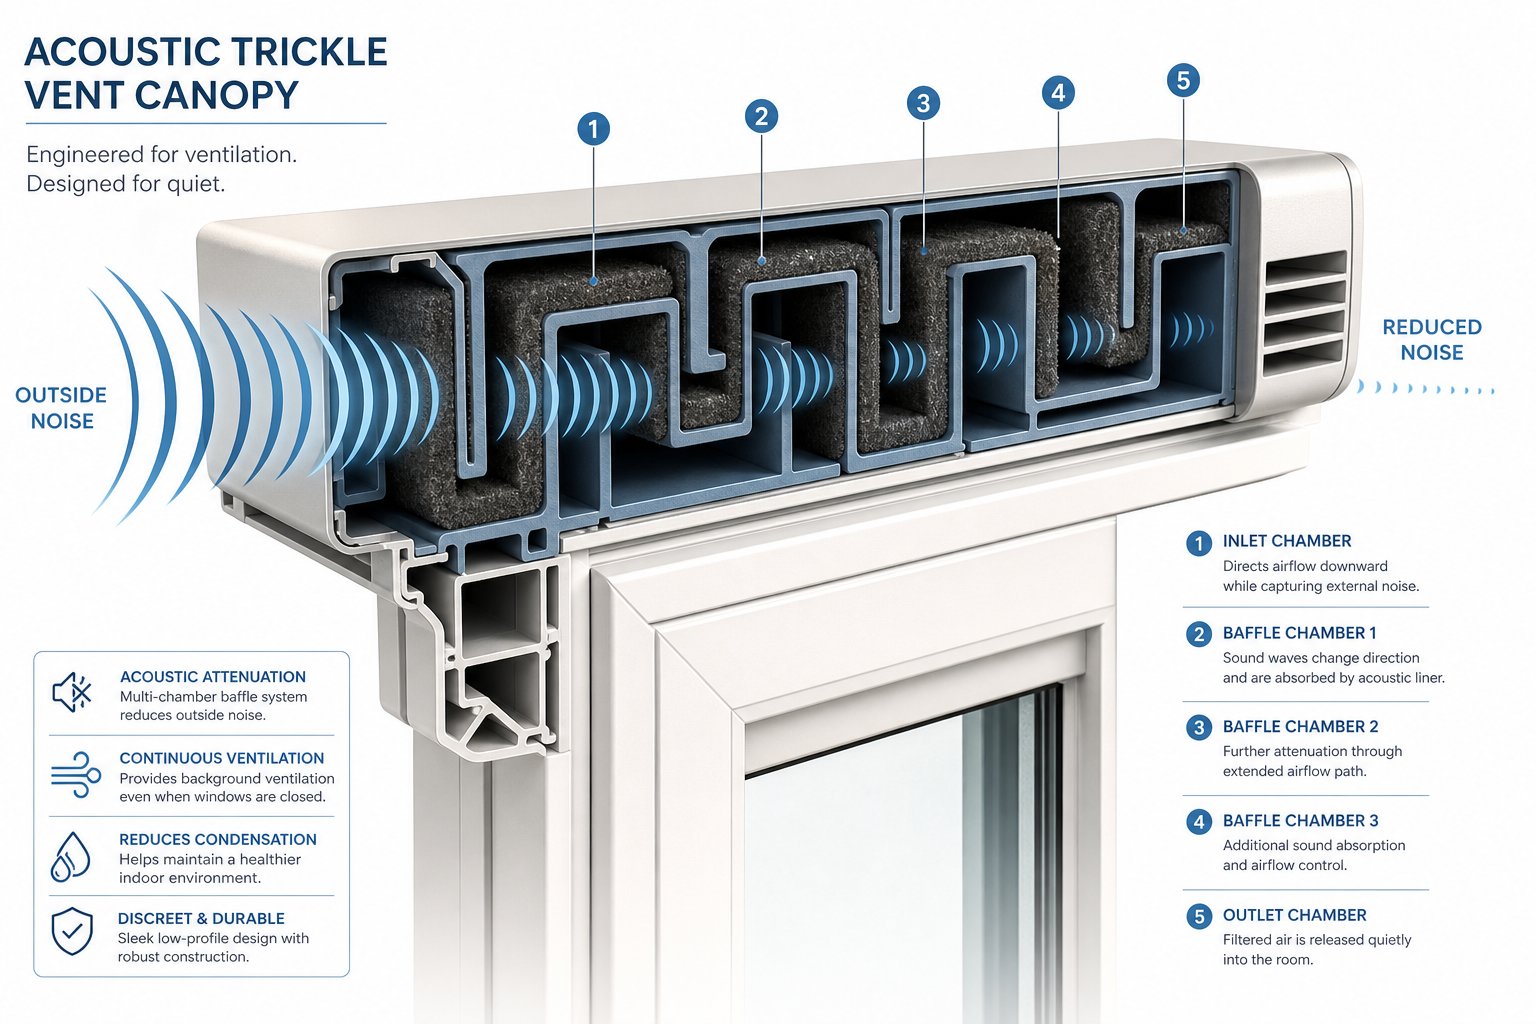
A standard trickle vent canopy does a fine job keeping rain and insects out. What it does not do — at all — is keep noise out. Those short, straight baffle channels that deflect water droplets barely slow a sound wave down. For a home on a quiet suburban street, that is perfectly acceptable. For a bedroom overlooking a dual carriageway, a flat above a late-night restaurant, or a living room under an airport flight path, it is a deal-breaker. The canopy that protects you from weather becomes the weak link in your building envelope's acoustic performance.
This is where acoustic trickle vent canopy noise reduction enters the picture — and where the external cover transforms from a simple weather shield into a precision-engineered sound attenuator.
Imagine sound as a ball rolling down a hallway. In a standard canopy, that hallway is short and straight — the ball reaches the other end almost instantly, barely losing speed. An acoustic canopy redesigns that hallway into a labyrinth. The ball has to navigate multiple turns, squeeze through narrow passages, and bounce off surfaces lined with energy-absorbing material. By the time it reaches the far end, most of its momentum is gone.
That analogy captures the three core design strategies acoustic canopies use to attenuate noise:
Some high-performance systems go a step further with a dual attenuator configuration — an acoustic canopy on the outside and an acoustic grille on the inside, working in tandem. Titon's guide to acoustic trickle vents describes this approach as combining a vent inside the door or window with a canopy outside, both with acoustic attenuators, to minimise noise transmission through the assembly. The dual setup effectively doubles the number of sound-attenuating surfaces in the air path without requiring a single oversized component.
Here is the tension that every acoustic canopy designer has to resolve: every feature that reduces noise also reduces airflow. A longer baffle path means more friction. Sound-absorbing linings narrow the available channel width. Additional chambers create more pressure drop. The vent still has to deliver the equivalent area mandated by building regulations — 8,000 mm² for habitable rooms, 4,000 mm² for bathrooms — or it fails compliance regardless of how quiet it makes the room.
Sound attenuation and airflow are inherently in tension. Every additional chamber, baffle turn, or layer of acoustic lining that reduces noise also increases resistance to air movement. Good acoustic canopy design does not eliminate this trade-off — it balances both demands so the vent meets regulatory airflow requirements while delivering meaningful noise reduction.
That balancing act has a visible consequence: acoustic canopies are physically larger than standard ones. The longer sound path requires more material, more depth, and more length. Where a standard canopy might project 16 to 20 mm from the frame face, an acoustic version can extend 30 mm or more. This has real implications for frame head clearance — if the window sits close to a lintel or reveal, there may not be enough room for the deeper profile. Aesthetically, the bulkier canopy is more noticeable from the street, which matters on projects where visual discretion is valued. Specifiers working on listed buildings or conservation area properties sometimes struggle to reconcile acoustic performance demands with planning restrictions on visible external alterations.
When you see an acoustic trickle vent canopy advertised as offering "noise insulation," the obvious question is: how much? The answer lives in a metric called Dn,e,w — the element-normalised level difference, weighted. This single-number rating, expressed in decibels (dB), tells you how many decibels of noise the vent reduces when tested under standardised laboratory conditions.
A higher Dn,e,w value means better trickle vent sound attenuation. For context, here is what different dB rating ranges translate to in practical terms, based on Titon's analysis of third-party testing data:
| Dn,e,w Rating Range | Performance Level | Practical Application |
|---|---|---|
| 30 – 40 dB | Moderate noise reduction | Suburban streets with light traffic; residential areas with occasional noise |
| 40 – 50 dB | Good noise reduction | Busy urban roads; properties near commercial zones; mixed-use developments |
| 50 dB and above | High noise reduction | Major transport corridors; flight paths; properties adjacent to railways or nightlife venues |
Those ratings are derived from rigorous laboratory testing. In the UK, acoustic performance is assessed under the BS EN ISO 10140 series, which measures sound reduction across frequencies from 100 Hz to 5,000 Hz. The vent — including its canopy — is installed in a test wall between a source room and a receiver room. A calibrated loudspeaker generates controlled noise on one side, and microphones measure how much reaches the other. The difference, adjusted for room acoustics, produces the Dn,e,w rating.
Two additional values often appear alongside the headline Dn,e,w figure: C and Ctr correction terms. These adjust the rating for specific noise types. The C term accounts for general background sounds (pink noise), while Ctr adjusts for low-frequency-dominant noise like traffic. A product listed as "Dn,e,w 44 dB (C; Ctr = -2; -3)" performs slightly less effectively against those specific noise profiles compared to its headline rating. For an acoustic ventilator for windows near roads, the Ctr value is the one to pay closest attention to, because road traffic generates significant low-frequency energy.
Testing should also break down performance by frequency band. Low frequencies (125–250 Hz) cover deep rumbles from heavy vehicles and distant industrial noise. Mid frequencies (315–1,000 Hz) capture most everyday traffic and conversation-range sounds. High frequencies (2,000–8,000 Hz) include sharper sounds like braking, alarms, and some aircraft noise. A vent might achieve excellent mid-frequency attenuation but offer limited protection against low-frequency rumble — a critical distinction for properties near rail lines or airports, where bass-heavy noise dominates.
Why does all of this matter for the canopy specifically? Because the canopy is tested as part of the complete vent assembly. A different canopy — even one that physically fits the same slot — changes the baffle path, alters the airflow resistance, and shifts the acoustic performance. The Dn,e,w rating on a product data sheet applies only to the exact canopy-and-vent combination tested. Swap the canopy, and the published trickle vent canopy noise insulation performance data no longer applies.
For architects and contractors working on noise-sensitive residential and commercial projects, this means specifying both halves of the assembly together — not just the internal vent, and not just the canopy. Manufacturers who publish tested airflow data alongside verified acoustic ratings make this process far simpler. Shengxin Aluminium's uPVC Passive Ventilation System, for instance, provides sound-reduction data and airflow performance on the same product page, allowing specifiers to cross-reference acoustic needs against equivalent area requirements without hunting through separate technical documents. That kind of consolidated data is exactly what building control expects to see when reviewing a ventilation strategy for a site near a noise source.
Professional specifiers typically evaluate acoustic trickle ventilators against a site-specific noise survey. The survey establishes external noise levels by frequency band, and the specifier then selects a vent whose Dn,e,w rating (with relevant C or Ctr corrections) will bring internal levels below the thresholds recommended in BS 8233:2014 — no more than 35 dB in habitable rooms during the day, and below 30 dB for restful sleep. When the external noise environment is defined and the vent's tested performance is documented, the selection becomes an engineering calculation rather than a guess.
Acoustic canopies solve one specific problem — noise entering through the ventilation opening. They do not replace high-performance glazing, sealed frames, or insulated walls. They work alongside those elements. And for buildings where even an acoustic canopy cannot deliver enough attenuation — or where passive ventilation itself is the limiting factor — entirely different ventilation strategies may need to come into play.
A trickle vent canopy is, by design, the simplest approach to background ventilation. It has no moving fan blades, no wiring, no ductwork, and no energy consumption. For decades, that simplicity has made it the default compliance route for residential projects across the UK. But "default" does not mean "only" — and in certain building types, noise environments, or energy performance targets, a canopy-based system is simply not the right tool for the job.
Understanding the background ventilation alternatives to trickle vents is not about finding fault with canopies. It is about recognising where each approach excels, where it falls short, and which factors should drive your decision. Think of it as choosing the right tool from a toolbox rather than insisting one wrench fits every bolt.
Four main alternatives compete with canopy-based trickle vents in the background ventilation space. Each takes a fundamentally different approach to moving air through a building:
Each of these alternatives addresses background ventilation from a different angle. The comparison table below maps them against the factors that matter most in real project decisions:
| Factor | Trickle Vent Canopy | Window Head Ventilator | Passive Stack (PSV) | MEV / dMEV | MVHR | Over-Frame Ventilator |
|---|---|---|---|---|---|---|
| Installation Complexity | Low — clip-on or screw-fix to frame head | Moderate — requires deeper head rail or additional housing | High — vertical ductwork through floors and roof | Moderate — fan unit plus ducting to wet rooms | High — central unit, full duct network, commissioning | Low to moderate — wall fixing above window; may need core drilling |
| Indicative Cost Range | Low (per unit, typically under £15-£30) | Low to moderate (£20-£60 per unit) | Moderate (ductwork and terminals per room) | Moderate to high (fan unit plus installation) | High (£2,000-£6,000+ for whole-house system) | Low to moderate (£30-£80 per unit plus fitting) |
| Suitability for Retrofit | Excellent — fits existing frames or can be added with minimal modification | Good — if sufficient head clearance exists above window | Poor — requires duct routes through occupied floors | Good — dMEV units can be fitted room by room | Poor to moderate — needs duct network; best planned at design stage | Very good — avoids frame modification entirely |
| Noise Attenuation | Minimal (standard); moderate to high (acoustic variants) | Moderate to high (larger body allows longer baffle paths) | Minimal through duct terminals | Fan noise is a factor; some models include acoustic insulation | Good — no direct opening to outside; filters also dampen sound | Moderate (standard); high (acoustic models available) |
| Maintenance Requirements | Very low — occasional cleaning of baffles | Low — similar to trickle vents | Low — no moving parts; terminal cleaning only | Moderate — fan servicing, filter replacement | Moderate to high — filter changes, heat exchanger cleaning, fan servicing | Low — periodic wipe-down of grille and baffles |
| Regulatory Acceptance | Standard compliance route under Approved Document F, System 1 | Accepted as background ventilator; higher EA per unit | Accepted under System 2 in Approved Document F | Accepted under System 3 in Approved Document F | Accepted under System 4; increasingly favoured for airtight builds | Accepted as background ventilator; must meet EA requirements |
| Energy Input Required | None — fully passive | None — fully passive | None — driven by buoyancy | Yes — continuous low-wattage fan | Yes — supply and extract fans run continuously | None — fully passive |
Several patterns emerge from that comparison. Passive approaches — trickle vents, head ventilators, over-frame units, and PSV — require no energy input and have minimal maintenance needs. Mechanical systems deliver far greater control and can recover heat, but they demand more infrastructure, more cost, and ongoing servicing. Every step up in performance comes with a corresponding step up in complexity.
For the vast majority of standard residential projects — replacement windows in existing homes, typical new-build houses, and straightforward extensions — trickle vent canopies remain the most practical solution. They satisfy Approved Document F requirements under System 1, they cost a fraction of any mechanical alternative, and they require no electrical connection. As Door and Window Experts notes, many installers and manufacturers default to trickle vents because they represent the simplest and most cost-effective means of demonstrating compliance — and in most situations, that default is entirely justified.
The picture shifts in several specific scenarios:
Worth noting: these alternatives do not always replace canopy-based vents entirely. Many mechanical systems still rely on passive background ventilators — including trickle vents with canopies — to provide makeup air. An MEV system, for example, extracts air from kitchens and bathrooms using fans, but the replacement air entering bedrooms and living rooms still flows through trickle vents. In these hybrid configurations, the canopy remains a critical component even though the overall strategy is classified as mechanical.
The honest reality is that no single ventilation method suits every building, every budget, and every noise environment. A canopy-based trickle vent is the right choice more often than not — but "more often than not" is not "always." Recognising the boundary between where a canopy excels and where an alternative takes over is what separates an informed specification from a default assumption.
With that landscape of options mapped out, the practical question becomes personal: which approach fits your specific project, and what steps ensure you select the right canopy — or the right alternative — without second-guessing the decision halfway through installation?

You have walked through the anatomy of the vent system, the regulations that govern it, the frame materials that constrain it, the measurements that define it, the problems that plague it, the acoustic options that enhance it, and the alternatives that sometimes replace it. Each of those threads feeds into one practical moment: standing in front of a window — or a specification spreadsheet — and making a decision. How do you choose the right trickle vent canopy without second-guessing yourself at every turn?
The answer depends on who you are. A homeowner replacing a cracked cover on a single bedroom window faces a fundamentally different set of priorities than an architect specifying ventilation for a 200-unit residential development next to a railway line. Both need the right canopy. Neither can afford to get it wrong. But the route from question to answer looks very different for each.
Whether you are a first-time homeowner or a seasoned contractor, the trickle vent canopy selection checklist below works as a sequential filter. Each step narrows your options until you arrive at a specific product that fits, performs, and complies. Skip a step and you risk ordering something that fails on a dimension you did not check.
Run through those six steps in order and you will arrive at a product that fits your frame, delivers the airflow your room needs, handles the noise environment your site presents, resists the weather your elevation faces, and looks right when you step back and inspect the finished job. That is how to choose the right trickle vent canopy — not by guessing, not by grabbing the cheapest listing online, but by filtering systematically through the variables that actually matter.
Homeowners doing a like-for-like canopy replacement can often work from a brand name and a tape measure. Professional specifiers — architects, building services engineers, window system suppliers, and main contractors — operate under a different set of pressures entirely. Building control officers do not accept "it looked like the right one" as a compliance argument. They want documentation.
Specifying trickle vent canopies for building control requires a paper trail that connects the selected product to the project's ventilation strategy. At minimum, specifiers need the following from their canopy manufacturer:
Manufacturers who consolidate all of this information into accessible product documentation make the specifier's job dramatically easier. Shengxin Aluminium's Window Trickle Vents page, for example, brings tested airflow data, sound-reduction performance, weather resistance information, and custom project configuration options into a single resource — the kind of one-stop reference that allows a specifier to verify compliance across multiple checklist items without chasing separate documents from different departments. For architects and contractors managing noise-sensitive residential or commercial projects, that consolidation saves time and reduces the risk of specifying a canopy that checks one box while quietly failing another.
Other established manufacturers — including UK-based suppliers like Titon and Glazpart — offer similar technical documentation through their product platforms. The common thread among reliable suppliers is transparency: they publish independently verified data, they identify compatible frame systems explicitly, and they do not require specifiers to guess at performance figures based on physical appearance alone.
Specifiers should also consider the supplier's ability to support volume projects over time. A residential development that takes 18 months to build needs consistent product availability throughout the construction programme. Lead times, minimum order quantities, and the supplier's track record for stock reliability all factor into the decision. A technically perfect canopy that goes out of stock halfway through a project creates site delays that no amount of verified performance data can offset.
Whether you are a homeowner matching a replacement canopy to a bedroom window or a project architect assembling a ventilation compliance package for a 15-storey apartment block, the underlying logic is the same: define what you need, measure what you have, verify what you are buying, and document the result. The six-step checklist handles the first three. The manufacturer's technical data handles the fourth. Together, they turn what feels like guesswork into a repeatable, defensible process — and they ensure the small, often-overlooked cover on the outside of a window frame does exactly what building regulations, acoustic standards, and common sense all demand of it.
Yes, in most cases you can replace only the external canopy if the internal hit-and-miss grille and the frame slot are both in good condition. The key is matching the replacement canopy to your original system — check for a manufacturer stamp on the existing grille or old canopy, then confirm the fixing centres, overall length, and profile depth before ordering. A like-for-like canopy swap is the quickest and most cost-effective fix, but if the frame slot is damaged or the internal grille is jammed, a full vent assembly upgrade is the better route.
Water ingress typically stems from a cracked canopy body, failed seals between the canopy and the frame, or blocked drainage weep slots along the canopy's underside. UV degradation on sun-facing elevations often causes hairline cracks that worsen over time. Start by inspecting the canopy for visible damage and clearing any debris from the drainage channels. If the canopy body is split or warped, a full replacement is necessary — applying sealant over structural cracks is only a short-term measure. Importantly, never permanently seal the canopy shut, as this removes the mandatory background ventilation your building regulations require.
Trickle vent canopies themselves are not individually mandated, but Approved Document F in England and Wales requires adequate background ventilation in habitable rooms. Trickle vents — including their external canopies — are one of the most common compliance routes. The canopy is a tested part of the vent assembly that must deliver a specified equivalent area (EA). Fitting an incompatible or damaged canopy can reduce the system's EA below the regulatory minimum, potentially making the window non-compliant. Systems like Shengxin Aluminium's uPVC Passive Ventilation System provide tested airflow and performance data that help specifiers verify compliance against these requirements.
A standard canopy uses short, straight baffle channels designed primarily to deflect rain and debris. An acoustic canopy incorporates sound-absorbing linings, longer multi-chamber baffle paths, and engineered chamber geometries that reduce noise transmission while maintaining the required equivalent area for ventilation. Acoustic canopies are physically larger — projecting 30 mm or more from the frame versus 16-20 mm for standard versions — because the extended sound path demands more material. Performance is measured as Dn,e,w in decibels, with higher values indicating greater noise reduction. Properties near busy roads, railways, or flight paths typically benefit from acoustic variants rated 40 dB or above.
Each uPVC window system manufacturer uses proprietary clip geometries, so a canopy designed for one brand will not necessarily fit another — even if both frames are uPVC. Start by looking for a manufacturer stamp or brand logo on the existing internal grille or old canopy. If no branding is visible, measure the clip spacing and cross-reference it against the product specifications of the canopy you plan to order. Common brands include Titon, Greenwood, and Glazpart, each with distinct clip profiles. Avoid assuming any canopy labelled 'universal' will fit; always verify at least two measurements — fixing centres and overall length — before purchasing.



 Інтернет-сервіс
 0086 136 3563 2360
 sales@sxalu.com
 +86 136 3563 2360
 Українська
 English
 français
 Deutsch
 русский
 español
 português
 العربية
 ไทย
ไทย Việt
Việt