
Ever wondered why paint sometimes peels off aluminum, even after you’ve used a primer? The answer often lies in the unique chemistry of aluminum and the type of primer you choose. Let’s break down what makes a self-etching primer for aluminum different, how it works, and why it matters for your project in 2025 and beyond.
When you hear "self-etching primer," think of a product designed to do more than just stick to bare metal. These primers contain acidic components—commonly phosphoric acid—and zinc pigments. When sprayed onto aluminum, the acid reacts with the surface, microscopically etching the naturally occurring oxide layer. This creates a series of tiny anchor points, allowing the primer to bond more effectively to the metal. The zinc pigment further enhances adhesion and provides some corrosion-inhibiting properties.
So, what does self etching primer do? It chemically prepares the surface, promoting better primer and topcoat adhesion than mechanical abrasion alone. But it’s important to recognize that this primer is not a complete corrosion barrier by itself. As shared by experienced builders, aluminum self etching primer is best used as part of a full paint system, not as a standalone protective layer (reference).
Aluminum is a reactive metal. The moment it’s exposed to air, it forms a thin, hard oxide skin. While this layer offers some natural protection, it can prevent paints or coatings from sticking well. Self-etching primer solves this by using acid to break up and partially dissolve the oxide, allowing the zinc and resin system to penetrate and create a chemical bond. Imagine the primer creating a molecular handshake between the aluminum and the paint system—this is what makes etching primer for aluminum so effective for initial adhesion.
Key takeaway: Self-etching primers create a chemical key for paint to grip onto, not just a roughened surface. This is crucial for reliable adhesion, especially on complex or thin aluminum parts.
Here’s where things get interesting. Epoxy primers and self-etching primers both help paint stick, but they work differently:
Still unsure which to use? Here’s a quick checklist:
Note: For visual learners, a schematic diagram showing how resin, acid, and pigment interact at the aluminum interface can clarify this process. Picture the acid dissolving the oxide, zinc filling the gaps, and resin sealing the surface.
As we move toward 2025, the coatings industry is shifting away from chromate-based systems to more sustainable, high-adhesion alternatives. Understanding the science behind aluminum self etching primer is essential for making informed, environmentally responsible choices.
Next up: We’ll dive into the exact surface preparation steps that maximize primer performance, walk through application best practices, and compare real-world lab data so you can choose the right system for your needs.
Ever started painting aluminum, only to watch the finish bubble or peel away months later? If so, you’ve experienced firsthand why prep is everything. The secret to making a self etching primer for aluminum truly perform—and your paint job last—lies in a careful, step-by-step surface preparation process. Let’s break down exactly how to prime aluminum for paint, using proven methods trusted by professionals and backed by science.
Aluminum’s natural oxide layer forms within seconds of exposure to air. While it protects against corrosion, it also blocks paint and primer from bonding. To get a durable finish, you must remove not only dirt and grease, but also this invisible oxide skin. Here’s a practical, field-tested playbook:
Sounds complex? Imagine prepping a boat hull or bike frame: start with 80–120 grit to break through any old finish, then finish with 220–320 grit for a paint-ready surface. For complex parts, light blasting with 80–120 mesh alumina at low pressure creates a consistent profile without warping thin sections (Shengxin). Avoid polishing to a mirror finish—overly smooth surfaces reduce primer "bite."
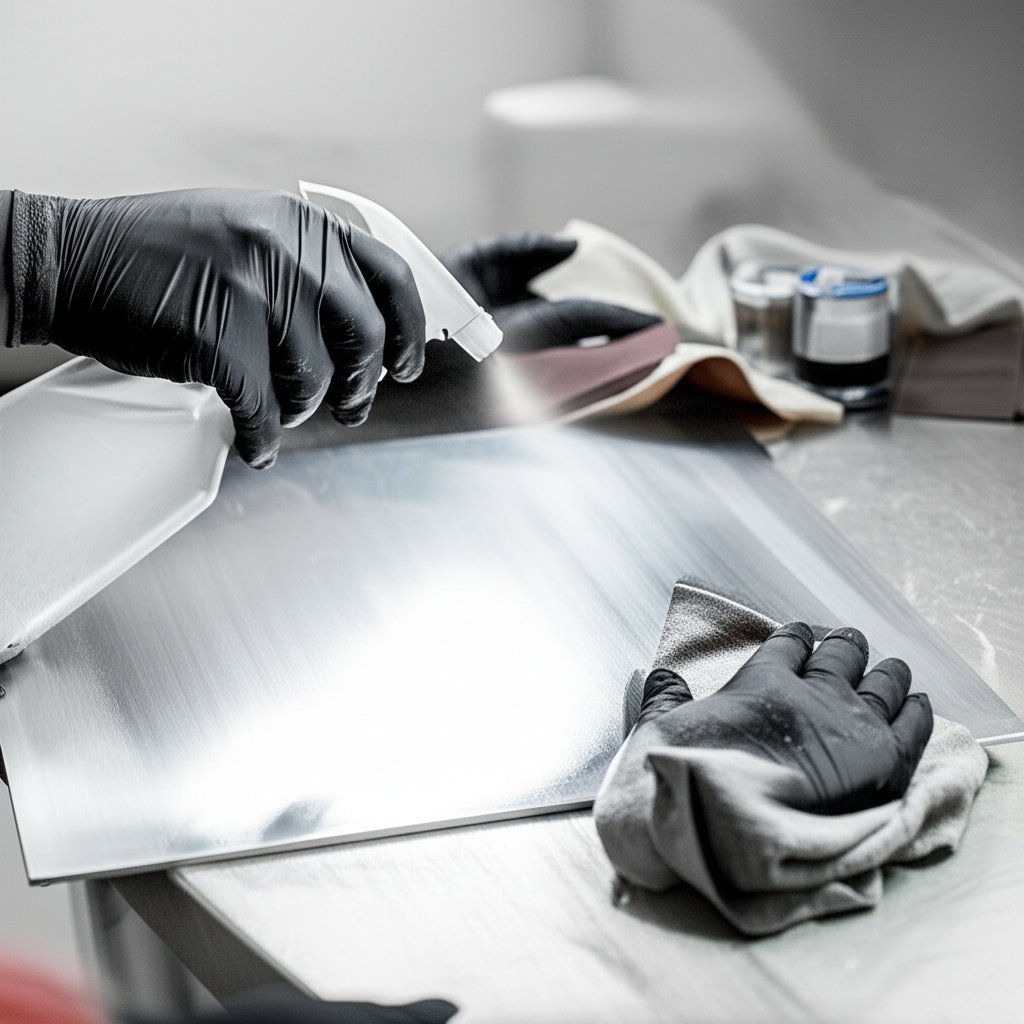
After prepping, treat your aluminum like it’s in a cleanroom. Even fingerprints can cause adhesion failures. Always wear nitrile gloves and use lint-free wipes. Handle parts only by masked or protected areas. For critical repairs, mask off sections to avoid undercut and ensure sharp feather-edges.
| Shop-Readiness Checklist |
|---|
|
Want to confirm your prep is working? Try the water-break-free test: drip clean water onto the aluminum. If it beads up, there’s still contamination or oxide. If it sheets off evenly, you’re ready to prime.
Common pitfalls? Polishing with too fine a grit (reducing mechanical grip), touching bare parts with ungloved hands (transferring oils), or letting too much time pass before priming (allowing oxide to reform). For teams or recurring projects, document your prep parameters—grit used, cleaners, timings—so success can be replicated across different alloys and parts.
Proper aluminum prep isn’t just about following a list—it’s about controlling every variable that can sabotage adhesion. The difference between a finish that lasts years and one that fails in months often comes down to these small details.
Still asking, can you use self etching primer on aluminum? With the right prep, it’s not only possible, but highly recommended for most bare or raw aluminum projects. Next, we’ll explore the exact application parameters—mixing, spraying, and film builds—that turn a perfectly prepped surface into a professional-grade finish.
Ready to turn that prepped aluminum into a finish that lasts? Application is where all your prep pays off—or falls short. Whether you’re using a classic self etch primer, an acid etch primer, or a modern self etching primer spray paint, nailing these parameters ensures you get the adhesion, coverage, and durability you expect. Let’s break down the essential techniques, tools, and numbers you need for success.
Most self-etching primers are ready to spray right out of the can—no mixing or thinning required. However, some professional metal etch primer paint systems, especially in larger volumes, may call for a catalyst or hardener. Always check the product’s technical data sheet (TDS) for specific mixing ratios and induction (waiting) times. For example, SEM’s Self Etching Primer comes pre-mixed for both aerosol and conventional spray use—just shake or stir thoroughly before application. No reducer is needed, and thinning is not recommended (SEM TDS).
Whether you’re using a spray gun or a can, the right setup makes all the difference. Here’s a quick-reference table to set you up for success:
| Parameter | Conventional/2K Spray | Aerosol Application |
|---|---|---|
| Reducer Type & Ratio | Not required (ready to spray) | Pre-mixed in can |
| Fluid Tip Size | 1.2–1.4 mm (HVLP) | Factory set |
| Air Pressure | 8–10 psi at cap (HVLP); 25–30 psi (conventional) | Factory set |
| Coats | 2–3 light coats | 2–3 light coats |
| Wet Film Thickness (WFT) | 1.0–1.5 mils per coat | — |
| Dry Film Thickness (DFT) | 0.5–1.0 mil total | — |
| Overlap | 50% | 50% |
| Flash Time Between Coats | 5–10 min | 5–10 min |
| Topcoat/Recoat Window | 10–20 min | 10–20 min |
For both methods, apply only enough to achieve hiding—too much film can cause lifting or adhesion problems, especially with acid etching primer types. If you’re working with thin gauge aluminum, use a lower fluid flow and add a light pass to the edges for better coverage without runs.
Timing is everything. Each coat should flash (dry to the touch) within 5–10 minutes. Don’t rush—if you recoat too soon, you risk solvent trapping. If you wait too long, especially in humid conditions, you may lose chemical bite. Always topcoat within the manufacturer’s window—typically 10–20 minutes for most self etching primer spray paint products. For best results, avoid painting directly over the primer with high-solvent topcoats; use a compatible sealer if possible.
For edge retention on thin aluminum, remember: less is more. A lighter pass on edges prevents buildup and possible runs, ensuring a smooth transition for your topcoat.
Getting the application right is what separates a finish that fails from one that lasts. The right film build, flash times, and safety practices are non-negotiable for professional results.
Now that you have the numbers and tips for applying self etch primer and acid etch primer, you’re ready to move on to evaluating real-world performance. Up next: we’ll look at lab test data to show how these application steps translate to adhesion and corrosion resistance on actual aluminum panels.
Ever wondered how your aluminum primer stack-up really performs? Lab data can cut through the guesswork, giving you numbers to benchmark your results. Whether you’re working with a classic aluminium etch primer or a modern self etching aluminum primer, understanding adhesion and corrosion resistance is key to a finish that lasts.
Picture this: You’ve prepped your 6061-T6, 5052-H32, or 3003-H14 aluminum panel, applied your etching primer aluminum, and want to know if it’ll hold up. Adhesion is typically measured using the ASTM D3359 crosshatch test (rated 0B to 5B, where 5B is perfect adhesion) and the ASTM D4541 pull-off test (measured in psi). Here’s a snapshot of real-world results based on well-prepped panels and industry-standard methods:
| Alloy | ASTM D3359 (Crosshatch) | ASTM D4541 (Pull-off, psi) | ASTM B117 (Salt Spray to First Creep at Scribe, hrs) |
|---|---|---|---|
| 6061-T6 | 5B | >800 | 300–500 (self-etch only) |
| 5052-H32 | 4B–5B | 700–850 | 240–400 (self-etch only) |
| 3003-H14 | 4B–5B | 700–820 | 250–380 (self-etch only) |
*The above data is the typical performance range under ideal conditions. Actual results will vary depending on product, construction and environment.
Corrosion resistance is where differences between primer systems really show. The ASTM B117 salt spray test is the industry gold standard. Panels are scribed, exposed to a salt fog, and monitored for "creep"—the spread of corrosion from the scribe. Here’s how different primer stacks compare:
| Primer Stack | ASTM D3359 | ASTM B117 (hrs to First Creep) | Notes |
|---|---|---|---|
| Self-etch-only (aluminium etch primer) | 4B–5B | 240–500 | Best for initial adhesion, moderate corrosion resistance |
| Self-etch + Epoxy Sealer | 5B | 750–1000 | Superior corrosion resistance, especially in marine/salt environments |
| Epoxy-only | 4B–5B | 700–950 | Excellent corrosion barrier, less forgiving on complex shapes |
What do these results mean in practice? Self etching aluminum primer excels at providing a chemical key for adhesion, especially on intricate or thin parts. However, for the best primer for aluminum in harsh environments, pairing a thin self-etch with an epoxy sealer before topcoat offers the greatest long-term corrosion protection. This is especially important for marine or deicing-salt applications, where moisture and aggressive ions can quickly defeat a thin primer alone.
ASTM D4541 pull-off tests confirm that both self-etch and epoxy primer systems can achieve high bond strengths—often exceeding 700 psi when properly prepped. However, the combination of self-etch by epoxy typically produces the most consistent results, especially on panels with complex geometry or variable surface roughness.
The key takeaway: For maximum durability and corrosion resistance, use a self-etching aluminum primer as a chemical anchor, then seal with an epoxy primer before topcoating—especially in demanding environments. This layered approach outperforms either system alone for most real-world applications.
Ready to see how these numbers translate to your own projects? Replicate these tests using your preferred brand and alloy mix. Log panel IDs, cure times, and climate conditions so you can troubleshoot and optimize your process over time. Next, let’s map which topcoats pair best—and where self-etch systems may not be the right fit.
Ever finished a project only to see the paint bubble, peel, or flake away months later? If so, you know that getting the primer right is only half the battle—the topcoat system and overall process matter just as much. So, when to use self etching primer directly under your chosen finish, and when should you pause and rethink?
Not all paints play well with self etching paint for aluminum. The acidic nature of etch primers can cause some topcoats to lift, wrinkle, or fail to bond, especially if you skip recommended tie-coats or sealers. Here’s a quick-reference compatibility table to help you match your aluminum paint primer stack for best results:
| Topcoat Type | Direct Over Self-Etch | Requires Epoxy Sealer | Recoat Window* | Notes |
|---|---|---|---|---|
| Acrylic Enamel | Possible | Recommended | 10–30 min | Best performance with epoxy tie-coat |
| 2K Urethane | No | Yes | 10–20 min | Direct-to-etch can cause solvent bite; always use epoxy sealer |
| Epoxy Topcoat | Possible | Optional | 10–30 min | Good chemical compatibility; check TDS for specific brands |
| Powder Coat | No | No | N/A | Use conversion coating or zinc chromate primer aluminum instead |
| Marine Systems | Not advised | Yes | 10–20 min | Epoxy barrier coat needed for saltwater durability |
*Always verify the recoat window in your product’s TDS—timing can vary by brand and climate.
Wondering what is self etching primer used for? It’s unbeatable for bare, clean aluminum where fast adhesion is crucial. But there are clear “do not use” scenarios, where etching primer paint or self etching paint for aluminum can actually cause failures:
Painting anodized aluminum? The thick, hard oxide layer created during anodizing resists both mechanical and chemical etching. For these surfaces, etching primer for anodized aluminum is sometimes used, but only after sanding or roughening the oxide layer. In most cases, an epoxy or urethane primer designed specifically for anodized aluminum will deliver better long-term results, as it forms a strong chemical bond and resists delamination.
For powder coating, skip etch primers entirely and opt for a conversion coating or a legacy zinc chromate primer aluminum system if regulations allow. These create a phosphate or chromate layer that’s ideal for high-temperature curing and long-term corrosion resistance.
Process sequencing is key: etch or convert the bare metal, seal with epoxy if durability is critical, then apply your chosen topcoat within the specified recoat window. Skipping a step or using the wrong primer can lead to costly rework.
Still debating the right approach for your project? Here’s a quick recap for choosing a primer on aluminum:
Choosing the right primer and topcoat combination takes a little planning but pays off with finishes that last for years. Up next: We’ll see how these choices play out in real-world case studies—auto, marine, and aerospace—so you can match your stack-up to proven results.
Ever wondered how all this theory about self etching primer for aluminum plays out in the real world? Let’s walk through three application examples of ideal coating systems—automotive, marine, and aerospace—so you can see what actually works (and what doesn’t) when the stakes are high and the conditions are tough.
In this scenario, the self etching primer for aluminum provided excellent chemical anchorage, while the epoxy sealer ensured long-term durability under automotive paint systems. You’ll notice this stack-up is common with modern automotive etching primer systems, especially for spot repairs where fast turnaround and high reliability are needed (Krylon).
This case highlights why a dedicated aluminum boat primer system matters. The combination of self etch and epoxy barrier gave both adhesion and corrosion resistance—critical for hulls exposed to saltwater and marine organisms. If you’re searching for the best primer for aluminum boat projects, this approach delivers proven results (Huaren Chemical). Many professionals now use an aluminum primer for boats stack like this to extend hull life and reduce costly maintenance.
This example underscores that, for certain aerospace and defense projects, self etching primer for aluminum isn’t always the right call. Instead, conversion coating plus epoxy primer is mandated for maximum corrosion protection and regulatory compliance. If you’re working on aircraft or critical transport, always check the latest specs before choosing your primer system.
Key takeaway: Always validate your process against real-world conditions—temperature, humidity, and salt exposure can shift the best-practice stack-up. What works in the lab or for one project may need tweaks for another. Document your outcomes and adjust your process for long-term success.
Curious about how to read technical data sheets and troubleshoot defects before they become costly failures? In the next section, we’ll show you how to decode TDS and SDS documents like a pro, helping you avoid common pitfalls and keep your aluminum finishes flawless.
Ever grabbed a can of self etching primer for aluminum, only to wonder if you’re really using it right? If you’ve ever had a finish lift, chalk, or just not stick, the answer often lies in the technical data sheet (TDS) and safety data sheet (SDS). These documents may look intimidating, but with the right approach, you can unlock all the information you need for a flawless, professional-grade finish. Let’s walk through exactly how to read—and use—these sheets for 2k self etching primer, aerosols, and more.
Sounds complex? Imagine you’re prepping a bare metal primer job on a classic car or a marine hull. The TDS is your roadmap for getting the best results. Here’s what you’ll want to look for every time:
What is self etching primer if not a blend of strong solvents and acids? That’s why the SDS matters. Here’s what to focus on before you open the can:
Pro tip: Store self etching primers and components at 70–77°F and rotate your stock using FIFO (first in, first out) to ensure consistency and avoid surprises during 2025’s unpredictable supply cycles.
Even with careful prep and application, things can go wrong. Here’s a quick-reference table mapping common defects, causes, and fixes—so you can get back on track fast:
| Defect | Likely Cause | Solution |
|---|---|---|
| Poor Adhesion | Insufficient deoxidizing, contamination, or incorrect prep | Degrease, re-abrade, and use correct primer for bare metal |
| Lifting Under Topcoat | Recoating outside window, hot solvents, or incompatible topcoat | Follow TDS recoat guidelines, use compatible topcoats, avoid recoat delays |
| Chalking | UV-sensitive undercoat exposed or improper topcoat coverage | Ensure full topcoat coverage, use UV-stable systems |
| Pinholes | Trapped solvent, heavy wet coats, or moisture | Apply lighter coats, allow proper flash times, ensure surface is dry |
Imagine you spot pinholes after spraying your self etching primer for aluminum. Instead of guessing, you can now pinpoint the cause—often trapped solvent from heavy coats or moisture in the substrate—and fix it by adjusting your spray technique and allowing more flash time.
To avoid confusion and keep results consistent, save all brand TDS and SDS PDFs in a shared digital folder—use version control so everyone’s working from the latest instructions. This is especially important for teams handling multiple projects or switching between different primer for bare metal products.
Mastering the TDS and SDS isn’t just paperwork—it’s your best defense against costly rework and failed finishes. Next, we’ll look at how smart sourcing and workflow integration can further reduce defects and streamline your aluminum finishing process.
Ever spent hours perfecting your prep and primer, only to run into adhesion or finish problems because of the aluminum itself? You’re not alone. The secret to a flawless, durable finish with self etching primer for aluminum isn’t just about the paint booth—it starts with smart sourcing and workflow integration, long before the primer hits the metal. Let’s break down how the right choices at the sourcing stage can save you time, money, and headaches down the line.
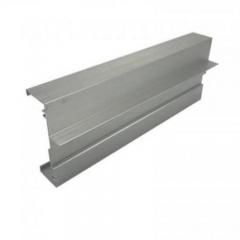
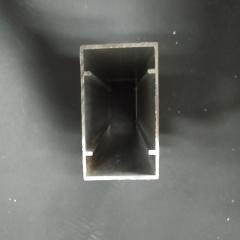
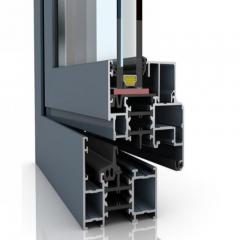
Imagine you’re building a product line that needs hundreds—or thousands—of painted aluminum parts. Do you trust a job shop to finish your extrusions, or do you partner with a supplier who understands both extrusion and finishing? Here’s how three common routes compare when it comes to etch priming aluminium and getting a finish-ready surface:
| Route | Typical Lead Time | Surface Quality Control | Cost per Unit at Scale | Logistics Complexity | Best For |
|---|---|---|---|---|---|
| Shengxin (Integrated Extrusion & Finishing Partner) | 15–20 days after sample confirmation | High—custom surface prep, anodize, powder, or PVDF options | Low at volume (bundled processing) | Low—one-stop, less handling | OEMs, fabricators needing consistent, paint-ready profiles |
| Local Job Shop Finishing After Fabrication | 20–40 days (split shipping, scheduling) | Variable—depends on local expertise | Medium—multiple vendors, added transport | Medium—coordination required | Custom, low-volume, or repair work |
| Fully In-House Finishing | 10–30 days (plus setup/learning curve) | High—if you control every step | High until scale is reached | High—equipment, training, compliance | Large OEMs with established finishing lines |
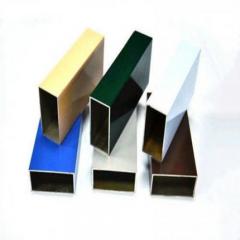
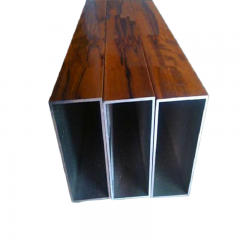
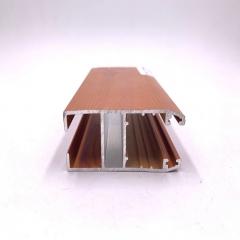
Not all aluminum extrusions are created equal. If you want your aluminium primer spray or aluminium spray paint primer to perform at its best, start by sourcing profiles designed for paint or powder workflows. This means specifying:
For example, aluminum extrusion profiles China from Shengxin can be ordered in a range of surface finishes—from brushed to powder coated to PVDF—that are tailored for downstream painting or etch priming aluminium, reducing the need for aggressive sanding or rework.
Sounds complex? It doesn’t have to be. If you’re managing high volumes or tight tolerances, consider specifying pre-treatment—like light anodizing, chemical etching, or even pre-priming—at the extrusion supplier. This can improve consistency and cut down shop labor, especially for parts destined for harsh environments or that require aluminium primer paint or primer aluminium for final finishing. Just remember, even with pre-treated profiles, you must still follow best practices for cleaning and prepping before applying your self etching primer for aluminum.
Key takeaway: Aligning alloy choice, extrusion die design, and surface finish with your painting workflow reduces rework, improves adhesion, and ensures your self etching primer for aluminum delivers every time. But remember—no matter how good your sourcing, proper prep and TDS adherence are non-negotiable.
By taking these sourcing and workflow steps, you’ll set the stage for a finish that stands up to real-world demands. Whether you’re scaling up production or tackling a custom project, the right partner and prep make all the difference in aluminum etching and paint performance.
Self etching primer chemically reacts with the aluminum’s oxide layer, creating microscopic anchor points that enhance paint adhesion. It uses acidic components and zinc pigments to bond the primer to the metal, making it especially effective for freshly abraded or complex aluminum parts. However, it is not a full corrosion barrier and works best as part of a multi-layer paint system.
Yes, self etching primer is commonly used on bare or abraded aluminum to ensure strong initial adhesion for paint or topcoats. It is necessary when you want to avoid peeling or flaking, especially on intricate shapes or thin sections where mechanical abrasion may not be enough. Proper surface prep is crucial for best results.
Self etching primer uses acid and zinc to chemically bond with the aluminum’s oxide layer, providing excellent initial adhesion. Epoxy primer relies on resin chemistry and a roughened surface for mechanical grip, offering superior corrosion resistance. For maximum durability, many professionals use self etching primer first, by an epoxy sealer before applying topcoat.
Avoid self etching primer on anodized aluminum unless the anodic layer is removed or conditioned, over existing catalyzed coatings, or where alkaline contamination is present. It is also not recommended under powder coatings or in applications requiring aerospace-level corrosion resistance, where conversion coatings or epoxy primers are preferred.
Choosing aluminum profiles designed for paint or powder workflows—like those from integrated suppliers such as Shengxin—can improve finish quality and reduce preparation time. Specifying surface finish, alloy, and pre-treatment at the sourcing stage helps ensure consistent, paint-ready surfaces and enhances the performance of self etching primer for aluminum.


 Інтернет-сервіс
 0086 136 3563 2360
 sales@sxalu.com
 +86 136 3563 2360
 Українська
 English
 français
 Deutsch
 русский
 español
 português
 العربية
 ไทย
ไทย Việt
Việt